
Bernzomatic torches are very popular amongst professional plumbers, at-home DIYers, and culinary artists. Suppose you have bought a Bernzomatic torch and looking for directions for using it. Then you have come to the right place. So, how to use Bernzomatic torch?
As a matter of fact, you will know the method to use and the components that play a significant role in the torch. Some features might not be available for your purchased torch model. You can skip those steps in that case.
After your introduction to the torch parts, there are five steps- assembly, lighting, flame locking, after maintenance, and storage. Follow them meticulously for optimal torch service.
Let’s dig in deeper!

Components

To properly use the torch, we must be acquainted with the parts.
- At the top, there is a burning tip. Some call it the nozzle.
- The burn tube.
- The torch body or regulator
- Flame adjustment knob
- Ignition knob
- Flame lock button.
Lastly, there is a gas canister. This is a separate part from the actual torch. It comes with the bernzomatic torch kit, and the kit includes a handheld torch and a gas cylinder.
If the torch is not self-igniting, a manual igniter is necessary. The kit’s components depend on the type of torch or the model you are purchasing.
How To Use Bernzomatic Torch?
1. Burn Tip
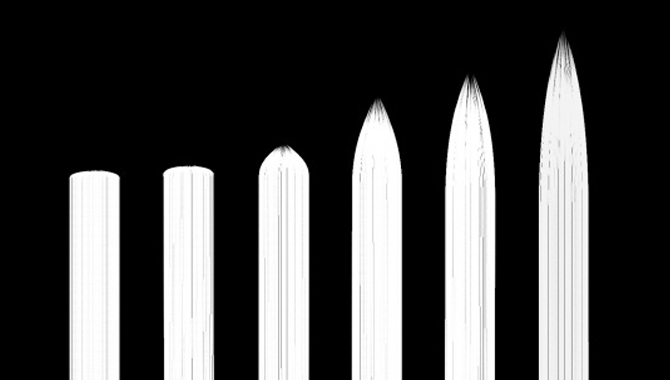
The burning tip is located on the top. Its function is to let the flame burn with precision. This is where the gas comes out from. It is a narrow exit point. Also, there are wider nozzles available.
Wider burn tips cover a wider surface. Meanwhile, the narrow tips are for a precise flame. Like, electronics soldering, wire soldering, culinary arts, e.t.c. For manual igniting torches, this is where combustion takes place.
Whatever you chose to light up the gas, the igniter or lighter, hold it in front of the burning tip until it lights up. Immediately remove the flame source when the torch is lit. Otherwise, the source will melt.
2. Burn Tube
The burn tube is next in line. It is a crucial component of the torch. Built-in igniter torches have igniters placed in here.
When the nozzle is removed, the end of the igniter is visible. When the trigger is pulled, it creates a spark for ignition. The stoichiometric gas travels through this tube and exits by the nozzle.
3. The Torch Body
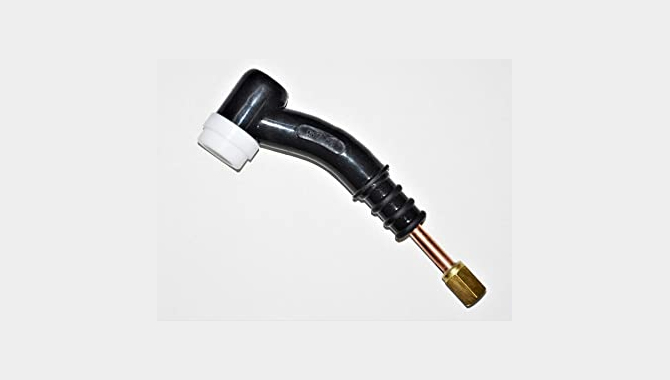
Well, this part holds everything together. It is the handle. Inside are various parts that supply gas and light the flame. There is also a pressure regulator ( only for specific models ).
The pressure regulator is located at the very bottom of the body. It controls the pressure, thus regulates the pulsating of flame. The yellow flame, or when the flame pulsates, is due to the tiling of the torch.
Other parts inside the body is a narrow pipe that supplies gas to the valve. There are some holes at the top of the body.
These are located before the burn tube. These are ventilators. Vents allow air to come in. Oxygen then mixes with the gas, creating an explosive mixture.
Lastly, there is a piezoelectric igniter. A circuit is present and threaded into the tube. This circuit lights the gas on fire.
4. Flame Adjustment Knob
This is a valve that regulates the amount of gas that will pass through. Adjusting it will determine how much flame you will get.
But for best output, bernzomatic suggests turning the valve to its maximum potential. Models with this feature are TS7000 and TS8000.
5. Ignition Knob

The ignition knob is the trigger start for the igniter. It has an on-and-off function. When it is turned on, the button is free to press.
When it is turned off, the button gets locked and can not be pressed. Models with this feature are TS4000 and TS4500HS.
6. Flame Lock Button
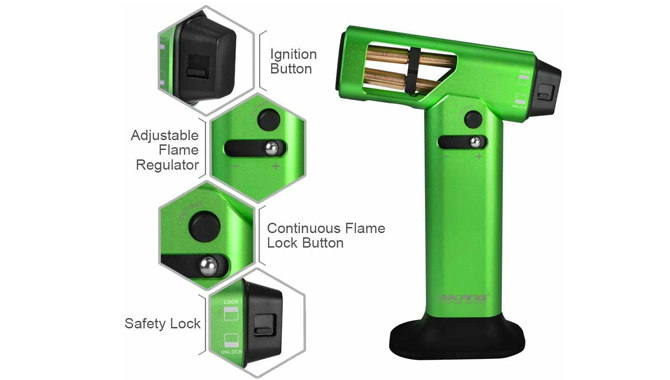
This button locks the flame. This means, when it is on, the flame will stay ignited. When the ignition knob is pressed, the fame is turned on.
Upon release, the flame is turned off. The flame lock button keeps the flame on even when the ignition knob is released.
Assembly
- To assemble the Bernzomatic torch, turn off the ignition knob for a locked position. Turn the flame adjustment knob clockwise until it stops.
- Do not use pressure. This makes sure the regulator valve is off. A light turn is sufficient. Not all models have this function.
- Now, turn the burning tip away from the person’s face and any materials that may be capable of catching on flame.
- Thread the gas cylinder into the regulator or torch body. Use only hand pressure for this action. Do not use pliers or tools to tighten it.
Lighting And Operation
For models with the flame adjustment knob, turn the knob towards the open sign counterclockwise. Turn it until it stops. This enables the flame regulator valve fully. Do not use force.
Always turn the flame adjustment valve to its full potential. If not done so, lightning causes damage to the ignition system. Of course, this is only applicable to the models with the adjustable valve and autoignition function.
- Indeed, do not look into the burner tube or face it in an unsafe direction.
- Turn the ignition knob towards the unlocking position.
- Now, turn the nozzle towards a safe zone and pull the ignition button in your direction.
- Repeat this step if the gas does not ignite on fire. Keep on pressing the ignition button. While it is kept depressed, adjust the flame size by turning the flame adjustment knob clockwise.
Keep in mind that when lighting the gas on fire, the valve should be fully open. After lighting up, you can adjust the flame according to your need. Upon releasing the ignition button, the flame turns off on its own.
Enable Flame Lock Feature
- This feature is not available on all bernzomatic torches. If yours has this feature, enable it to press on ignition button. While keeping it depressed, press the flame lock button.
- To undo this feature, pull the ignition button towards self until the flame lock button releases. It will turn off the flame.
- After the flame is extinguished, turn the ignition button towards a locked position. Now you cannot ignite the torch.
After Use
- Return the ignition button to a disabled position.
- Now turn the flame adjustment knob fully clockwise until it is off. Do not apply pressure. This is to make sure the regulator valve is closed. It will result in a restricted gas flow.
- If you are not using the torch any further, remove the cylinder and put its cap back on.
- After the torch is disconnected from the gas tank, face it safely and press the ignition button to release any remaining gas in the torch.
Storage
To store the torch, you have to check all the knobs. First, check the ignition button by turning it to a locked position. Then turn the flame adjusting valve fully clockwise until it stops.
Before disconnecting the cylinder, let the torch cool down. Then store the torch and the cylinder separately. Keep it out of reach of children.
Read the caution on the cylinder label and observe. Do not expose cylinders above temperature 120 degrees Fahrenheit. Also, store cylinders in well-ventilated rooms.
Precautions
- Check every joint, coupling periodically to ensure against any loose connection. With the valve open, test every connection with soapy water. If bubbles appear, gas is leaking from somewhere. Hence, it needs repairing; never use a flame to check for leaks. Conduct this test in a well-ventilated area.
- When conducting your operation, do it well-ventilated area.
- If there is cadmium plating and galvanic metal coating on the heating surface, use filling or sand before applying heat. Never use a torch on stripped led paint.
- If there is any flammable object in the vicinity of your operation, remove it.
- Do not use the gas cylinder more than 60 degrees from its upright position. This causes the torch to flare. Some built-in regulator torches have reduced the risk of yellow flames. But most of the torches cannot take this pressure.
- In cold weather, the tank or valve might freeze due to an endothermic reaction. Bring it to room temperature before use.
Conclusion
Before attempting anything, read the instruction manual. It is provided with the package. Also, you can find it on the bernzomatic website. Dispose of the empty
Finally, if you follow the steps correctly, your project should end hassle-free. Make sure to take care of this equipment as you would of any fine tool or instrument.
Do not drop, throw, or otherwise abuse. It will ensure your torch is usable for many years to come. Some people have been using it for over 10 years even! I hope now you know how to use Bernzomatic torch.

![10 Best Torch For Plumbing [Reviews With Buying Guide]](https://accuratepicker.com/wp-content/uploads/2022/03/Best-torch-for-plumbing.jpg)