

You’re in the furnace room to turn off the boiler. And all of a sudden, you hear a dripping sound, like a horror movie. A leakage! Now being the family handyman, you must fix it. That should not be horrifying.
This is a job for a rookie. Installing a new pipe is a simple process where you have to solder a new copper pipe in place of the old one. A few basic guidelines will help you out while doing so. Let’s get to the solving soldering copper pipe problems.
Some amateur mistakes happen when you are soldering for the first time. If not avoided, these create a problem when soldering or in the future. So keep on reading for a successful installation!

Tools And Materials For Soldering Copper Pipe
- Propane torch,
- Fitting brush,
- rug,
- Emery cloth,
- Gloves,
- Tube cutter,
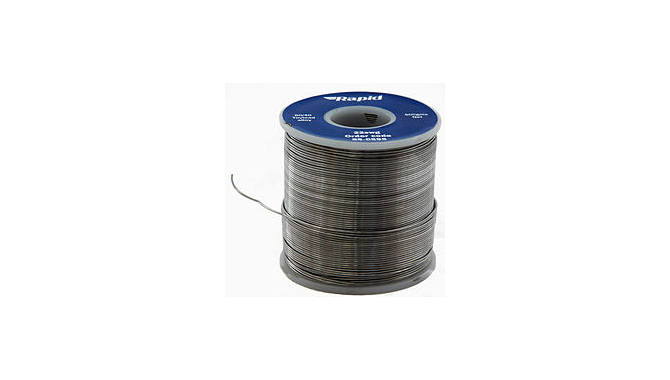
- Lead-free solder,
- Flux
- Copper strap.
A Brief Introduction To The Soldering Process
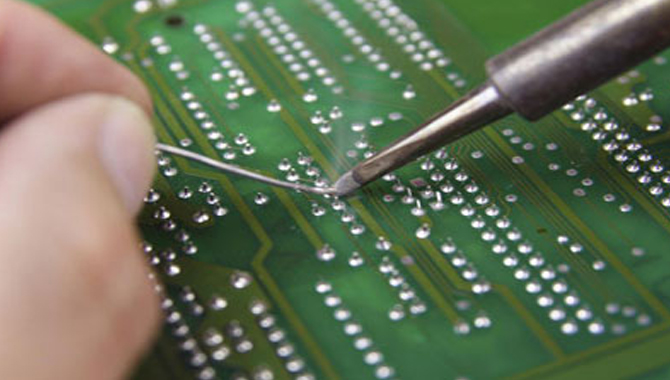
Prepare your tools and materials before the actual process. Put on safety gloves. Remove the burrs with a tube cutter. Use the emery cloth to wipe the outer part of the pipe.
Then use the wire brush to clean all the corrosion and debris away. Apply flux to the outer part of the pipe. Then join the pipes.
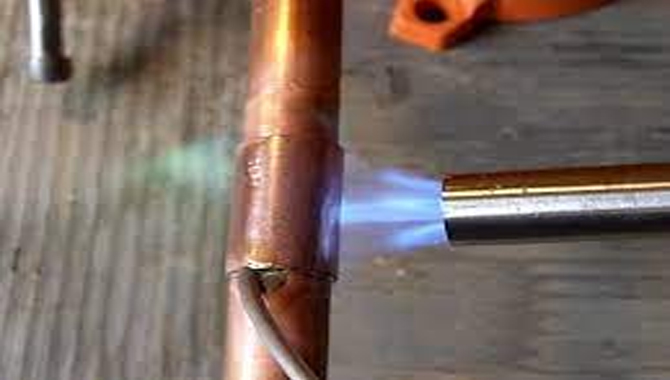
Apply heat with the propane torch and move. This will ensure an even distribution of heat. Then start to apply the solder. When it has covered all around the pipe, let it cool down. It will harden as it cools down. Then give it a good wipe.
It will take 30 minutes maximum. But there are some professional tips so that the joint does not fail.
Possible Soldering Copper Pipe Problems
1. Improper Cleaning

The pipes arrive very much clean from the manufactures. Even so, the pipes must be clear. The penetrating pipe’s outer surface should be spotless and shiny. The inside of the
joint should be shiny as well. It helps the flux adhere better. It also creates a roughness, so the joint is adequately secured. If not done so, the solder will not stick to the pipe.
2. Bent Or Rough Edge
Deburr the outer edges of the copper pipes with the tube cutter. Sharp or bent edges prevent the pipes from attaching correctly.
When cutting the pipe, use a tube cutter instead of a hacksaw. The hacksaw tends to put too much pressure on the pipe; thus, the pipe gets distorted.
This also leaves burrs around the edge of the pipe. These edges are not conducive to the copper pipe joint.
3. Applying Flux
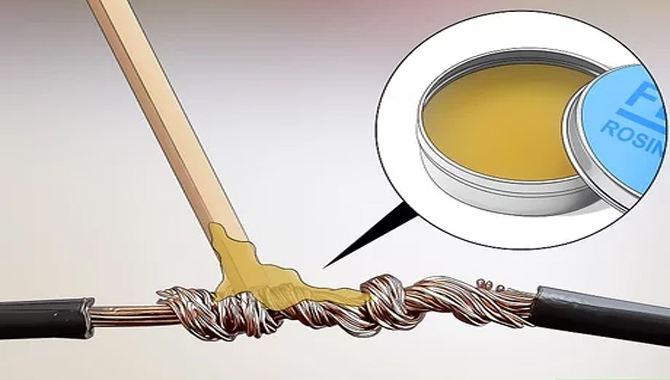
Take a small brush and apply a thin layer of flux to the penetrating pipe. Some professionals suggest not to put flux inside the fitting pipe. The reason for that is, the flux will be pushed inside of the pipe and accumulate.
The trick is to neither apply too much flux nor too little. As you know, too much flux accumulation results in leaking pipes over time.
Too little of it will not clean the surface, and the copper will oxidize when applied heat. So apply enough to properly coat the edge.
Facts about flux: flux is an acid. It helps to clean the surface of the pipe, eliminating any residual contamination.
Finally, it oxidizes when applied heat in place of the copper. But excess of it can eat through the pipe over time. It will create rust and leakage.
4. Amount Of Heat

It is crucial to know how much heat to apply. It is the same case as the flux and solder. Too much heat can damage the chemical.
Too little heat will not melt the solder. If you are new to this job, it is suggested that you use an old-school propane torch.
There is another kind of torch that is available. That is the MAPP gas torch. It provides higher temperature levels.
This will warm up the pipe fast and melt the solder quickly. Professional plumbers are used to this task. So they can handle it effortlessly. But as a newbie, it’s good to take it slow to get a job well done.
Preheating the pipe is essential. This will warm up the pipe to absorb solder into the vacancy between copper pipe and fitting. Preheat until the flux starts to bubble. When it is bubbling, that is the right time to apply solder.
If you overheat the pipe, it will turn black. It means the flux is burnt. At this point, the solder will not stick to the pipe. To fix this, you have to start from scratch and clean them again. Repeat the entire process one more time.
If the heat is not enough, the flux will remain on the pipe and eat it away until the pipe leaks.
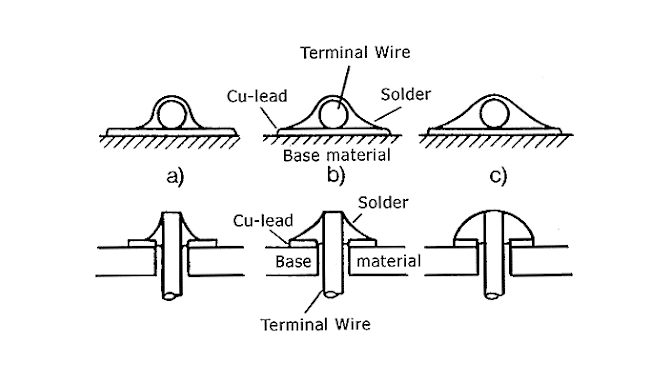
5. Heat Application Directions

If the heat is applied from the same side as the solder, it will drip down. It will not cover around the pipe.
The reason for this is because the pipe opposite of the heat will be cold. Heat attracts solder. That is why the solder cannot come around.
So, The trick is to apply heat opposite of the solder. This will ensure that the solder comes around the pipe. It is the capillary action. The capillary action is a liquid traveling into nooks and crannies of a pipe against gravity.
Even distribution of heat is imperative for even coating the solder. If there are some points where the solder is sparse, reapply flux and put solder on it.
6. Avoiding “Cold” Solder
When the heat is put on the fitting and not on the pipe, it starts to expand. So the pipe is then lacking suitable heat to melt solder properly. It results in poor fitting and further leakage.
Hence, it is crucial to put the torch on the pipe. Doing this will expand the pipe to fit into the fitting and create an impenetrable bond.
7. The Right Amount Of Solder
Just like flux, too much or too little amount of solder will not do. The appropriate amount of solder is necessary.
To know the right amount, measure the pipe size. Usually, in households, ½ inch supply pipes are used. But there are also 2/3 inch pipes or other types available.
After measuring the pipe, get the solder strand and bend it according to the respective length. That is the right amount of solder for the joint.
Right Finishing
1. Final Flux Application

Finish the process by applying another layer of flux. But give the solder 1 to 2 minutes to cool down before you do so.
If the flux is applied over the hot solder, the temperature drops significantly. This will introduce cracks on the solder over a long period of time. The joint will break.
2. Rub Off The Excess
Use a rag to wipe away the excess flux with a damp cloth. If it is left there, there will be leakage on the pipe in no time.
3. Using Straps

The solder joints are not designed to take stress or any type of weight. Using a copper strap to hold the pipe will ensure the longevity of the joint.
Choosing Suitable Materials:
1. Emery Cloth
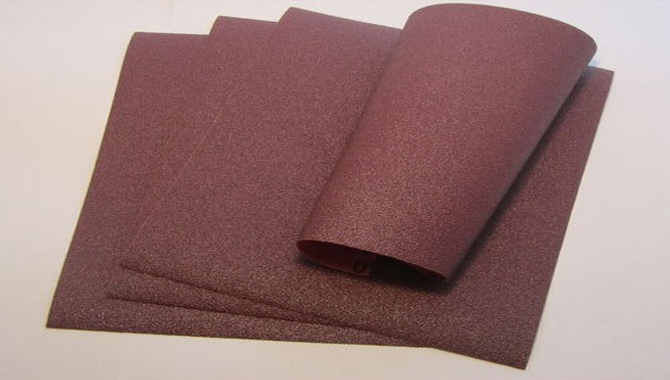
The sandpaper or the emery cloth should be of 120 grits. So while you are shopping, do not buy one below 120 grits.
2. Solder
There are two types of solder available for copper pipe soldering. The lead-free one is used in water supply pipes because the lead can leave a trace in the water for months. The lead solder is for drainage systems. The lead does not affect the heath in this system.
3. Flux

Flux is of two types: Tinning flux and regular flux. The tinning flux has tin in its composition. So it is better to protect pipes from leakage rather than the regular ones.
When soldering, there are a few things to consider. You might face some problems while soldering the pipe.
Some problems might occur later on. With these few simple tricks mentioned above, these problems are avoidable.
Conclusion
We hope these easy-to-follow steps helped you fix the problem at your home. The problems addressed above are going to make your task easy and effortless. Soldering copper pipes is a very uncomplicated procedure.
A little caution and concentration will diminish the chances of future leakages and save your property from further water damage. I hope now you know solving soldering copper pipe problems.
