
If you’re a car enthusiast or a mechanic, you’ll know that the proper valve lash setting is crucial for engine performance and longevity. Valve lash can affect the engine’s power, fuel efficiency, and emissions and can cause severe damage to the engine if not set correctly.
Setting valve lash can be daunting for those who own Small Block Chevy (SBC) heads, especially for those new to the process. But fear not; we have created a comprehensive step-by-step guide to help you quickly set the valve lash on your SBC heads.
We’ll look at the tools you need, the steps you need to follow, and the precautions you should take before setting the valve lash. We’ll also highlight common mistakes to avoid and provide tips to make the process simpler.

How To Set Valve Lash On SBC Heads – Comprehensive Guide
Setting valve lash on Small Block Chevy (SBC) heads is an essential maintenance task to ensure proper engine performance. Here is a comprehensive guide on how to set valve lash on SBC heads, along with some important “do’s” and “don’ts” to keep in mind:
Note: Valve lash specifications may vary depending on the engine and camshaft used. It’s essential to consult the manufacturer’s specifications or the camshaft manufacturer’s recommendations for the correct valve lash settings.
1: Tools And Equipment Needed:
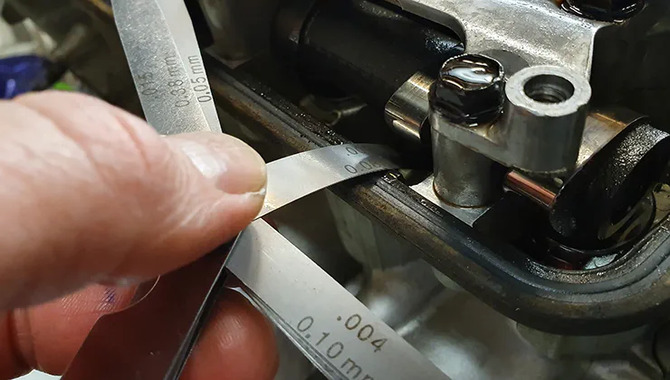
- Feeler gauges
- Wrenches and sockets
- Ratchet or breaker bar
- Torque wrench
- Screwdriver or hex key (for adjusting rocker’s arms)
- Engine service manual (for specifications)
2: Prepare The Engine
- Ensure you turn off and let the engine cool to avoid accidental burns.
- Remove the valve covers to access the rocker arms and valve train.
- Rotate the engine to bring each cylinder to Top Dead Center (TDC) on the cylinder’s compression stroke you are working on. Consult the engine service manual for the correct procedure.
3: Determine The Valve Lash Specifications
- Refer to the engine service manual or the camshaft manufacturer’s specifications for the recommended valve lash settings.
- Valve lash is typically specified as a cold or hot setting. Cold settings are measured when the engine is cold, while hot settings are measured when the engine is at operating temperature. Follow the appropriate procedure based on the specifications.
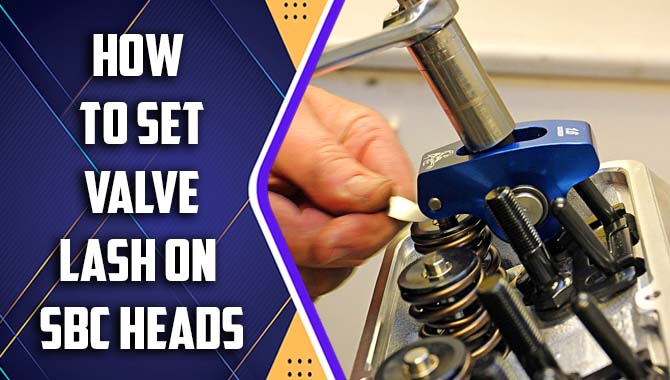
4: Measure And Adjust Valve Lash
- Locate that cylinder’s intake and exhaust valve, starting with one cylinder at a time.
- Loosen the lock nut on the rocker’s arm using a wrench or socket, but do not remove it.
- Insert the appropriate feeler gauge between the valve stem and the rocker arm pad. Gradually tighten the adjusting nut until you feel slight resistance on the feeler gauge.
- Hold the adjusting nut in place and use another wrench to tighten the lock nut against the rocker’s arm once you feel the resistance.
- Check the valve lash by gently pulling the feeler gauge. The gauge should have a slight drag, but it should still slide smoothly.
- Repeat this process for each valve, following the engine’s firing order.
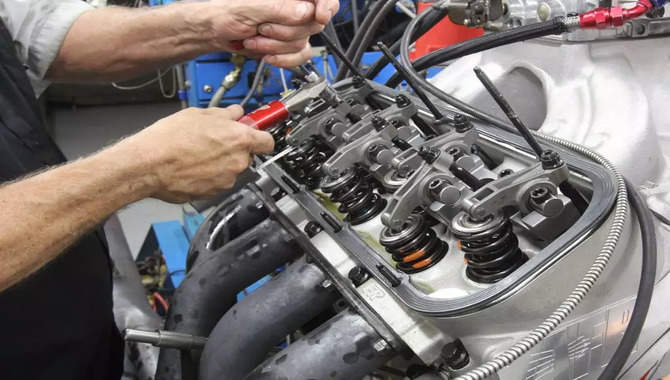
5: Reinstall Components
- Double-check each valve’s lash settings to ensure they are within specifications.
- Once all valves are properly adjusted, reinstall and secure the valve covers.
Introduction To Valve Lash Adjustment
Valve lash adjustment is a critical aspect of maintaining the performance and longevity of an engine. This process is the clearance adjustment between the valve stem and the rocker arm or camshaft, allowing proper valve operation.
Over time, the valve lash can become too tight or too loose, which can cause various issues, such as poor fuel economy, reduced power, and even engine damage. Valve lash adjustment is significant in high-performance engines, where precise valve operation is crucial for optimal performance.
Valve lash adjustment can do manually or with the help of specialized tools. The process involves loosening the lock nut on the rocker’s arm or camshaft, adjusting the clearance to the manufacturer’s specifications, and then tightening the lock nut back in place.
Following the manufacturer’s recommendations for valve lash adjustment is essential, as different engines may have different specifications.
Overall, valve lash adjustment is a necessary maintenance procedure that should not overlook.
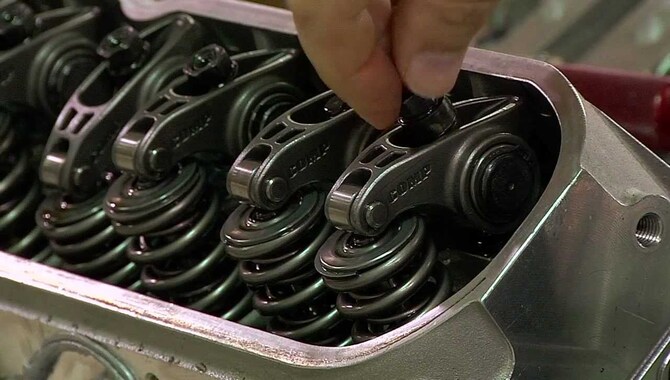
Understanding Camshaft And Valve Train Components
The camshaft and valve train components are essential for an internal combustion engine. The camshaft is responsible for opening and closing the engine’s valves, which allows air and fuel to enter the combustion chamber and exhaust gases to exit.
The valve train components, including the lifters, pushrods, rocker arms, and valves, work together to transfer the motion of the camshaft to the valves and ensure they open and close at the correct time. Understanding these components is crucial for anyone working on an engine, as any problems with the camshaft or valve train can lead to engine failure.
When selecting camshaft and valve train components, it is important to consider their compatibility with the engine’s other parts. The camshaft profile, for example, must match the engine’s intended use, such as street driving or racing.
Similarly, the valve train components must be strong enough to withstand the engine’s operating conditions. Failure to consider these factors can result in reduced engine performance or even catastrophic failure.
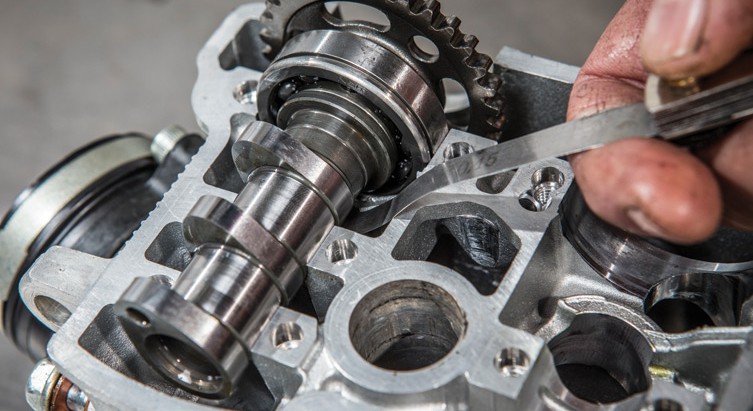
Finding Top Dead Center (Tdc)
Finding Top Dead Center (TDC) is crucial in working on an engine. It is the position in which the piston is at its highest point in the cylinder. Finding TDC varies depending on the engine and the tools available. One standard method involves removing the spark plug and using a piston stop tool to prevent the piston from moving.
With the piston stopped a degree wheel can attach to the crankshaft to measure the engine’s rotation. Slowly rotating the engine, the degree wheel will show the crankshaft’s position as it approaches TDC. Once the degree wheel shows the engine is near TDC, a dial indicator can use to find the piston’s exact position.
This knowledge is essential for setting the engine’s timing and ensuring it runs properly. It’s important to note that finding TDC is not a one-time task. It must do every time the engine is worked on or adjusted.
Setting The Intake Valve Lash
Setting the intake valve lash is integral to maintaining a properly functioning engine. It refers to adjusting the gap between the rocker’s arm, and the valve stems when the cylinder is at Top Dead Center.
Failure to set the intake valve lash correctly can lead to many problems, including loss of power, increased fuel consumption, and decreased engine lifespan. To set the intake valve lash, remove the valve cover and rotate the engine to the Top Dead Center position.
Then, using a feeler gauge, one can measure the gap between the rocker arm and the valve stem and make the necessary adjustments by loosening or tightening the rocker’s arm and adjusting the nut.
Ensuring the gap is within the specified range in the manufacturer’s manual is crucial. Once the adjustments have been made, the valve cover can reinstall, and the engine can be started. Regularly setting the intake valve lash can help improve engine performance and extend lifespan.
Setting The Exhaust Valve Lash
Setting the exhaust valve lash is essential to maintaining an engine’s performance and longevity. It ensures the valve is properly regulated and prevents excessive wear and tear on the engine’s components.
The first step in setting the exhaust valve lash is to locate the valve and remove any obstructions that may impede access to it. Once the valve is exposed, the technician must use a feeler gauge to measure the clearance between the valve and the rocker’s arm.
This clearance is then adjusted by raising or lowering the rocker arm until the proper measurement is achieved. Each engine exhaust valve must repeat this process to ensure they are all properly adjusted.
Following the manufacturer’s recommended specifications for the valve lash is crucial, as improper adjustments can lead to engine damage or failure. Additionally, regular valve lash checks and adjustments should be performed as part of routine engine maintenance to ensure the engine remains in optimal working condition.
Double Checking Your Valve Lash Settings
When it comes to ensuring the proper performance of your engine, one crucial step is double-checking your valve lash settings. This involves measuring the clearance between the rocker arm and the valve stem, which can become compressed over time due to wear and tear.
Incorrect valve lash settings can lead to many problems, including decreased power output, poor fuel efficiency, and even engine damage. That’s why it’s important to take the time to measure and adjust your valve lash settings periodically, especially if you’re driving a high-performance vehicle or putting a lot of miles on your engine.
To get started, you’ll need basic tools, including a feeler gauge, a wrench, and a socket set. First, remove the valve cover and locate the rocker arm for the valve you want to measure. Use the feeler gauge to check the clearance between the rocker arm and the valve stem, and adjust the nut on the rocker’s arm to achieve the proper clearance.
Benefits Of Proper Valve Lash Adjustment
Proper valve lash adjustment is crucial for an engine’s optimal performance and longevity. The valve lash is the clearance between the valve stem and the rocker arm or cam follower.
When this clearance is too tight or loose, it can cause various problems, including decreased power output, poor fuel economy, and increased engine wear. However, the benefits of maintaining proper valve lash adjustment are numerous.
Firstly, proper valve lash adjustment ensures that the engine’s valves open and close at the correct time, allowing for optimal fuel combustion and power production. This results in improved engine performance and fuel efficiency. Additionally, it reduces the risk of engine damage caused by valve collisions, which can occur when the valves don’t close properly.
Proper valve lash adjustment also increases the lifespan of engine components. When the valve lash is incorrectly set, it causes excessive wear and tear on the valve train, which can lead to premature engine failure.
Troubleshooting Common Valve Lash Issues
Valve lash issues are a common problem that can cause poor engine performance. Troubleshooting these issues can be frustrating, but understanding the common causes can help you diagnose and repair the problem quickly.
One of the most common causes of valve lash issues is incorrect valve adjustment. If the valve clearance is too tight or too loose, it can cause the valve to either not open or not close properly, leading to poor performance. Another common cause of valve lash issues is worn or damaged components, including the valve springs, pushrods, and rocker’s arms.
These parts can wear out over time, causing the valve lash to become too loose or tight. To troubleshoot valve lash issues, check the valve clearance and adjust it if necessary. If the valve clearance is correct, inspect the valve components for signs of wear or damage. Replacing these components can often solve the problem and restore proper engine performance.
Conclusion
setting valve lash on SBC heads is essential in maintaining engine performance and longevity. It’s a task that requires careful attention to detail and a systematic approach. Following the step-by-step guide, you can confidently and precisely set the valve lash on your SBC heads.
Always consult your engine’s manufacturer specifications and use the appropriate tools and safety precautions. Correctly charging the valve lash ensures your engine runs smoothly and efficiently, giving you years of reliable performance.
FAQ
1.How Often Should Valve Lash Be Checked And Adjusted On SBC Heads?
Ans: Valve lash on SBC (Small Block Chevy) heads should check and adjusted every 12,000 to 15,000 miles or once a year, whichever comes first.
2.Are There Common Mistakes To Avoid When Setting Valve Lash On SBC Heads?
Ans: Not checking for proper pushrod length before setting valve lash. Using incorrect pushrod length can result in improper valve clearance and can cause damage to the engine.
3.What Tools Are Required To Set Valve Lash On SBC Heads?
Ans: To set valve lash on Small Block Chevy (SBC) heads, the following tools are required:
- Feeler gauge
- Wrench or socket for the rocker arm adjusting nut
- Flathead screwdriver or valve adjustment tool
4.What Is The Proper Procedure For Setting Valve Lash On SBC Heads?
Ans: Turn the engine over until the #1 cylinder is at the top dead center (TDC) on the compression stroke. You can do this by using a timing light or by putting your finger over the #1 spark plug hole and feeling for compression.
5.What Are Some Common Mistakes To Avoid When Setting Valve Lash On SBC Heads?
Ans: Here are some common mistakes to avoid when setting valve lash on Small Block Chevy (SBC) heads:
- Failing to rotate the engine to the correct cylinder position before adjusting the valve lash.
- Not using the correct method for setting valve lash, such as using the wrong feeler gauge or not using a dial indicator.
- Over-tightening or under-tightening the rocker arm nut can cause valve train damage or poor performance.
