
Planning a weekend trip with your friends is exciting. It is more exciting if the trip is going to be on your motorcycles. The first thing you need to do is, get your bike in tip-top shape. If you have not used it for a while, then chances are it has become dusty and rusty.
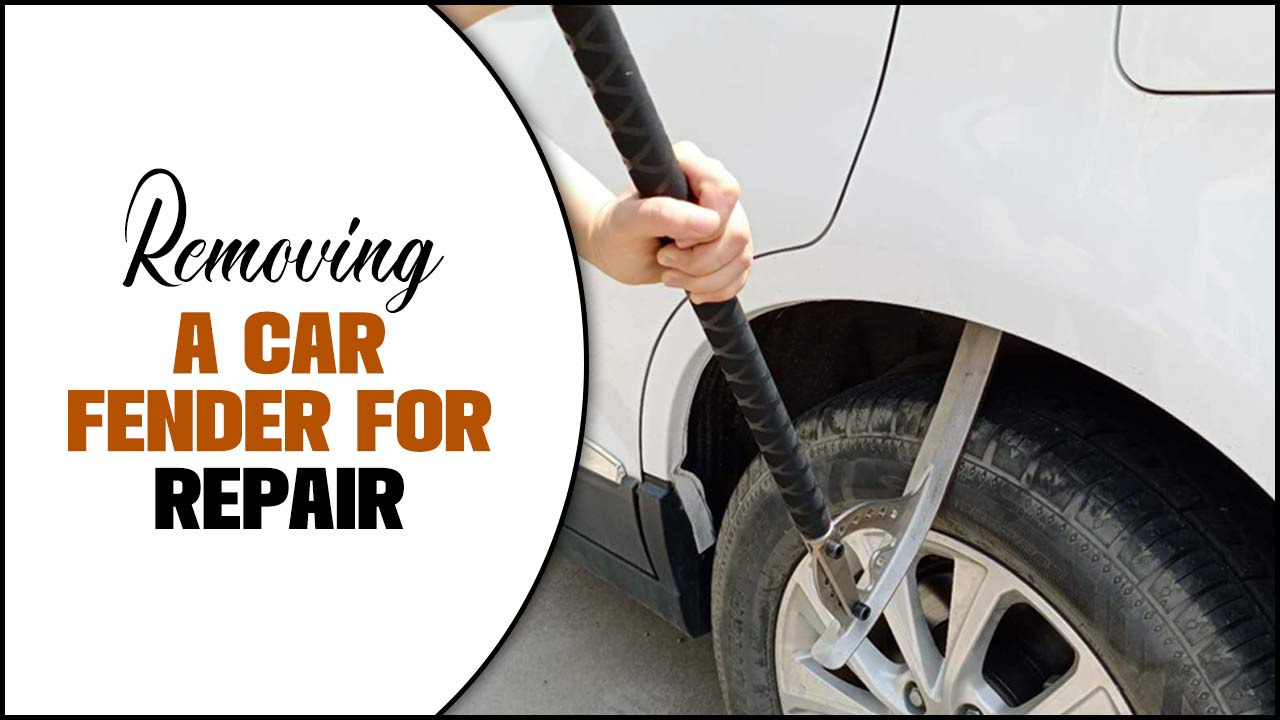
After cleaning, the best thing to do is to give it a paint job. While you are at it, you may find some parts to be tricky to remove, like the strut covers beside the fender. It is tricky because the instructions are not clear. Also, is very few demonstrations online about the removal of this part.
No need to panic. It’s a piece of cake!
So, how to remove fender strut covers? It hardly takes one hour for this job. For those who DIY fix their motorbikes at home frequently, it takes 20 to 30 minutes. People who were uncertain whether to do it themselves were overwhelmed by how easy it was. Someone even stated,” it’s so easy, even a caveman can do it!”.
Before attempting anything, you have to read the instruction manual. There should be a step-by-step direction, “how to remove the fender strut covers.” It may be a little difficult to conceptualize.
That is where we offer our assistance. Our simplified instructions will help you to take off the cover in no time. So get your toolbox ready and let us jump in.

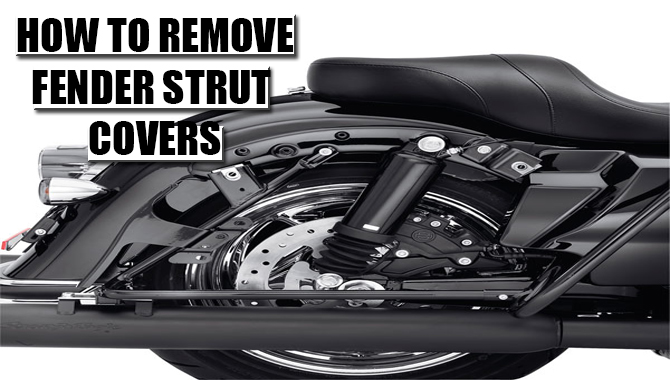
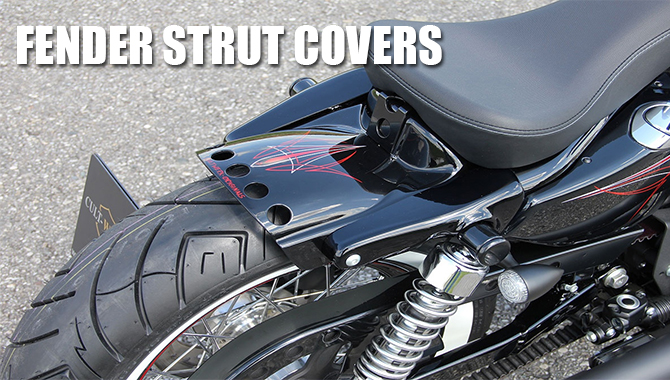
Importance Of Fender Strut Covers:
The cover’s main idea is to protect what is underneath. And the rear end of the motorbike has cast-iron struts and shocks.
The fender strut covers conceal the struts. The covers hold the sissy bars, shockers, and the rear turn signal lights in place.
Most importantly, it gives the bike a sleek look. Some people like the black-out look that black covers give matching with the dark exterior.
Step By Step Guide On How To Remove Fender Strut Covers
1. Firstly, Lift The Bike.
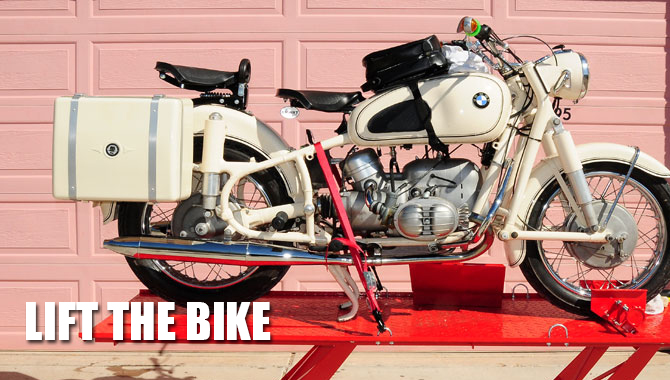
You can not remove the mounts without lifting the bike. Because the tires are very adjacent to the rear turn lights. Hence, when the signal mount bolts are pushed, they get stuck to the tires.
You have to use a jack to lift it. The rear tire should be above the ground. When using the jack, you have to secure the bike.
Because there is a lot of weight at the motorcycle’s rear end, it should not wobble around while you are working.
When turn signals are being removed, the lights should be above the tires. Lift the bike enough so that the tire hangs.
2. Secondly, Unbolt The Upper Shock Nut.
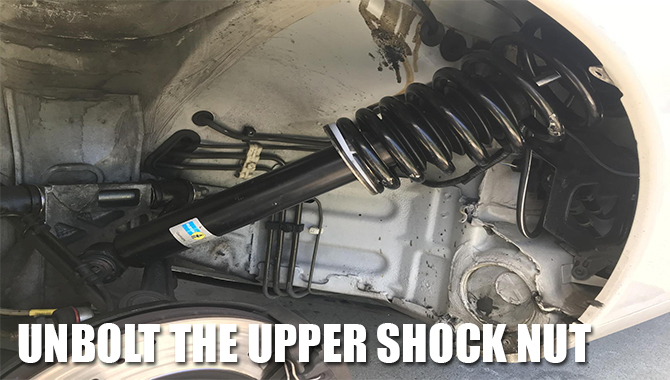
A few simple tools will get the job done. You will need an appropriate spanner, socket wrench, and extensions according to the respective nuts and bolts.
There is a bolt for the upper shock. Remove it with the tools at hand. Hold the back nut with a spanner and twist the bolt couple of times. These will easily come off. The nut and bolts should be kept in a box for re-attachment.
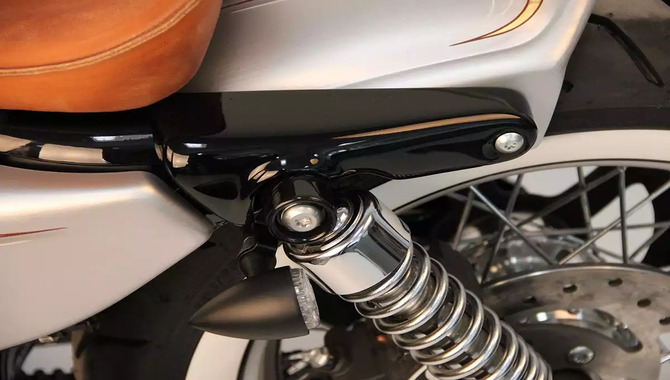
3. Thirdly, Remove The Strut Mounting Bolt.
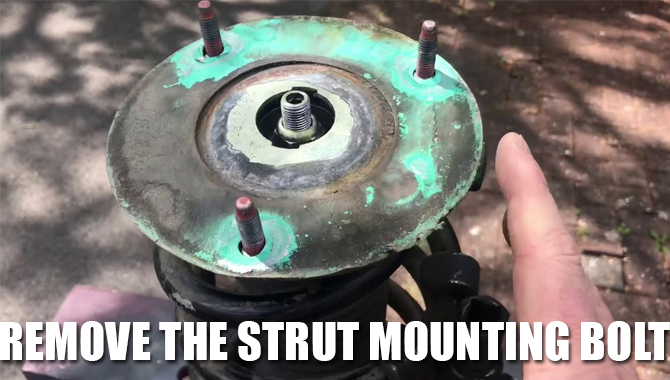
After removing the shock, there should be enough space to work with. There is a bracket on both sides of the inner surface of the fender if you look closely.
The Torx head mounting bolt goes into this bracket. In the previous manner, remove this bolt. Save the bolt for later. You will have to attach it with the struts.
4. Finally, Remove The Rear Signal Lights.
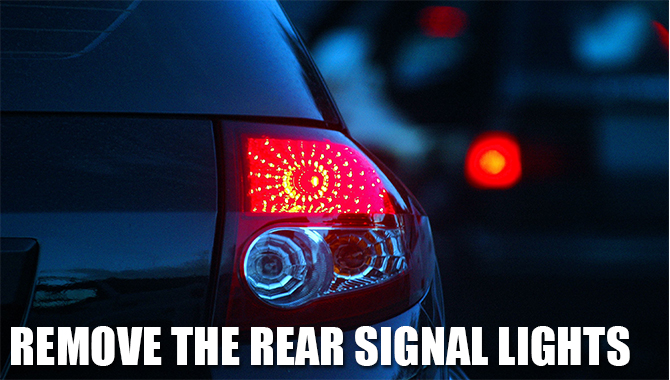
The side turning light mounted bolts are a bit complex to remove. Because there is a wire attachment with the brake light fuse, take out the light bulbs. Disengage the battery before working with the fuse. Open the tail light lens.
Underneath, you will find four-wire harnesses with different connections. First, take out the tail light wire.
Use a small screwdriver to push the little pins ( for right and left turn signal) down and pull the wire to unplug. The wire harnesses are small enough to thread through the fender wire restrainers, strut holes and cover holes.
The long hex bolt also needs to be removed. It is very easy and needs a simple spanner. It is a tight place but is manageable. Hold the back piece while unscrewing.
The final nut will be behind the turning signals. Loosen that with a spanner. The cover will come off.
Now the strut cover is attached to the lights. Remove the nut from the backside. The lights will come off too. Now the fender strut covers are free!
Tips Time
- When taking off the covers, it is better to do one side at a time. Nothing should be done in haste, as this might result in a disaster. The first plan out what to do, then execute it.
- If needed, you have to remove the upper and lower shock bolts. This will give you more space to work. Do what you think is necessary to get your job done. After removing the covers, the shocks can be put back into place.
- For some models, you do not need to go through the second step. Because the cover might not be attached to the shocks, this eases your work.
Specifications:
- These are made from steel. The better quality ones are made from the original equipment components. Like, the Harley-Davidson fender strut covers are made from superior quality iron and give that glossy black-out look.
- There are other colors for the cover besides black. Chrome is more popular for most bikes.
- Different model motorbikes need different types of covers. Like long, shortened, or can be custom-made.
- It hides the cast-iron struts and protects them. Exposed struts do not give the bike that organized finish. Also, it does not look stunning.
Final Words
With all that being said, the strut covers are an important component of the motorbike. Epoxy paints give the covers a polished look.
You can refit the parts in the same order as you dismantled them. Now you can go that road trip and startle everyone with your revamped motorbike. And share your newfound skills with your friends! I hope now you know about how to remove fender strut covers.
