
Soldering is a crucial skill for any electronics enthusiast or professional. It involves joining two or more metal components by melting a filler metal (solder) into the joint to create a strong electrical and mechanical bond.
While a soldering microscope can make the process easier and more precise, not everyone can access one. Soldering without a microscope can be daunting, especially with small components, but it is still possible with the proper technique and tools.
This step-by-step guide will explore how to solder without a soldering microscope and still achieve high-quality results. We will cover everything from selecting the right soldering iron and solder to preparing the components and executing the soldering process.
Whether you’re a seasoned veteran or just starting with soldering, this guide will provide essential tips and tricks to improve your soldering skills and confidently tackle your next project. So, without further ado, let’s dive into soldering without a microscope.

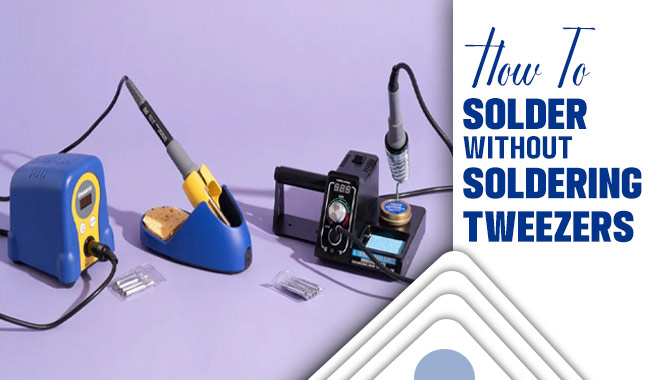
How To Solder Without A Soldering Microscope A Comprehensive Guideline

Soldering is essential to many electronic projects, but not everyone can access a soldering microscope. However, with a few tips and tricks, you can still solder like a pro without a microscope. By following the below steps, How to Solder without a soldering microscope step-by-step guide:
What Are The Necessary Tools For Soldering
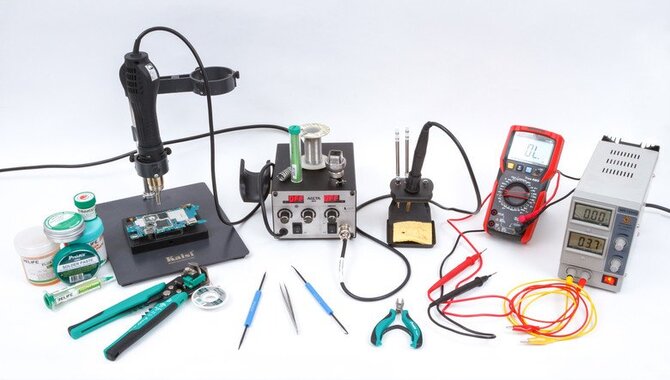
Soldering is a delicate process that requires the right tools to ensure precision and efficiency. One of the most essential tools for soldering is the soldering iron itself. This tool heats the solder, allowing it to melt and bond with the joined metal components.
You should choose a soldering iron based on the project’s specific needs, such as wattage and tip size. Another crucial tool for soldering is solder wire.
This is the material that melts and bonds the metal components. It comes in different alloys and thicknesses, and the selection should depend on the project’s requirements.
A third necessary tool for soldering is flux. This chemical compound helps to remove oxidation and contaminants from the metal surfaces, allowing the solder to flow freely and bond correctly. A fourth important tool is a soldering stand. This helps to keep the soldering iron safe and secure when not in use and prevents accidental burns or damage to surrounding materials.
Safety Precautions You Must Take Before Soldering
People commonly use soldering as a technique in electronic repairs and DIY projects. However, it comes with potential hazards that can cause harm to both the individual and the environment. Therefore, it is important to take safety precautions before soldering.
- Ensure that you are working in a well-ventilated area. Soldering produces fumes, which can be harmful if inhaled. Thus, it is essential to have proper ventilation or work in an area with sufficient air circulation.
- Wear protective gear such as safety goggles, gloves, and respirators. These will offer protection against splatters, burns, and fumes.
- Inspect your soldering iron to ensure it is in good condition. A damaged or faulty iron can cause a short circuit or even start a fire.
- Keep a fire extinguisher nearby just in case of an emergency.
Lastly, disconnect all power sources before starting your work. Accidentally soldering a live circuit can be dangerous.
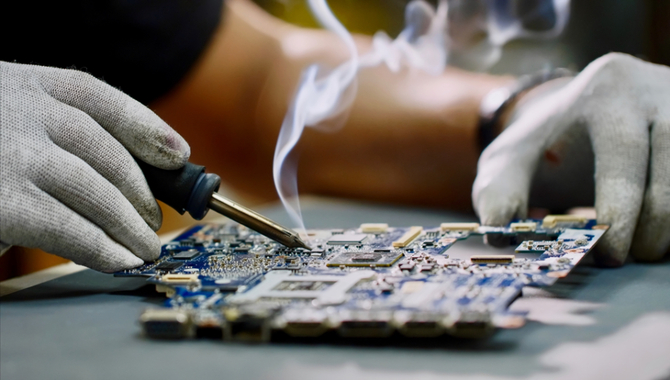
Understanding The Basics Of Soldering Without A Microscope
People use soldering, a common technique, to join metal components in electronics and DIY projects. It involves heating a metal alloy, called solder, to its melting point and applying it to the joint, where it solidifies and forms a strong bond. While many professionals use microscopes for precision soldering, it is possible to learn the basics without one.
- choosing the right soldering iron and tip for the job is important. A 25-40 watt iron with a conical tip is ideal for most hobbyist projects.
- It is important to prepare the joint by cleaning it with a wire brush or sandpaper and applying flux to help the solder flow.
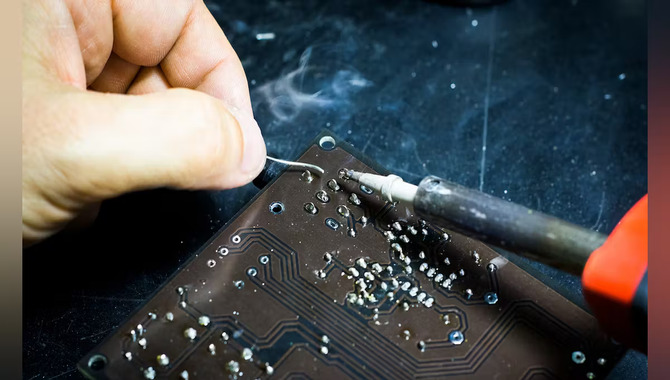
- Heat the iron, touch the tip, and add a small amount of solder until it melts and flows into the joint.
It is important to avoid overheating the joint, which can damage the components or cause the solder to form a cold joint.
Tips For Successful Soldering Without A Microscope
Soldering is an essential skill for any electronics enthusiast or technician. It can be a daunting task for those who do not have access to a microscope. The good news is that successful soldering without a microscope is possible with a few tips.
- select the right soldering iron with a fine tip. A fine tip will enable you to work with small components and make precise joints.
- Choose the right solder wire with the appropriate diameter and flux content. A thin diameter will help you to avoid solder bridges, while the right flux content will help to create a strong bond.
- 3. Use a good quality soldering stand that can steady your workpiece while you solder. This will provide stability and prevent accidental movement while you work.
- Ensure that your work area is well-lit and free from distractions.
A well-lit work area will help you see the finer details of your components while minimizing distractions will ensure that you remain focused.
How To Do Soldering Without The Soldering Machine?
Not everyone has access to a soldering machine or may be in a situation where they cannot use one. In such cases, there are several alternatives to soldering without a machine. One option is a soldering iron, which can be heated using a stove or a portable gas burner. While this method requires more skill and patience, it is still an effective way to combine two metal parts.
Another option is to use a conductive adhesive, which can be applied to the surfaces that need to be joined. This adhesive is made of conductive particles allowing an electric current to pass through. It is a good alternative for those who do not want to deal with the heat and fumes associated with soldering.
Finally, wire wrapping is another method that can be used to join wires together. This technique involves wrapping one wire around the other, creating a secure and durable connection.
Different Techniques For Soldering Without A Microscope
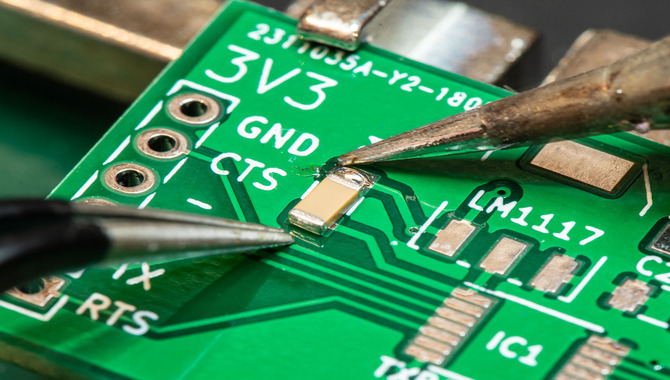
Soldering is an essential skill that every electronic technician must master. However, soldering without a microscope can be challenging, especially when dealing with small components.
Fortunately, different techniques can be employed to solder without a microscope. One of the easiest methods is to use a magnifying glass. A magnifying glass can help you see the fine details of the solder joint and make it easier to place the solder precisely.
Another technique is to use a light source. Bright light can help you see the solder joint clearly, and it also helps to prevent shadows from obscuring your view. You can also use a camera or a smartphone to take a picture of the component before soldering. This lets you zoom in on the image and see the details more clearly.
Another technique is to use a flux pen. A flux pen helps to clean the solder joint and prevent oxidation, making it easier to see the joint.
Troubleshooting Common Soldering Problems
Soldering is a crucial skill in electronics, but it can be frustrating when things go wrong. Troubleshooting common soldering problems can save you time and money and ensure your projects are successful.
One common issue is cold solder joints, which occur when the solder hasn’t fully melted, resulting in a weak connection. This can be caused by not heating the joint long enough or not using enough solder.
Another issue is bridging, where solder connects two pads that should not be connected. This can be caused by using too much solder or improperly placing the soldering iron tip. Insufficient heat can also cause problems, such as incomplete melting of the solder or damage to the soldered components.
It’s important to use a soldering iron with sufficient wattage for the job and to give it time to heat up before use. Lastly, excessive heat can cause damage to components or even burn them. This can be avoided by using the correct temperature setting on your soldering iron and being careful.
How To Care For Your Soldering Tools
Here’s a step-by-step guide on how to care for your soldering tools:
- Unplug the soldering iron: Before performing any maintenance or cleaning tasks, make sure the soldering iron is unplugged and has completely cooled down. This is important for your safety.
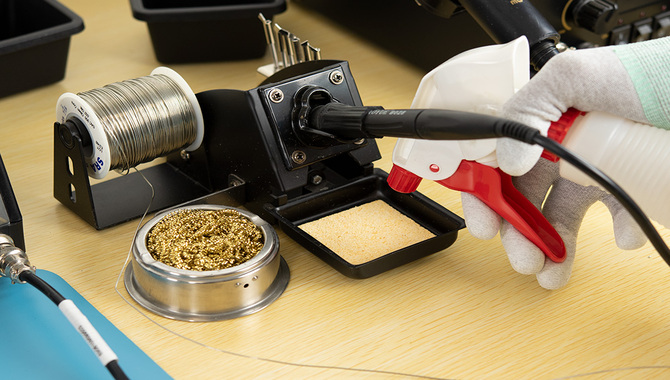
- Clean the soldering iron tip: Use a damp sponge or a brass wire tip cleaner to remove any excess solder, flux residues, or oxidation from the soldering iron tip.
- Tin the soldering iron tip: After cleaning, apply a small amount of solder to the tip to create a thin layer of fresh solder. This process is known as tinning and helps protect the iron from oxidation when not in use.
- Store the soldering iron properly: When you’re done using it, store it in a safe and dry place. Ideally, use a designated holder or stand to keep it upright.
- Clean the soldering iron stand: If your soldering iron stand has a sponge or brass wool cleaner, make sure to clean and replace them regularly.
- Inspect the power cord: Periodically check the power cord for any signs of damage, such as fraying, cuts, or exposed wires. If you notice any issues, it’s crucial to replace the cord or have it repaired by a professional.
- Store solder and flux properly: Keep your solder and flux in airtight containers or sealed bags to prevent moisture absorption. Moisture can affect the quality of solder joints and lead to poor soldering results.
- Maintain proper ventilation: Ensure adequate ventilation in your workspace when soldering. Soldering fumes can be harmful, so use a fume extractor or work in a well-ventilated area to minimize exposure.
- By following these steps, you can ensure that your soldering tools remain in good condition and perform optimally, extending their lifespan and maintaining high-quality soldering results.
How To Care For Your Soldering Tools
Advanced soldering techniques without a microscope can be challenging but possible with the right tools and techniques. Here is a step-by-step guide to help you:
- Prepare your workspace: Set up a clean and well-lit work area. Make sure you have all the necessary tools and materials readily available.
- Gather the required tools: While you won’t be using a microscope, it’s essential to have some tools that can assist you in achieving precision.
- Choose the appropriate solder and flux: Select the solder and flux suitable for your soldering project. Lead-based solder with a low melting point (around 60/40 or 63/37 composition) is commonly used for general electronic soldering.
- Clean and prepare the components: Ensure that the surfaces to be soldered are clean and free from any contaminants.
- Tin the soldering iron tip: Pre-tin your soldering iron tip by melting a small amount of solder onto it.
- Position the components: Use tweezers to hold and position the components you want to solder. Make sure they are aligned properly and held securely in place.
- Heat the joint: Bring the soldering iron tip into contact with the joint, heating both the component lead and the pad on the circuit board.
- Apply solder: Once the joint is heated, touch the solder wire to the joint, not to the soldering iron. Allow the solder to flow onto the joint, forming a small, smooth fillet around the component lead and pad.
- Remove the soldering iron: Once the solder has flowed properly, remove the soldering iron. Be careful not to disturb the joint while it cools.
- Following these steps and practicing good technique can achieve quality solder joints without a microscope.
Conclusion
Knowing How to solder without a soldering microscope is a crucial task that requires attention to detail and precision. Soldering without a microscope is not impossible with the right tools, technique, and focus. Following the step-by-step guide above, one can successfully solder small components without a microscope.
It may take some practice and patience, but you can achieve professional-level results with time, a steady hand, and a clean workspace. Always prioritize safety by wearing protective gear and working in a well-ventilated area. With these tips in mind, you can confidently tackle any soldering project that comes your way.
FAQs
1.How Can One Improve Their Soldering Skills Without Relying On A Microscope For Inspection?
There are several ways to improve soldering skills without relying on a microscope for inspection:
Ans: 1. Practice.
- Use a magnifying glass.
- Work with good lighting.
- Use a soldering iron with a fine tip.
- Use flux.
2.Are There Any Specific Tools Or Equipment That Can Help To Solder Without A Microscope?
Ans: Yes, several tools and equipment can help with soldering without a microscope.
3.What Are The 3 Soldering Tools?
Ans: The 3 soldering tools are a soldering iron, solder, and flux.
4.What Is A Hand Tool Used In Soldering?
Ans: A hand tool used in soldering is a soldering iron.
5.Why Use Soldering Paste?
Ans: The soldering paste facilitates the soldering process by improving the wetting and adhesion of the solder to the joined surfaces.

![Top 8 Best Solder For Copper Pipe [Reviews With Buying Guide]](https://accuratepicker.com/wp-content/uploads/2022/03/Best-Solder-For-Copper-Pipe.jpg)