

Adjusting the fender of a guitar is an important part of the instrument’s setup and maintenance. It can affect the playability and sound of the guitar, so it’s important to know how to adjust it correctly. This article will discuss the steps involved in adjusting a guitar’s fender for better playability, including the tools needed, the process of adjusting the fender, and the benefits of doing so.
With the right knowledge and tools, players can make the most out of their instrument and ensure a better playing experience. So, if you are looking to improve the playability of your guitar, read on to learn how to adjust a guitar’s fender for better playability.

Fine -Tuning A Guitar’s Fender – Optimal Ways

Before we jump into the main article about how to adjust a guitar’s fender for better playability, it is important to understand the basics of guitar setup. A guitar setup is the process of adjusting the instrument to its optimal playing condition.
This includes adjusting the action, intonation, and bridge height. It also involves replacing worn parts, such as strings, and performing minor repairs. With proper setup, a guitar can be far more playable and enjoyable to play. Now, let’s dive into the article and learn how to adjust a guitar’s fender for better playability.
Adjusting Intonation

Adjusting intonation is an important step for achieving the best sound from your guitar. It involves setting the distance between the strings and the fretboard, which determines the strings’ pitches. To adjust intonation, you will need to loosen the strings and adjust the bridge saddles.
Make sure to tune the strings again after adjusting the bridge saddles. Some guitars come with adjustable bridges, which allow for easy and accurate intonation adjustments. If you have an adjustable bridge, you can make the necessary adjustments with a few simple steps. First, loosen the strings and turn the bridge saddles until the desired intonation is achieved.
Then, tune the strings to the desired pitch. Finally, re-tighten the strings and check the intonation again. With an adjustable bridge, you can quickly and effectively adjust the intonation of your guitar for better sound and playability.
Check Bridge Position
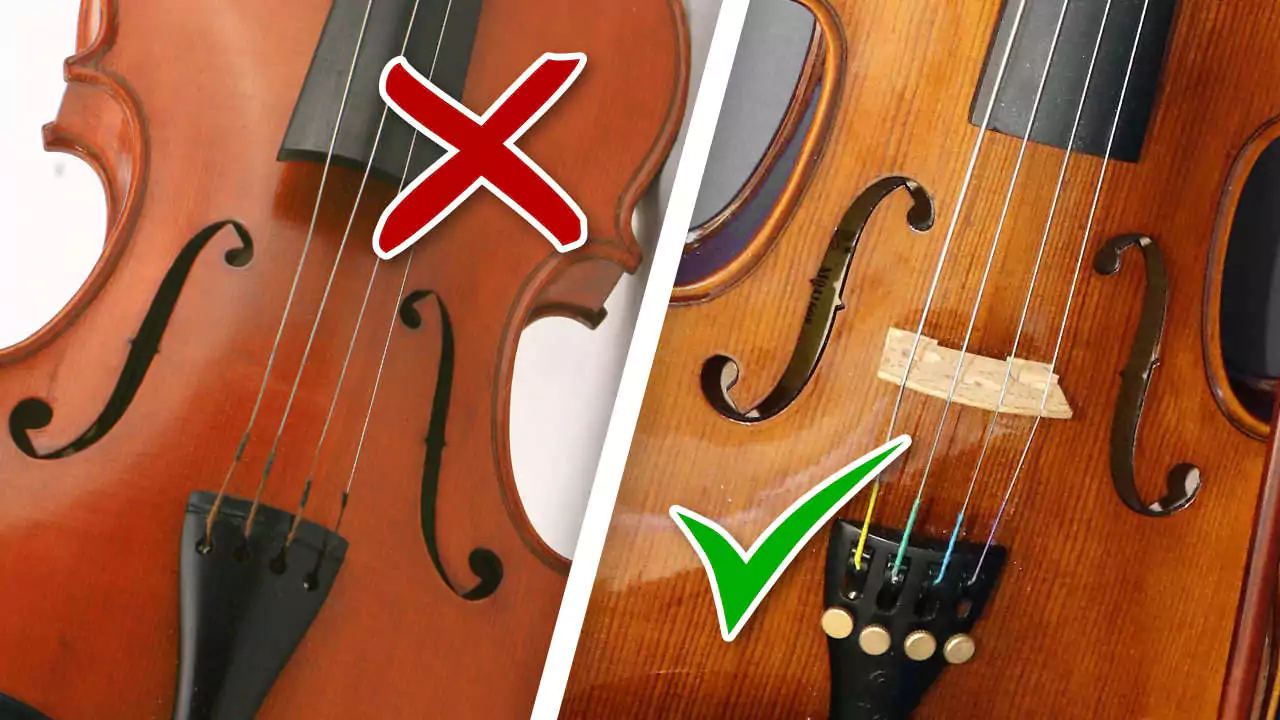
When it comes to adjusting a guitar’s fender for better playability, the first thing to check is the bridge position. The bridge should be positioned so that the strings have the proper balance of tension and intonation. To check the bridge position, take a look at the bridge from the front and make sure it is parallel to the body of the guitar and that the bridge saddles are level.
If the bridge is not in the correct position, use an Allen wrench to adjust the bridge’s height and/or angle. When adjusting the bridge, it is important to avoid exerting too much pressure, as this can cause damage to the instrument.
Additionally, you should check the bridge post for tightness, as a loose bridge post can cause issues with intonation. Once the bridge is in the proper position and the bridge post is tightened, you can then adjust the string height and intonation.
Adjust Saddles
It is important to adjust the guitar’s fender saddles to improve playability. Fender saddles are the pieces of metal on the bridge that hold the strings in place and control the height of each string. To adjust the saddle, you will need an allen screwdriver and a ruler.
Start by measuring the height of the string at the twelfth fret with the ruler. Then adjust the screw in the saddle to match the height of the string. Make sure to do this for each string. Additionally, you can adjust the intonation by turning the small screws at the back of the bridge. To make sure the intonation is accurate, use an electronic tuner. With the proper adjustments, your guitar’s fender will be playing better than ever.
Test String Tuning

String tuning is one of the most important elements of guitar playability. It is important to make sure the strings are in tune and that the guitar is adjusted to the right tension. In order to test string tuning, start by checking the tuning pegs. Make sure the tuning pegs are tight and that the strings are not slipping.
If they are, tighten the tuning pegs. Then, use a digital tuner to test the strings for accuracy. Make sure each string is in tune and that the tension is even across the strings. Make any adjustments as needed. Once the strings are in tune, use a capo to check the intonation. Place it on the fretboard at the third or fourth fret and play a note on a string.
Check the sound of the note to make sure it is in tune. If it is not, adjust the intonation with the saddle screws. This will ensure the guitar is both in tune and in proper adjustment for the best playability.
Repeat As Necessary
In order to ensure the best playability of a guitar, it is important to adjust the fender regularly. To begin, you should check the fender’s height, making sure that it is not too high or too low. If the fender is too high, it can interfere with the strings and make playing difficult. If the fender is too low, the strings can buzz when played.
Next, check the fender’s intonation, which means the strings should be correctly tuned. Finally, check the fender’s action, which means the distance between the strings and the fretboard. If the action is too high, it can make playing uncomfortable. If it is too low, the strings can buzz again. Repeat these steps as necessary to keep your guitar in optimal playing condition.
Adjusting Action

Once you have the strings in place, you can adjust the action of the guitar. Action is the height of the strings off the fretboard. Too low and the strings will buzz against the fretboard, too high and it will be harder to press down the strings. To adjust the action, you need to adjust the saddles of the bridge.
Loosen the screws on the bridge, then carefully adjust the height of the saddles until the action is at a comfortable level. If the strings are too high, lower the saddles a bit and retune the strings. If the strings are too low, raise the saddles a bit and retune. You may need to experiment a few times to get the action just right. Once the action is set, tighten the screws on the bridge and you’re ready to play.
Check Fret Level
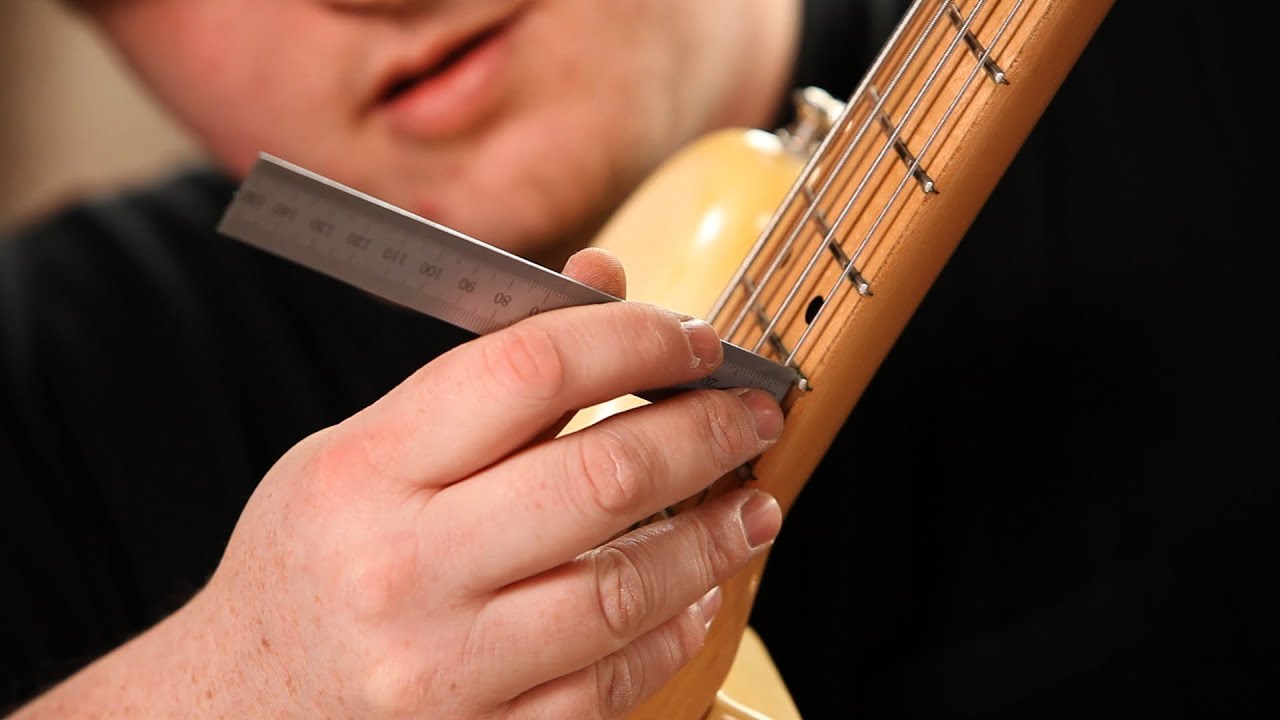
It is important to check the fret level of your guitar for better playability. The frets should be level with each other and with the fingerboard. To check your fret level, you’ll need a straight edge and a feeler gauge.
Place the straight edge across the frets, and then use the feeler gauge to measure the distance between the straight edge and the tops of the frets. If the distance is greater than 0. 010 inches, the frets need to be leveled. If the distance is less than 0.
010 inches, the frets are level. If the frets are not level, you can level them by filing them down with a fret file. Once the frets are level, you should check the fret ends to make sure they are not sticking out too far.
This can be done by lightly running your finger along the fret ends to feel for any sharp edges. If any sharp edges are found, you should file them down with a fret end file.
Adjust Truss Rod
A truss rod is a metal rod that runs along the neck of a guitar. It’s purpose is to counter the tension of the strings and help keep the neck of the guitar straight. Adjusting the truss rod is an important step in getting the guitar to play the way you want it to. To adjust it, you need to loosen or tighten the rod using a truss rod wrench.
Start by loosening the rod until you can easily turn the wrench. Then, play the guitar and see how it feels. If the neck is too straight, then you need to tighten the rod. If it’s too curved, then you need to loosen the rod. Make adjustments in small increments and play the guitar between each adjustment until you get the desired feel.
Adjust String Height
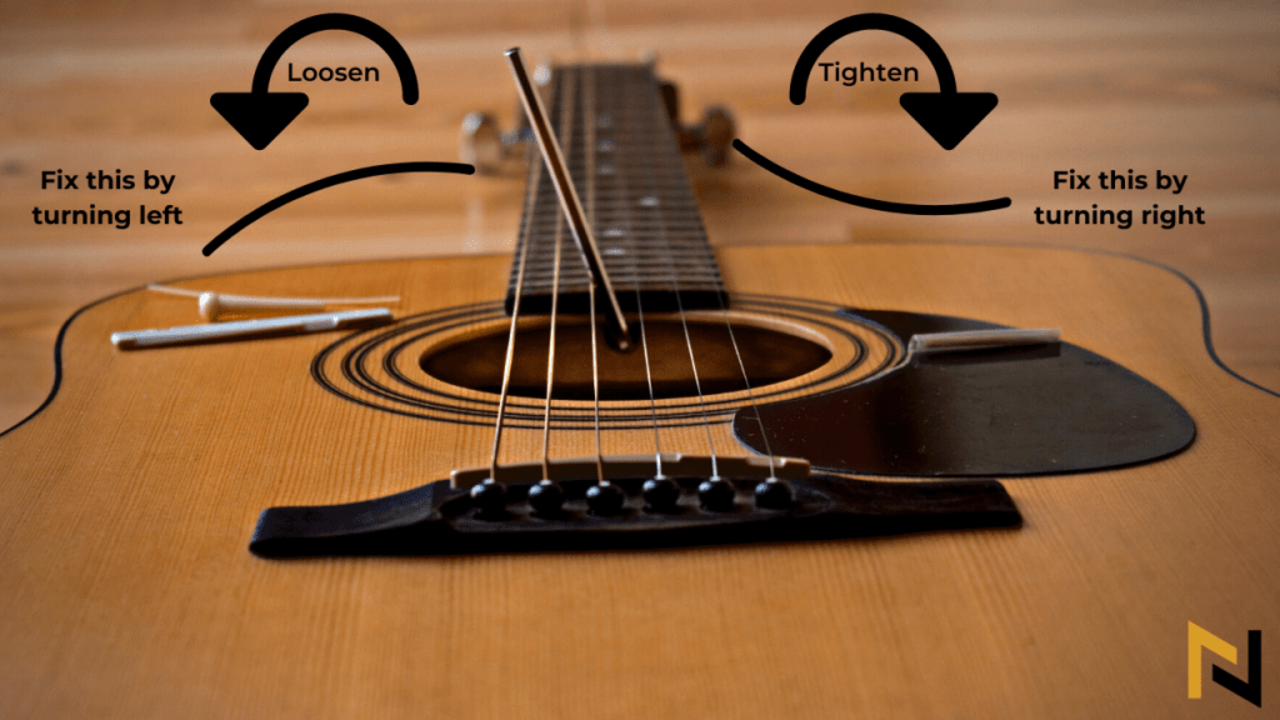
Adjusting the string height of a guitar is essential to achieving good playability. To start, loosen the strings and remove the bridge cover. Place a capo on the first fret and use a ruler to measure the distance between the bottom of the string and the top of the fret. The ideal height is 3/64 of an inch.
If the strings are too high, use a screwdriver to turn the bridge screws counterclockwise until the strings are at the right height. If the strings are too low, turn the bridge screws clockwise. When the strings are at the correct height, retune the guitar and replace the bridge cover. With the right string height, playing your guitar will be a more enjoyable experience.
Repeat As Necessary
Adjusting a guitar’s fender is an important part of making sure it is in optimal playing condition. Adjusting the fender can help improve the instrument’s playability and allow the strings to vibrate more freely. To adjust the fender, first check the truss rod and make sure it is adjusted properly.
Next, make sure the nut slots are properly cut and the strings are sitting just right in the slots. Finally, adjust the height of the strings by adjusting the bridge saddles and then recheck the truss rod. If necessary, repeat the process until the instrument is playing as desired. With the right adjustments, your guitar’s fender can make a huge difference in its playability.
Conclusion
This article provides tips on how to adjust a guitar’s fender for better playability. It covers topics such as adjusting the truss rod, setting the intonation, and setting the action. Additionally, it offers advice on how to check the nut, bridge, and pickups as well as how to clean and lubricate the strings. With these tips, guitarists can make sure their instruments are in top condition for playing.
FAQ’s
1.What Tools Are Needed To Adjust A Guitar’s Fender?
Ans: In order to adjust a guitar’s fender, you will need a guitar tuner, a set of hex wrenches, a screwdriver, and a truss rod adjustment tool. The guitar tuner will help you tune the guitar and make sure it’s in the right key. The hex wrenches and screwdriver will help you loosen and tighten the screws that hold the fender in place. Finally, the truss rod adjustment tool will help you adjust the tension of the strings.
2.How Do You Know When A Guitar’s Fender Needs Adjusting?
Ans: You can tell when a guitar’s fender needs adjusting if the strings are buzzing or the action is too high when fretting notes. You may also notice that the intonation is off, meaning the notes don’t ring true when played. If the strings are too loose, it can also cause the neck to bow, resulting in an inability to maintain the correct action. If any of these issues arise, it’s time to adjust the fender.
3.What Are The Steps Involved In Adjusting A Guitar’s Fender?
Ans: First, use a screwdriver to loosen the screws on the guitar’s bridge plate. 2. Next, adjust the bridge saddles on either side of the guitar’s strings. 3. Follow this by tuning the strings to the desired pitch. 4. Lastly, retighten the screws on the bridge plate to secure the bridge in place.
4.What Are The Potential Consequences Of Incorrectly Adjusting A Guitar’S Fender?
Ans: Incorrectly adjusting a guitar’s fender can cause the guitar to become out of tune, make it difficult to play, and create buzzing or rattling noises. Additionally, improper adjustments can damage the strings, affect the sound quality, and even cause permanent damage to the guitar. Therefore, it is important to take the time to properly adjust the fender when setting up a guitar.
5.Does Adjusting A Guitar’s Fender Improve Its Sound Quality?
Ans: Yes, adjusting a guitar’s fender can improve its sound quality. The fender acts as a resonator, amplifying the sound of the strings, so adjusting it can help the sound resonate better. When it’s adjusted correctly, the strings will vibrate more freely, resulting in better sound quality. In addition, the fender helps reduce feedback, which can also improve sound quality.


![9 Best Fender Covers [Reviews With Buying Guide]](https://accuratepicker.com/wp-content/uploads/2022/03/Best-fender-covers.jpg)