

Guitarists often find themselves in the unfortunate situation of having a bent guitar fender, which can cause serious issues with playability.
Fortunately, this problem can be resolved with some basic repair work. This article will explain the process of repairing a bent guitar fender in order to improve playability and restore the instrument to its original condition. It will cover the tools and techniques needed to properly repair a bent guitar fender, as well as provide tips for avoiding this problem in the future.
By the end of this article, readers will have the knowledge and confidence needed to repair a bent guitar fender for improved playability. So, if you’re ready to get your guitar back in shape, let’s get started!

Repair A Bent Guitar Fender For Improved Playability: How-To Guide
This article will provide an overview of how to repair a bent guitar fender for improved playability. The process requires some basic tools and knowledge of the instrument, so it is important to understand the basics before attempting to repair the fender. We will discuss the necessary steps to properly repair the fender, from identifying the problem to fixing it.
Additionally, we will provide tips on how to prevent future damage and ensure the fender remains in good condition. Finally, we will discuss the best practices for maintaining the fender to ensure improved playability. With the right approach, you can make sure your guitar fender is in great condition and ready to perform.
Preparation
Before attempting to repair a bent guitar fender, it is important to take certain preparatory steps. First, check to make sure the bend is not too severe; it should be repairable with a few simple tools. Next, gather the necessary materials such as a small hammer, a wooden block, and a rubber mallet. Additionally, you may want to have some soft cloth or a leather pad to protect the finish of the guitar.
Finally, make sure you have enough space to work on the guitar without having to move it around too much. Once all of these preparations are complete, you are ready to start repairing the fender.
Measure Damage
Taking measurements of the damage is the first step in repairing a bent guitar fender. Start by measuring the gap between the bent area and the neck pocket. This will give you a good indication of how much you need to adjust the fender.
Measure the area with a ruler or feeler gauge to ensure accuracy. Next, measure the gap between the bent area and the pickups. This will help you determine the amount of relief you need to give the fender so that it sits correctly. Finally, measure the height of the bent area from the back of the guitar. Once all measurements are taken, you can begin the process of restoring the guitar fender.
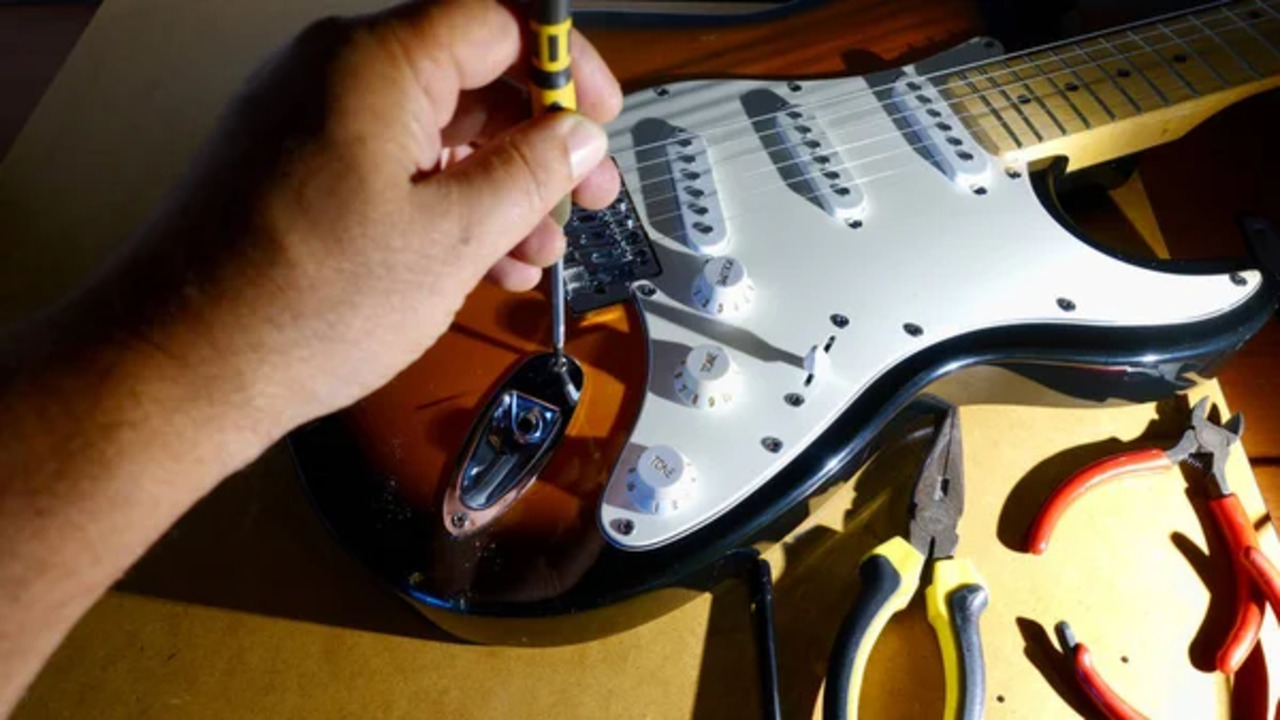
Gather Tools
Before you begin repairing a bent guitar fender, it is important to gather the necessary tools. Start by gathering a few different sizes of clamps. Choose clamps that are large enough to fit around the fender but won’t be too bulky. Additionally, you will need a rubber mallet to help straighten out the fender.
A sanding block and some fine-grit sandpaper will also come in handy for smoothing out the metal when you are done. Finally, you will need some sort of lubricant like WD-40 to help loosen the metal. With all of these tools on hand, you will be ready to repair your bent guitar fender.
Prepare Fender
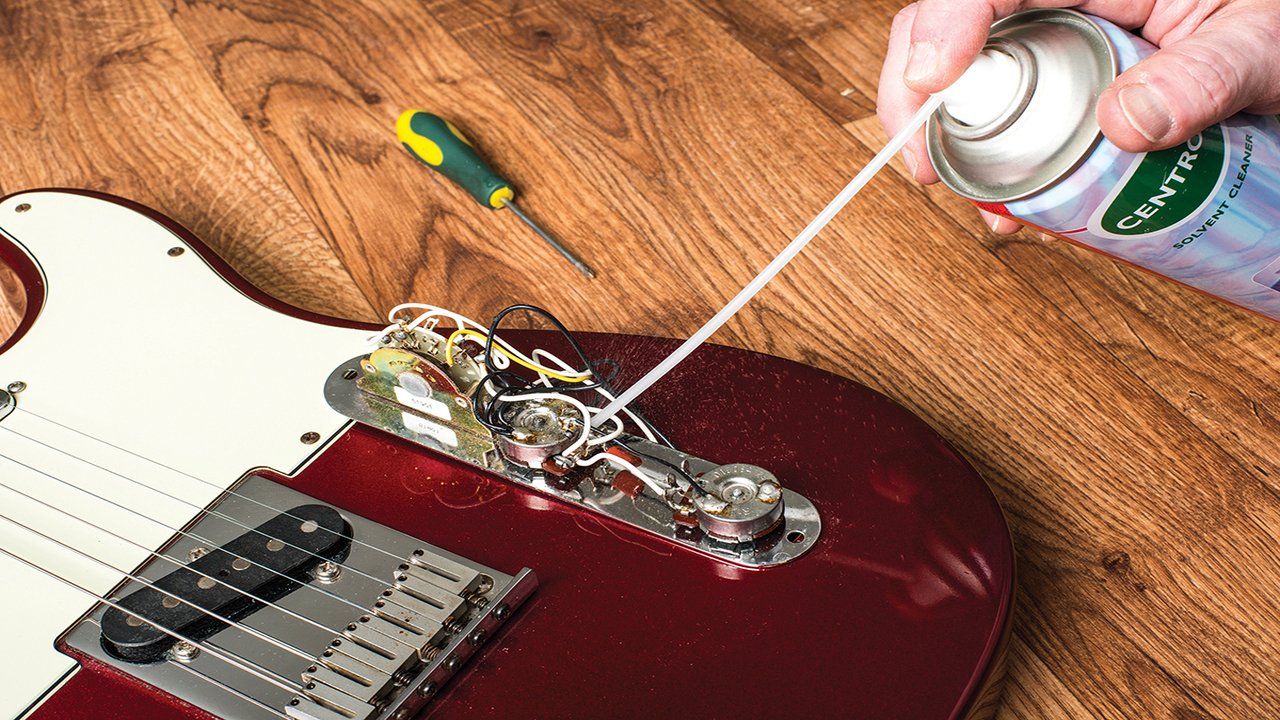
Before beginning any repair project, it is important to properly prepare the fender. Begin by carefully examining the fender for any signs of damage, such as dents or cracks. If any signs of damage are found, they should be addressed first before any further repair work is done.
Once the fender has been examined, gently wipe down the fender with a soft, damp cloth to remove any dust or dirt that may be present. Taking the time to properly prepare the fender will ensure the repair work is done correctly and the guitar will have improved playability after the repair is complete.
Protect Guitar
Maintaining a guitar’s fender is key to keeping its playability and performance at a high level. A bent fender can be a safety hazard, as well as impacting the guitar’s ability to produce sound. To protect a guitar’s fender, a musician should inspect the fender regularly to check for damage.
If the fender is bent, it should be repaired as soon as possible. Repairing a bent fender requires the right tools and a steady hand. It’s important to take your time and be careful not to cause additional damage. You’ll need a flat surface and a straight edge, such as a ruler, to begin the repair.
Start by lightly sanding the area of the fender that needs to be repaired. After sanding, use the straight edge to push the bent area back into place. If the bent area is severe, you may need to use a hammer to gently tap the area into place. Once the fender is back in place, use a cloth to buff the area and follow up with a polish to protect the fender. Taking the time to maintain and repair a guitar’s fender will ensure that the instrument remains playable and produces a quality sound.
Straightening

Straightening is the process of repairing a bent guitar fender and restoring it to its original shape. The first step is to remove any dirt or grime from the surface of the fender. Next, the fender should be warmed up with a heat gun or hairdryer.
This will make it easier to bend back into shape. Once it has been warmed up, use a flat object, such as a ruler, to carefully push the bent area back into place. If the fender is too bent to be straightened by hand, use a clamp to hold it in place while it cools. To ensure that the fender is straightened correctly, repeat the process until the fender is back to its original shape. Once the guitar fender is straightened, the playability of the instrument will be improved.
Heat Fender
Heat bending the guitar fender is one of the most effective ways to repair it and improve its playability. To do this, you’ll need the right equipment, such as a heat gun or heat lamp, along with a bending jig to help keep the fender’s shape while it is being heated. Start by clamping the fender into the jig, making sure that the area that needs to be bent is firmly secured.
Heat the fender gently, making sure to move the heat source to ensure that the heat is evenly distributed. Once the fender has reached the desired temperature, use the jig to help you bend the fender into its new shape.
Allow the fender to cool completely before removing it from the jig. Once the fender is cooled, check the bends to make sure they are even and uniform. If not, repeat the process until the desired shape is achieved. Once complete, your guitar fender will be repaired and ready for improved playability.
Straighten Fender
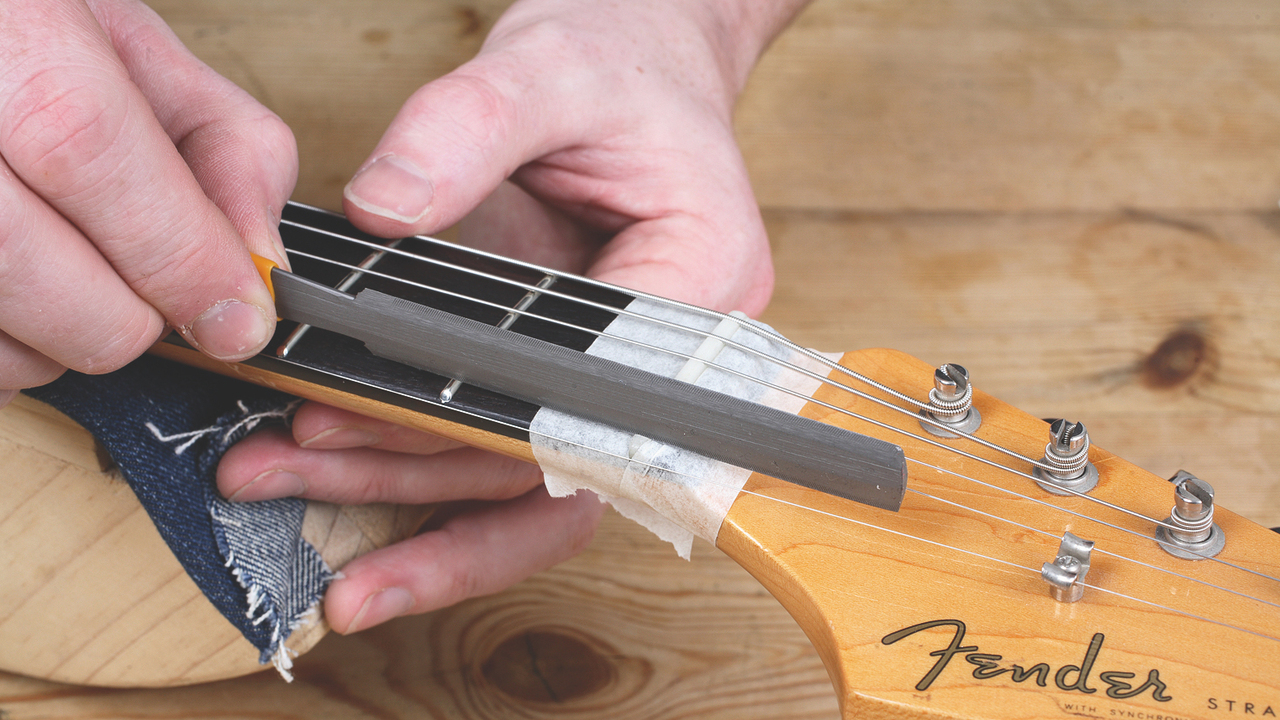
If your guitar’s fender is bent, it can make playing difficult and decrease the overall sound quality. Fortunately, you can easily fix this yourself with a few simple tools and some patience. To straighten a bent fender, the first thing to do is to use a heat gun to help soften the metal. Heat the area of the fender that is bent and use a mallet to apply pressure until it is straight again.
If the fender is still slightly bent, use a clamp to help hold it in place while you hammer it down. Finally, once the fender is completely straight, you can use sandpaper to smooth out the surface. Taking the time to properly straighten your guitar’s fender will improve the playability of your instrument and ensure that you get the best sound possible.
Refinish Fender
When it comes to repairing a bent guitar fender, the most important step is to refinish the damaged area. To do this, you’ll need to remove the old finish using a high-speed sander or buffer. Make sure you wear protective gear, such as safety glasses and a dust mask, and work in a well-ventilated area.
Once the old finish is gone, you can use a metal file to remove any burs or rough spots. Then, use a good-quality automotive-grade primer and spray on a thin coat. Once the primer is dry, use a spray gun to apply the new finish. The finish should be smooth and even.
Allow the finish to dry completely before you start playing your guitar again. With a few simple steps, you can refinish a damaged guitar fender and improve its playability.
Finishing
Once the repaired area has been sanded down and the Fender is back to its original shape, it is time to finish the job. Depending on the type of Fender you have, you may need to apply a primer coat of paint before the final colour is added. If you are using a metallic finish, you may also need to apply a base coat before the final colour is added.
Once the primer coat has been applied, it is time to apply the final colour. Be sure to use a spray gun with the appropriate nozzle settings for a smooth, even finish. Once the colour has been applied, allow it to dry. Once the guitar Fender has been painted, you can add any decorative details and a clear coat to protect the finish.
Once the clear coat has been applied, allow it to dry and you are done. Your repaired Fender is now ready to go back on the guitar and make playing easier and more enjoyable.
Reattach Fender
Reattaching a bent guitar fender is a relatively easy task and can be done in a few simple steps. First, you’ll need to make sure the fender is securely attached to the guitar. Make sure all screws are tight and that the fender is properly aligned. Next, you’ll need to use a strong adhesive to bond the pieces of the bent fender together.
Once the adhesive has been applied, carefully press the pieces together and hold them in place for a few minutes. Finally, let the adhesive dry completely before playing the guitar. With the fender now securely in place, you can enjoy improved playability and a better overall sound.
Adjust Intonation
When adjusting the intonation of a bent guitar fender, it is important to consider the overall playability of the instrument. The intonation of a stringed instrument is determined by the length of the string and the distance from the nut to the bridge. If the intonation is off, the strings will not sound properly when played.
To adjust the intonation, start by loosening the strings and then unscrewing the bridge saddles. Move the bridge saddles back or forward, depending on what needs to be adjusted. Once the bridge saddles are in the correct position, tighten the strings and tune the instrument to the desired key. After the strings are tuned, check the intonation by playing chords and single notes up and down the fretboard. If the intonation is still off, repeat the process until the desired results are achieved.
Check Playability
It is important to check the playability of the guitar fender before attempting any repairs. If the fender is badly bent, the strings will not be properly aligned, which can cause tuning problems. Additionally, the strings may be too close to the fretboard, making it difficult to play.
To check for playability, begin by tuning the guitar to standard tuning. Then, play up and down the fretboard and assess the comfort level. Make sure that the strings are not too close to the fretboard and that you can play each note clearly. If you find that the strings are too close, this is a sign that the neck may need to be adjusted.
Finalize Setup
Once the fender has been repaired and the strings have been tightened, the final setup will need to be done. This includes adjusting the truss rod, setting the intonation, and adjusting the action. The truss rod should be adjusted until the neck is straight and the strings are at the correct height.
The intonation should be adjusted so that each string is in tune up and down the neck. Lastly, the action should be adjusted so that the strings are not too close or too far from the fretboard. Once these adjustments have been made, the guitar should be ready for playing.
Conclusion
This article provides a step-by-step guide on how to repair a bent guitar fender for improved playability. Firstly, the guitar should be carefully inspected to determine the extent of the damage. Then, the fender must be removed and placed on a flat surface. Next, the bent area should be heated with a heat gun to make it malleable.
After that, the fender should be clamped and bent back into shape. Finally, the fender should be secured with screws and checked for any further damage. With these steps, the guitar fender can be repaired for improved playability.
FAQ’s
1.What Tools Are Needed To Repair A Bent Guitar Fender?
Ans: To repair a bent guitar fender, you will need a heat gun, a flat surface, a rubber mallet, and a small block of wood. Heat the fender with the heat gun and place it on the flat surface. Use the rubber mallet and the small block of wood to gently tap the fender back into shape. Finally, ensure the fender is completely cool before use.
2.How Do You Determine The Amount Of Force Needed To Repair A Bent Guitar Fender?
Ans: To determine the amount of force needed to repair a bent guitar fender, you will need to measure the degree of the bend and assess the material of the fender. Depending on the severity of the bend, you may need to use a combination of force and heat to reshape the fender. The type of force used will depend on the material and the desired aesthetic outcome of the repair. It is important to use the correct amount of force to ensure a successful repair.
3.What Techniques Should Be Used To Repair A Bent Guitar Fender?
Ans: There are a few techniques that can be used to repair a bent guitar fender. Firstly, the guitar fender can be heated and then bent back into position using a heat gun and flat surface. Secondly, the metal can be reshaped using a hammer and dolly. Thirdly, the fender can be filled with a metal filler and then sanded down to its original shape. Finally, the fender can be repainted to restore its original look.
4.How Can You Make Sure The Bent Guitar Fender Is Properly Aligned After The Repair?
Ans: To make sure the bent guitar fender is properly aligned after the repair, it is important to measure the angle of the fender with a protractor and adjust it if necessary. Once the angle is correct, use clamps to hold the fender in place while it is being glued. Allow the glue to dry completely and then check the alignment again. Lastly, use sandpaper to smooth out the surface of the fender.
5.What Are The Potential Risks Of Attempting To Repair A Bent Guitar Fender?
Ans: The potential risks of attempting to repair a bent guitar fender include damaging the finish, permanently deforming the metal through excessive force, and potentially weakening the structural integrity of the fender. Additionally, if the repair is not done correctly, it can lead to further issues with the guitar’s playability. It is recommended to have a professional repair any damage to a guitar’s fender as it requires specialized tools and knowledge.


