
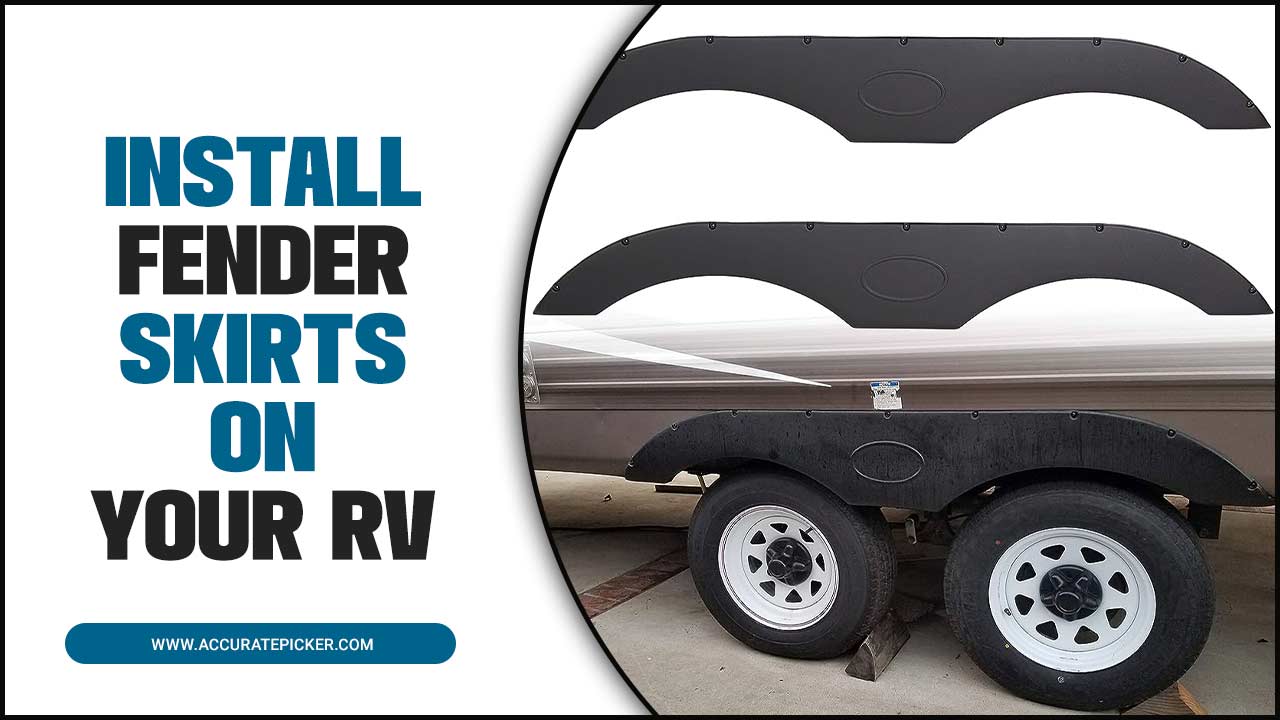
Installing fender skirts on your RV is a great way to protect its exterior from damage and enhance its aerodynamic performance.
Fender skirts are designed to fit snugly around the wheels of your RV, providing a barrier between the vehicle and the road. Selecting the right fender skirt for your RV can be a daunting task, but with the right information and some careful planning, the process can be made much simpler.
In this article, we’ll discuss the different types of fender skirts available, how to measure and select the right size, and how to install your new fender skirts. With this knowledge, you’ll be ready to get your RV ready for the road. So, if you’re ready to take your RV’s protection and performance to the next level, let’s get started and learn how to select and install fender skirts on your RV.

Install Fender Skirts On Your Rv: A How-To

Before we get into the details of how to select and install fender skirts on your RV, it is important to understand why they are a necessary addition to your vehicle. Fender skirts provide protection from dirt, debris, and moisture, helping to keep the exterior of your RV looking clean and new.
They also provide an extra layer of insulation, which can help keep the interior of your vehicle cooler in hot weather and warmer in cold weather. Installing fender skirts is a relatively simple process that can help extend the life of your RV. In this article, we will discuss how to select and install fender skirts on your RV.
Measure Rv
Measuring your RV is the most important step when selecting and installing fender skirts. It is critical to ensure that the fender skirts you choose will fit your RV properly. You will need to measure the RV along with the fender area’s length, width, and height.
Make sure to measure the length of the fender area from the bottom of the wheel well to the bottom of the RV’s side. Additionally, you will need to measure the width of the fender area from the outside edge of one wheel well to the outside edge of the other wheel well. Finally, measure the height of the fender area from the bottom of the wheel well to the top of the RV’s side. Once you have accurate measurements, you can begin shopping for the right size of fender skirts for your RV.
Measure Width
Before you select and install fender skirts, it is important to measure the width of the RV. This is essential to ensure that the fender skirts you purchase are the correct size. To measure the width, place the measuring tape across the top of the wheel wells and measure from one side to the other. Be sure to measure both wheel wells to ensure that the skirts you select will fit properly.
Additionally, measure the height from the wheel wells to the bottom of the RV. This will help you determine the length of the skirts you should purchase. It is important to measure accurately so that the fender skirts fit properly and provide protection for your RV.
Measure Height
Once you have the correct size fender skirts, you will need to measure the height of the fender skirt to the top of the wheel well. Measure from the ground up and make sure to measure on both sides as the fender skirt must fit both sides. Before you begin the installation process, make sure the fender skirts are the right size and the height is correct. If the height does not match, you may need to adjust the fender skirt by trimming it down to the correct size. Once you have the correct height, you can begin the installation process.
Measure Depth
Measuring the depth of your RV is the first step in selecting and installing fender skirts. For this, you will need to measure the distance between the wheel arch and the lower edge of the vehicle chassis. This will give you the depth of the fender skirt you need to purchase. It is important to get accurate measurements as fender skirts come in different sizes and depths.
Once you have the measurements, you can choose the right fender skirts for your RV. Make sure to measure both sides of your vehicle before you buy the fender skirts. This will help you ensure that the skirts fit properly and look great.
Select Fender Skirt
When selecting a fender skirt for your RV, you need to consider the make, model, and year of your vehicle. The fender skirt should match the size and style of the RV, and should be designed specifically for the make, model, and year of your RV. Measure the width and length of the fender area, and choose a fender skirt that will fit comfortably.
Check the fender skirt for any damage, and make sure it is in good condition before installing it on your RV. Once you have selected the correct fender skirt for your RV, the next step is to install it. You will need to attach the fender skirt to the RV’s frame with bolts or screws. It is important to use the correct size of bolts and screws for the fender skirt, and to make sure they are firmly secured.
Once the fender skirt is attached, check for any gaps or loose areas, and adjust the skirt as necessary. Finally, you should apply a sealer to the fender skirt to protect it from the elements and ensure a long life. With proper installation and care, you can enjoy the look of a new fender skirt on your RV.
Choose Material
When it comes to selecting the material for your fender skirts, you have a few options. If you want something that is lightweight and easy to install, vinyl is a great choice. It is also weather and UV resistant, making it a great choice for outdoor use.
If you prefer a more durable option, fiberglass is more suitable. It is more expensive, but it is much more resistant to damage and can last for many years. Whichever material you choose, make sure to pick something that matches the style and color of your RV so that it looks great.
Choose Size
When selecting the size of your fender skirts, you must first measure the wheel well opening of your RV. Measure the length, width, and height of the wheel well opening, and select the corresponding size of fender skirt. These sizes are typically listed in inches or by manufacturer.
Make sure you double-check the measurements to ensure you purchase the correct size. Additionally, it is important to note that some fender skirts may require additional trimming or cutting to fit the size of the wheel well opening. If this is the case, you must use extreme caution when doing so, as to not damage the skirt.
Choose Color
Choosing the right color for your RV’s fender skirts is important for both aesthetic and practical reasons. You want the skirts to blend in with the overall look of the vehicle, but you also need to consider how the color will affect the temperature of the area behind the skirt. Darker colors tend to absorb heat and lighter colors to reflect it, so choose a color that is appropriate for your climate. You can also add a touch of personal style by choosing a color that matches the rest of the RV’s paint job. Once you have chosen a color, it’s time to install the fender skirts.
Choose Design
When selecting a fender skirt for your RV, the first factor to consider is the design. Look for a skirt that will look good with the styling of your RV. You should also consider the color of the skirt in relation to the paint job of your RV. Make sure to choose a skirt that will blend in nicely with the rest of the vehicle.
Additionally, consider the size of the skirt. Make sure that the skirt is long enough to cover the entire wheel and its associated hardware. Lastly, think about the material of the skirt. Vinyl is a popular choice due to its durability and ease of cleaning.
Install Fender Skirt
Fender skirts are an important part of any RV and can help protect the sides of the vehicle from dirt and debris. Installing fender skirts is not a difficult task, but there are a few things to consider. First, determine the size and type of fender skirt that you need for your RV.
If you are unsure, consult the vehicle’s owner’s manual or contact the manufacturer. Once you have the right type of skirt, you can begin the installation process. Start by measuring the area where the skirts will be installed and cut the skirt material to fit. Next, attach the skirts to the RV frame using self-tapping screws.
Finally, use a sealant or adhesive to secure the skirts and ensure they will stay in place. With the right tools and supplies, you can easily install fender skirts on your RV.
Fasten Skirt
Installing fender skirts on your RV is a great way to add style and functionality. Fender skirts help protect the sides of your RV from dirt, debris, and anything that may come in contact with it while driving. The first step in installing a fender skirt is selecting the right size and style for your RV.
Measure the length and width of the area where the fender skirt will be installed and compare it to the size specs of the fender skirt. Once you have the correct size, you can begin the installation process. Begin by attaching the skirt to the frame of the RV. Secure it with screws and nuts, ensuring that it is securely fastened.
You may need to use a drill or other tools to make holes for the screws. Finally, once the fender skirt is securely fastened to the frame, you can finish the installation process. Place the fender skirt panel over the screws and use additional screws and nuts to secure the panel in place.
After the fender skirt is fastened, your RV will look great and have an extra layer of protection.
Secure Corners
Fender skirts help to protect the RV’s exterior from damage while traveling. To securely install them, begin by measuring the length and width of the skirt. Then, attach the clips on the back of the skirt to the RV’s wheel well. Make sure to attach the clips securely so the skirt will not easily fall off.
You may need to use a drill to secure the clips. Additionally, use a sealant adhesive to the skirt to the RV’s exterior to further secure it in place. Finally, use a level to make sure the skirt is straight. If necessary, use a drill to adjust the clip’s position. With the right tools and a bit of patience, you can easily secure a fender skirt to your RV.
Check Alignment
Once you have secured the fender skirts to your RV, it’s important to check the alignment. Start by standing back and making sure the skirts are even on both sides. Then, take a look at the top of the skirts to make sure they are aligned with the top of the RV. If the alignment is off, you may need to adjust the screws that hold the skirts in place.
You can also use shims to help with minor alignment issues. Finally, check the bottom of the skirts to make sure they line up with the bottom of the RV body. Once you are satisfied with the alignment, you can secure the screws and move on to the next step.
Finalize Installation
Once all the fender skirts are in place, it is time to finalize the installation. Secure the skirts with the provided mounting brackets. Pay special attention to the mounting brackets at the corners of the vehicle since they are the most important for support. If you have additional mounting brackets, use them as well.
Use a power drill to make sure the brackets are firmly attached. Once the brackets are secure, use the provided screws or bolts to complete the installation. When the installation is complete, make sure all the skirts are securely attached and that the seams are tightly sealed. If everything looks good, you can then move on to the next step of the installation process.
Secure Edges
Once you have your fender skirts installed, it is important to secure the edges. Start by using a heavy duty adhesive tape to secure the lower edges of the fender skirts to the lower edge of the RV. Be sure to use a tape that is strong enough to hold the skirts in place.
Next, use a screw gun to secure the upper edge of the fender skirts to the top of the RV’s wheel wells. Make sure to use screws that are long enough to get through the wheel well and into the skirts. Lastly, use a sealant to create an airtight seal between the skirts and the RV’s body. This will help ensure that no water or debris will get through the seams and damage your RV’s paint.
Clean Up Area
Once the area around your RV is clear, it’s time to start cleaning up. Begin by removing any dirt, debris, and other materials that could get in the way of your fender skirt installation. Use a broom and dustpan to sweep up the area, then use a hose to wash away any remaining dirt and grime.
Make sure to dry the area thoroughly before proceeding to the next step. Once the area is clean, you can begin installing the fender skirts. Begin by laying out the fender skirts to ensure a proper fit. Position the fender skirts where you want them to go and use a level to ensure they are even.
Once the skirts are in place, use a drill to secure them with the appropriate screws. Be sure to use the right size screws so they don’t strip the holes in the fender skirts. Finally, use a caulking gun to seal the edges of the fender skirts, making sure to work the sealant into the crevices.
This will ensure the fender skirts stay securely in place and prevent water from seeping in. Once complete, you can enjoy your newly installed fender skirts!
Test Fitment
Once you have found the fender skirt that fits your RV, it is time to test fit it. Start by laying the fender skirt on the ground in front of the RV wheel. You should check the fitment of the skirt around the wheel and make sure it is centered. Additionally, you should look at the length of the skirt to ensure it matches the length of the wheel well. After confirming the fitment is correct, it is time to install the skirt.
Conclusion
Fender skirts are a great way to add style and protection to your RV. Installing them is a straightforward process that can be done in a few simple steps. First, select a set of fender skirts that are designed to fit your RV. Next, measure the area where the skirts will be installed and mark the mounting points.
Finally, attach the skirts using the included mounting hardware. With these steps, you can easily add fender skirts to your RV and enjoy the improved style and protection they provide.
FAQ’s
1.What Type Of Fender Skirts Are Best For An Rv?
Ans: The best type of fender skirts for an RV depend on the size and shape of the RV. Fender skirts made of durable materials such as vinyl or fiberglass can be good choices. These types of skirts can provide protection and insulation from the elements and can also help reduce road noise. Fender skirts can also be customized to fit the exact size and shape of the RV.
2.How Do You Measure The Size Of The Fender Skirts For An Rv?
Ans: To measure the size of the fender skirts for an RV, you will need to measure the length, width, and depth of the fender skirt. Measure the length from the edge of the fender skirt to the end of the tread. Measure the width from the outside edge of the fender skirt to the inner edge of the fender skirt. Finally, measure the depth from the top of the fender skirt to the bottom. Once you have these measurements, you will know the size of the fender skirt.
3.What Tools Are Needed To Install Fender Skirts On An Rv?
Ans: The tools needed to install fender skirts on an RV include a drill, screws, a drill bit, a screwdriver, and a measuring tape. Additionally, an adhesive remover may be needed if there is existing adhesive on the RV, and a level will be needed to ensure the skirts are installed correctly.
4.How Do You Secure Fender Skirts To An Rv?
Ans: To secure fender skirts to an RV, you will need to use a drill and some screws or bolts. The size of the screws or bolts will depend on the material of the fender skirts. Start by placing the fender skirts in the desired location and mark the place where the holes should be drilled. Once the holes are drilled, insert the screws or bolts and secure them with nuts.
5.What Are The Benefits Of Installing Fender Skirts On An Rv?
Ans: Installing fender skirts on an RV can provide a number of benefits. First, they can help to keep debris, dirt, and water off the sides of the RV. Second, they can provide a more aerodynamic shape to the RV, which can improve fuel efficiency. Third, they can protect the RV from potential damage from flying rocks or other debris. Finally, they can make the RV look more attractive and stylish.

