
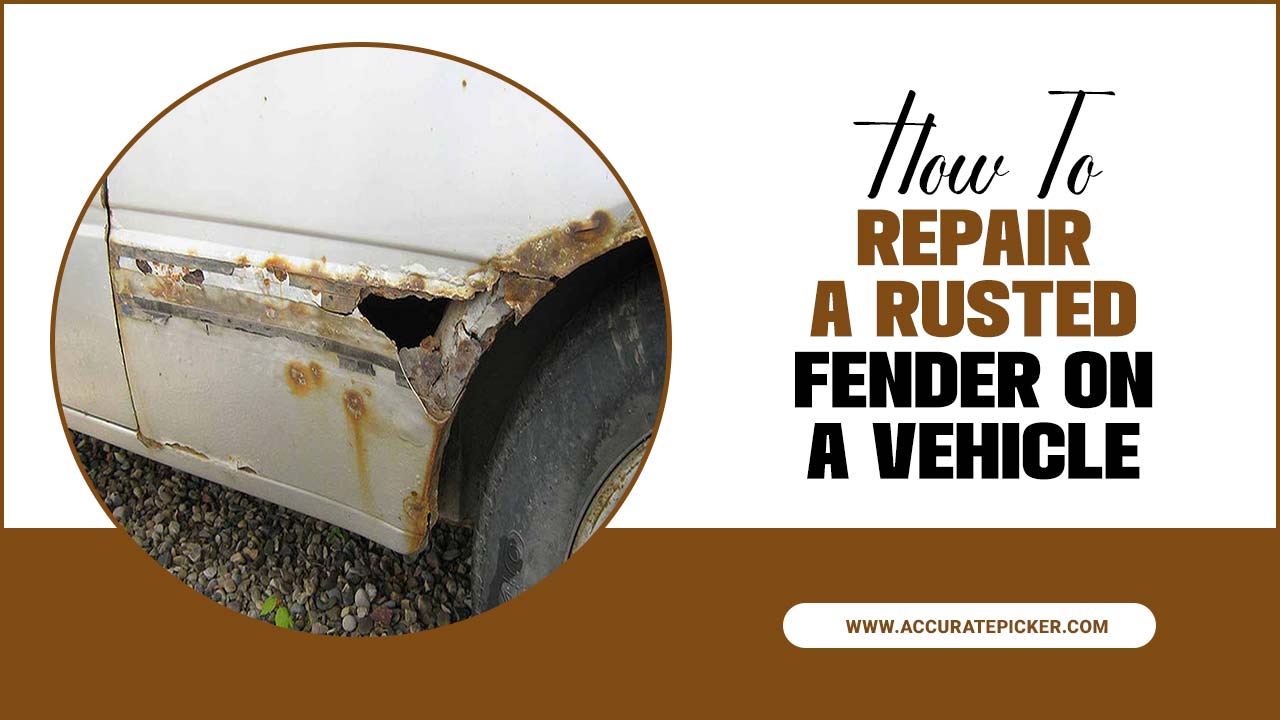
Rust can be a major problem for vehicle owners, as it can compromise the integrity of the body and lead to costly repairs. Fortunately, repairing a rusted fender can be done with the right tools and techniques.
In this article, we’ll discuss the process of removing rust from a vehicle fender, as well as the steps necessary to restore it to its original condition. From the tools and materials needed to the best practices for the job, we’ll cover everything you need to know to repair a rusted fender on a vehicle. So, if you want to learn how to repair a rusted fender on your vehicle, keep reading to find out more.

Repairing A Rusted Fender: In Easy Ways
Repairing a rusted fender on a vehicle is a common problem faced by many vehicle owners. In this article, we will discuss the steps you need to take in order to repair a rusted fender. We will cover the necessary tools and materials required, as well as the steps to take to ensure a successful repair.
We will also discuss the importance of taking the time to properly assess the damage before beginning the repair process. By following the steps in this article, you can ensure that your repair is done correctly and safely. So, let’s get started on how to repair a rusted fender on a vehicle.
Preparation
Before starting the repair process, it is important to prepare the vehicle for the job. The first step is to remove any dirt, wax, grease, and rust from the area that needs to be repaired. This can be done using a wire brush, sandpaper, or chemical rust remover. Additionally, you should make sure that the area is well ventilated and that any loose paint is removed.
Once the area is clean, use a spot putty or a body filler to fill any holes or dents in the fender. After the filler has been applied, sand the area to smooth it out. Finally, wipe the area down with a damp cloth to remove any dust or debris left behind. With the vehicle prepared, you can begin the repair process.
Gather Materials
Before you can get started with the process of repairing a rusted fender on your vehicle, it is important to gather all the necessary materials. The most important items you will need include sandpaper, rust converter, rust-resistant primer, body filler, and a paint that matches the color of your vehicle. You will also need a few common tools like a screwdriver, pliers, and a hammer.
Make sure to have a dust mask and safety glasses to protect yourself from any debris that may be created when sanding and painting. Finally, you will need a clean, well-lit workspace to work in. Once you have all these materials and tools, you can begin the process of repairing the rusted fender.
Disconnect Battery
Before beginning any repair work on a vehicle, it is important to disconnect the battery. To do this, you should first ensure all accessories such as headlights, air conditioning, and radio are switched off. Open the hood and locate the battery. You will need to disconnect both the positive and negative terminals.
Use a wrench to loosen and remove the negative cable first, and then the positive. Make sure to keep the cables separate and away from each other to avoid any sparks. Never touch the metal clamps on the terminals. Once the battery is disconnected, you are ready to begin repairing the rust on the fender.
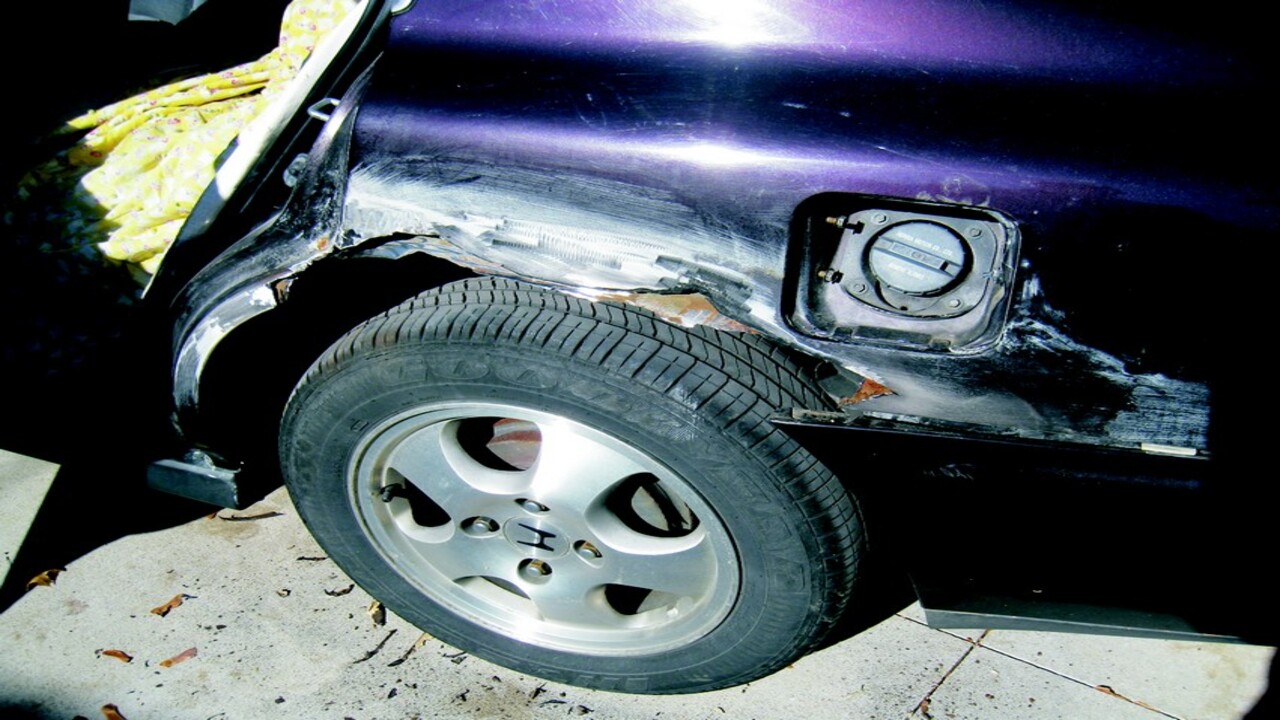
Remove Fender
Removing a rusted fender from a vehicle can be a difficult task. To begin, you’ll need a few tools such as a screwdriver, wrench, hammer, and pliers. First, use the wrench to remove any bolts or screws that may be holding the fender in place. Once all of the bolts have been removed, the fender should be loose.
Use the hammer to gently tap the fender until it comes off. If the fender is severely rusted, it may be difficult to remove. In that case, use the pliers to pull the fender off. Once the fender is off, inspect the area to make sure all of the bolts are removed. If you find any bolts that are stuck, use the screwdriver to remove them. After the fender is off, you can begin the repair process.
Clean Rust
Rust is a common problem for vehicles, especially if the car is used in areas that are high in moisture. Removing rust from a vehicle fender can be a difficult task, but it’s important to do so in order to keep the car in good condition. To clean rust from a vehicle fender, you’ll need a few supplies.
Start by gathering an abrasive sponge, rust converter, rust cleaner, and protective gloves. Begin by scrubbing the rusty area with the abrasive sponge. This will remove any rust flakes and any loose paint. Next, apply the rust converter to the area.
This will help to protect the metal from further corrosion. Once the rust converter has been applied, use the rust cleaner to remove any remaining rust and corrosion. Finally, finish off with a coat of paint to give the fender a fresh, new look. With a few simple steps, you can easily repair a rusted fender on a vehicle.
Repair Fender

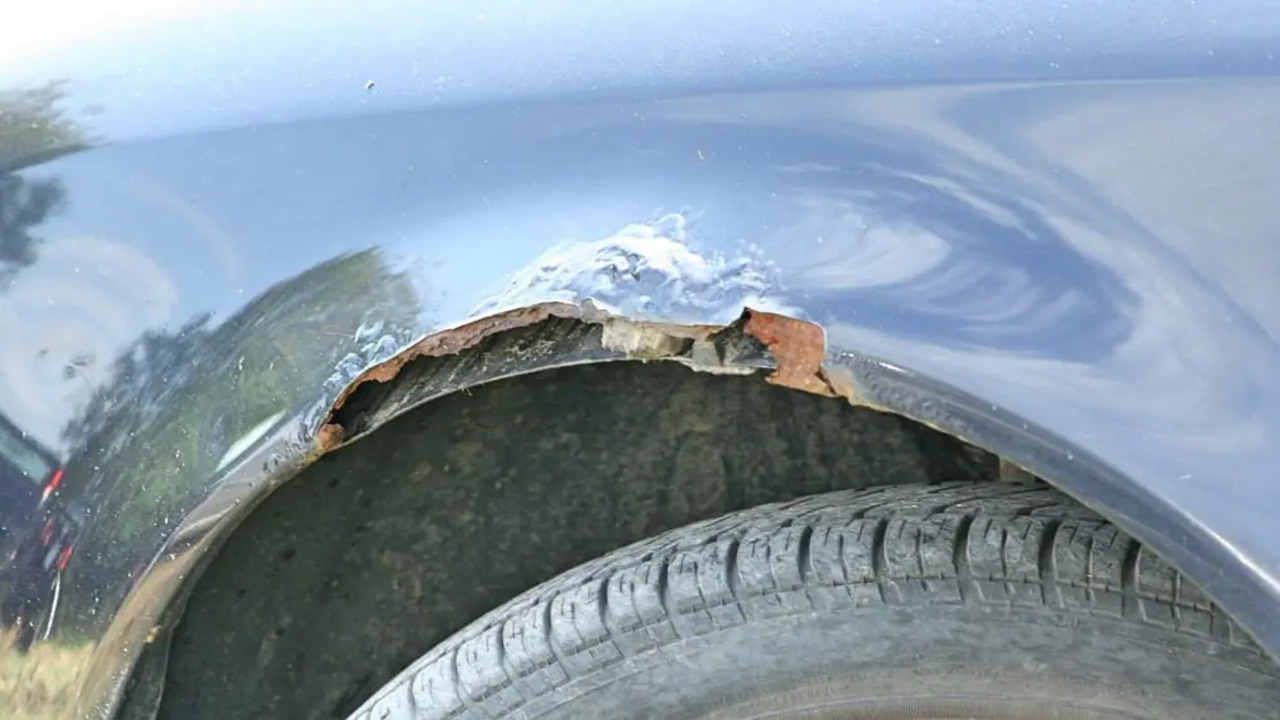
Rust is a common problem on vehicles, and it can affect the fenders. If this is the case, the repair process is relatively simple and can be done in a couple of hours. To start, you’ll need to assess the damage and decide if you want to repair or replace the fender. If the rust is isolated to a small area, you can sand it down and use a rust-resistant primer and paint to cover the area.
If the rust is extensive, replacement is the best option. Once you’ve decided on a course of action, you’ll need to remove the fender. This can be done with a wrench and socket set.
Once the fender is removed, clean the area with a wire brush to ensure all rust is removed. After this, apply a rust-resistant primer to the area and let it dry. Once it has dried, you can paint the area with a rust-resistant paint. Once that is done, reattach the fender and you’re all set.
Grind Rust
Grinding rust is an effective way to repair a rusted fender on a vehicle. To begin, you will need to use a wire brush or sandpaper to remove the loose rust and then switch to a grinding wheel. Be sure to wear protective goggles and a dust mask to prevent any flying debris from entering your eyes or lungs. Next, you will need to apply a rust converter or a rust inhibitor to the surface.
This will prevent the rust from spreading. After that, it’s time to use the grinding wheel to remove the rusted area. Proceed slowly and evenly, working the grinding wheel in a circular motion. Once the rust is completely removed, you should use a primer and paint to finish the job. With a few simple steps, you can have your vehicle looking brand new.
Apply Primer
Applying primer to a rusted fender is an important part of the repair process. It helps to prepare the surface for the next step, which is applying a new coat of paint. Begin by cleaning the fender with a wire brush to remove loose rust and dirt.
Once the fender is clean, use a paint scraper to remove any remaining rust. Once the fender is clean and rust free, use a tack cloth to remove any remaining dust. Next, apply a coat of rust-resistant primer. Begin at the top of the fender and work your way down, using a brush or a roller to ensure an even coating. Allow the primer to dry thoroughly before moving on to the next step.
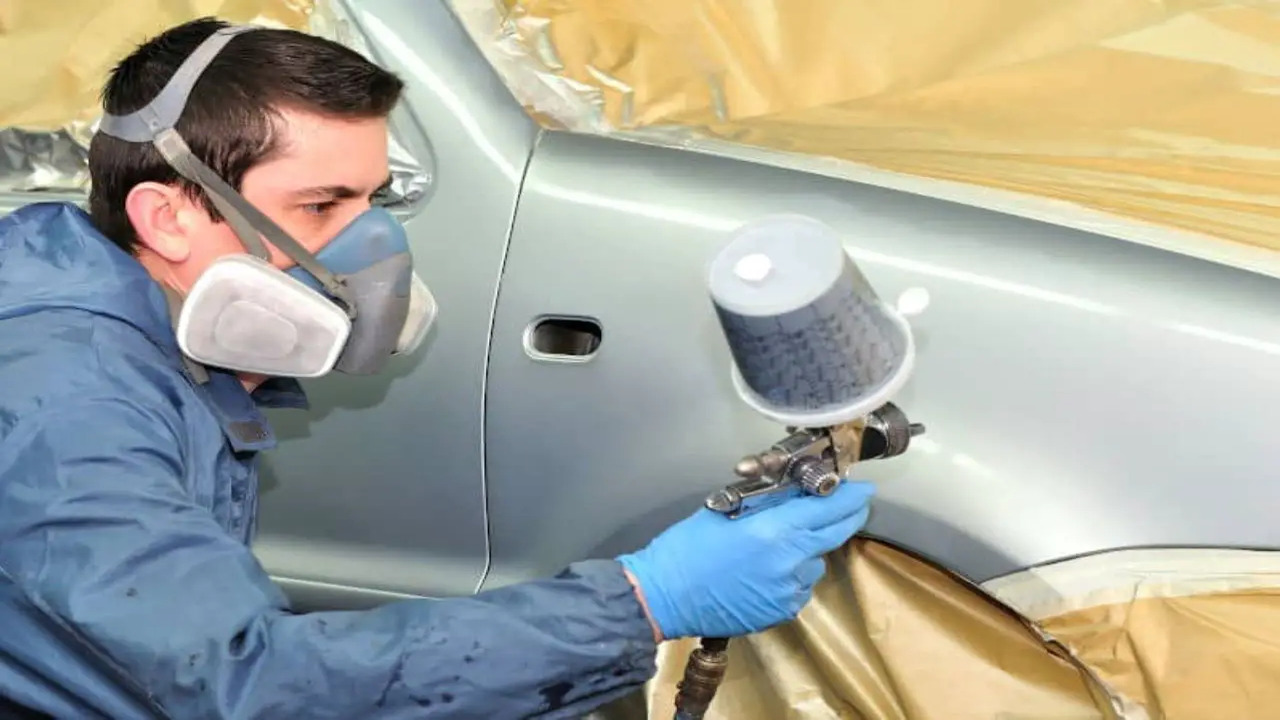
Apply Paint
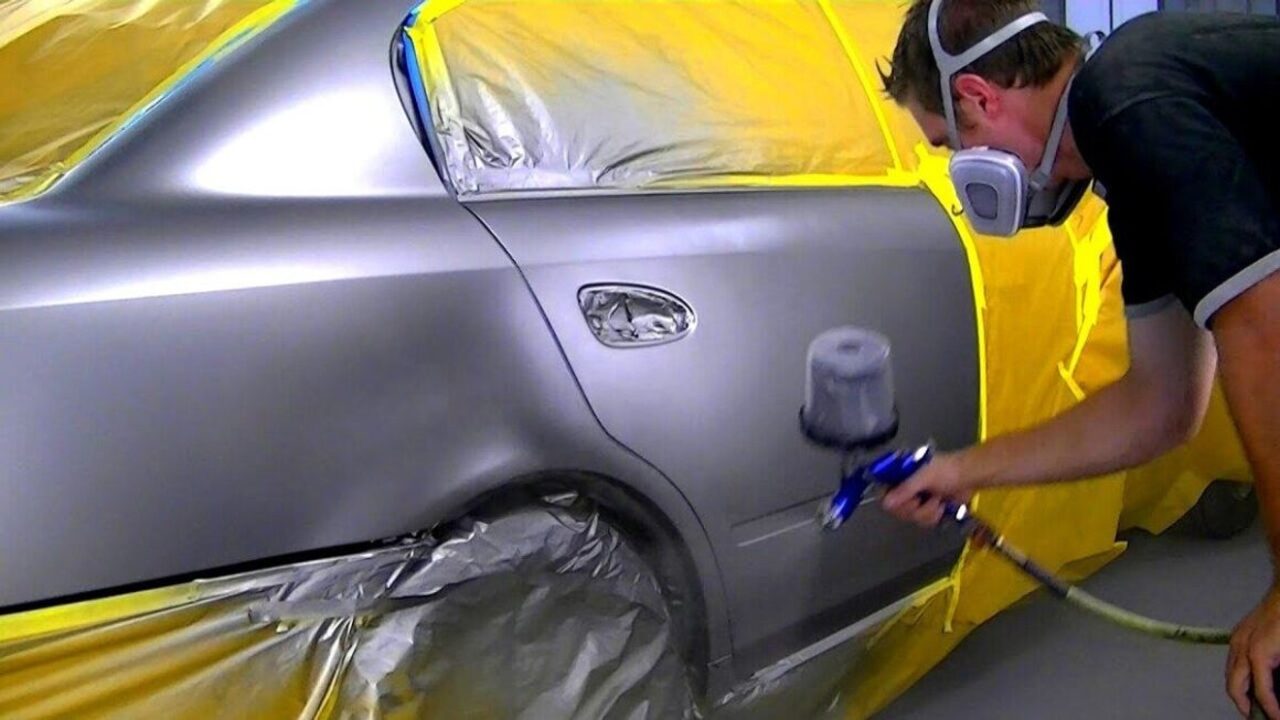
Applying paint is an important step in repairing a rusted fender on a vehicle. Before applying the paint, the rusty area must be properly prepared. Start by sanding the area with a coarse sandpaper.
This will remove any loose rust and create a smooth surface for the new paint. After sanding, wipe off the area with a damp cloth and allow it to dry. Now it is time to apply a rust-inhibiting primer. This will prevent further rusting and provide a good base for the paint.
After the primer has dried, use a spray paint specifically designed for automotive use to apply the top coat of paint. Allow the paint to dry completely before continuing with any further repairs.
Reattach Fender
After you have fixed the rust on your vehicle’s fender, it is time to reattach it. Begin by getting two or three people to help you lift the fender into place. Make sure it is properly aligned and secured with bolts or clamps. After the fender is in place, use a drill to drive in screws and bolts through the holes in the fender and into the frame of the vehicle.
Make sure the screws and bolts are tightened securely. Finally, use a metal file to smooth any rough edges on the fender and the frame. This will help to protect your vehicle from further rust damage. With these steps, you have successfully reattached your fender and repaired your vehicle’s rust.
Finishing

Once the rust is removed, the fender must be treated to protect against any future rust. Begin by cleaning the fender using a mild detergent solution and a clean cloth. Once the fender is dry, apply a rust inhibitor to the entire affected area.
This will help protect the fender from further rusting. Finally, apply a few coats of primer to the area. Allow the primer to dry for at least 24 hours, then apply a top coat of paint to the area. Allow the paint to dry for at least 48 hours before applying a clear coat. This will ensure that your newly repaired fender will be protected from the elements and look as good as new.
Sand Fender
Sanding a rusted fender is the first step in repairing it. To do so, you’ll need an orbital sander, sandpaper, and primer. Start by removing any rust, dirt, and debris from the area using the orbital sander. Be sure to go over the entire area, including any missed spots.
Once the surface is clean, sand the fender with a finer grade sandpaper to create a smooth, even finish. Finally, apply a coat of primer to the fender to help protect it from further rust and corrosion. With the proper tools, sanding a rusted fender is a relatively simple task and can be completed in under an hour.
Apply Clear Coat
Once the body filler and primer are dry, it is time to apply the clear coat. Clear coat is a coating that provides protection to the paint job and gives the car a glossy finish. You will need a paint gun and the appropriate clear coat for your car’s make and model. Start by shaking the can of clear coat vigorously for at least two minutes.
Then, adjust the paint gun so that the nozzle is set to the correct pressure. Begin by spraying the clear coat onto the fender at a distance of about 8 inches. Apply the clear coat in a steady back and forth motion. Allow the clear coat to dry for a few hours before continuing to the next step. Make sure to wear a respirator and safety glasses while applying the clear coat.
Inspect Work
Once you have completed the repair work, it is important to inspect the area thoroughly. Take a step back and look for any missed spots, rust spots, or other imperfections. Using a fine grit sandpaper, lightly sand the area to ensure that all the rust has been removed and the surface is even.
Check for any signs of rust or corrosion that may have been missed during the repair process and make sure to clean the area with a damp cloth to remove any dust or debris from the sanding. Once the area has been thoroughly inspected, the vehicle is ready for painting or polishing.
Conclusion
This article covers how to repair a rusted fender on a vehicle. The first step is to remove any rust and debris from the fender. Then, use a putty knife to remove any remaining rust and any loose paint. After that, use a wire brush to scrub away any remaining rust. Finally, apply a rust-inhibiting primer and paint to the fender to protect it from further rusting. With these steps, you can easily repair a rusted fender on a vehicle.
FAQ’s
1.What Tools Are Needed For Fender Repair?
Ans: Tools needed for fender repair include a hammer, a chisel, pliers, a drill, a rivet gun, and metal-cutting shears. Additionally, specialized tools like a dent puller and fender stand may be needed to facilitate the repair work. Finally, automotive body filler may be needed to make small repairs and fill in any gaps or holes in the fender. Protective gear, such as safety glasses and gloves, should also be worn while performing the repair.
2.How Do You Prepare The Surface For Fender Repair?
Ans: To prepare a surface for fender repair, the damaged area should be thoroughly cleaned with a degreaser or similar cleaner. Any rust should be removed with a wire brush or sandpaper. The area should then be scuffed with fine-grit sandpaper to create a rough surface that will help the filler adhere. Finally, the surface should be wiped down with a tack cloth to remove any dust or debris.
3.How Much Does It Cost To Repair A Rusted Fender?
Ans: The cost of repairing a rusted fender will depend on the extent of the rust damage as well as the type of car. Generally, you can expect to pay anywhere from $500 to $1,000 for the repair. The cost will also be determined by the type of repair needed, such as sanding, filling, and painting. If you take your car to a professional mechanic, they may be able to give you a more accurate estimate.
4.What Type Of Replacement Parts Are Needed To Repair A Rusted Fender?
Ans: Replacement parts needed to repair a rusted fender will depend on the extent of the damage. Generally, you will need a replacement fender, a primer, some sandpaper, and a sealant. You may also need additional items such as screws, bolts, and rivets to secure the parts. Lastly, you may need body filler to fill in any gaps or small holes.
5.Is It Possible To Repair A Rusted Fender Without Professional Help?
Ans: Yes, it is possible to repair a rusted fender without professional help. All you need is a few basic tools, some rust-removing chemicals, a grinding wheel, some sanding blocks, and a can of spray paint. Start by using a wire brush to remove the rust and then use the rust-removing chemicals to remove any remaining rust. Once the fender is rust-free, use the grinder and sanding blocks to smooth the surface before spraying on a rust-resistant paint.
