
Choosing the right head studs is essential if you’re planning on building or upgrading your Small Block Chevy (SBC) engine. Head studs securely fasten the cylinder heads to the engine block, allowing for proper compression and sealing.
However, with numerous options available in the market, selecting the right SBC head studs can be a daunting task. That’s why we have created the ultimate guideline to help you choose the best head studs for your SBC engine.
Our comprehensive guide covers everything you need to know about SBC head studs, including their importance, types, and factors to consider when selecting the right head studs. We will guide you through the differences between head bolts and studs and clarify why high-performance engines prefer studs.

How To Select SBC head Studs – Comprehensive Guide
If you’re building a high-performance Small Block Chevy (SBC) engine, selecting the right head studs is crucial. How to select SBC head studs help to secure the cylinder head to the engine block, ensuring that the engine can withstand the high pressures and temperatures generated by performance upgrades.
But how do you choose the right head studs for your SBC engine? Here’s a comprehensive guide to help you make an informed decision. The first consideration is the material. Head studs are typically made of either steel or titanium, with titanium being the preferred choice for high-performance applications due to its superior strength and resistance to corrosion.
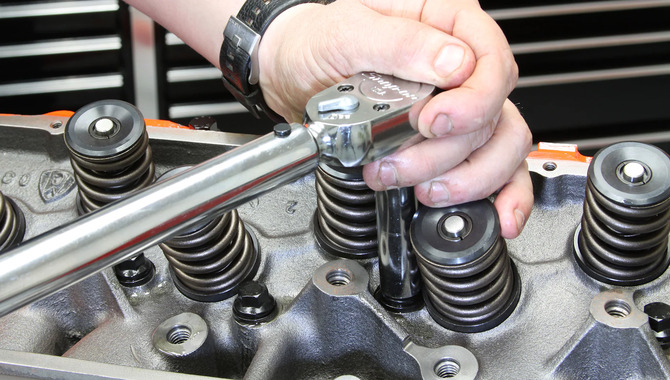
Next, you’ll need to determine the size and thread pitch of the studs to ensure a proper fit with your engine block and cylinder head. It’s also important to consider the length of the studs, as they must be long enough to accommodate any spacers or washers required for your specific engine configuration.
1. Introduction To Air Compressors And Spray Painting
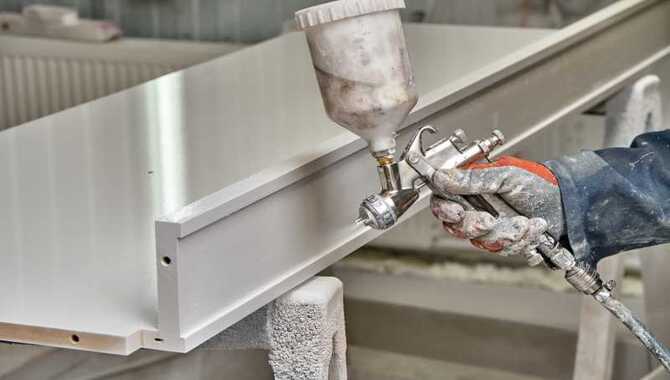
Air compressors are versatile tools used in various applications, from powering pneumatic tools to inflating tires. One of the most common uses of air compressors is in spray painting. A spray gun is attached to the air compressor, which sprays a fine mist of paint onto the surface being painted.
This is a faster and more efficient way of painting, as it allows for even coverage and reduces the risk of drips and uneven spots. However, choosing the right air compressor for the job is important.
You must match the compressor’s size and power with the spray gun’s requirements and the type of paint being used. In addition, it is important to properly maintain and clean the air compressor to ensure its longevity and optimal performance.
With the right air compressor and proper technique, spray paint can quickly and easily achieve a professional-looking finish on various surfaces.
2. Choosing The Right Air Compressor For Spray Painting
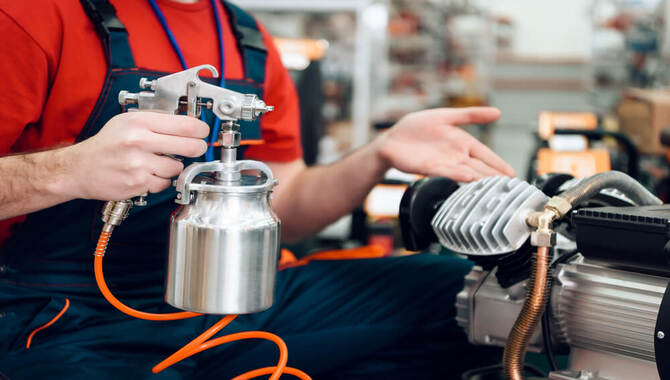
When spray painting, choosing the right air compressor is crucial for achieving a professional and flawless finish. The first step in selecting your compressor is determining your spray gun’s air volume and pressure requirements.
You can typically find this information in the manufacturer’s instructions or online. Once you have these specifications, you can narrow your search to compressors that meet or exceed those requirements. It’s important to consider the size and portability of the compressor, particularly if you plan on using it in a workshop or garage with limited space.
A smaller, more compact compressor may be more suitable, but check the noise level to ensure it won’t disrupt your work environment. Another factor to consider is the type of power source available. Electric compressors are popular due to their ease of use and affordability, while gas-powered compressors are ideal for outdoor use or in areas without access to electricity.
3. Understanding Spray Painting Techniques

Anyone interested in painting or DIY projects needs to understand spray painting techniques. Spray painting is a fast and efficient way to apply paint to a surface, but it requires skill and knowledge to achieve professional-looking results.
The first thing to consider when spray painting is the paint you will use. Different paints require different techniques and equipment, so choosing the right one for your project is important. Once you have your paint, you must prepare your surface by cleaning it thoroughly and removing any imperfections.
Next, you will need to practice your spraying technique. It’s important to hold the can at the correct distance from the surface and to move it in a smooth and even motion. You will also need to pay attention to the angle of the spray and the pressure of the can. Finally, if necessary, you must allow the paint to dry completely before applying a second coat.
4. Preparing For Spray Painting With An Air Compressor
Preparing for spray painting with an air compressor requires a few essential steps to ensure a smooth and successful painting process. First, selecting the right type of air compressor for your specific project is important.
Consider the size of the compressor, the amount of air pressure it can produce, and the type of paint gun you plan to use. Once you have the right equipment, it’s time to prepare your workspace. Choose a well-ventilated area and cover any nearby surfaces that you don’t want to get paint on.
Also, properly clean and prepare the surface you plan to paint. This may include sanding, priming, and masking off any areas you don’t want to paint.
Before beginning to paint, testing your equipment and making any necessary adjustments is important. This includes adjusting the air pressure and finding the right spray pattern for your project.
5. Setting Up The Air Compressor For Spray Painting
When spray painting, having the right air compressor setup is essential for achieving a smooth and even finish. The first step in setting up your air compressor for spray painting is to ensure that the compressor is clean and free from any dirt or debris that could contaminate the paint.
It’s also important to check that the air compressor has enough power to handle the job. Depending on the size of the project, you may need to invest in a larger compressor that can provide a consistent flow of air.
Once you have a clean and powerful compressor, you must attach a moisture filter to the airline to prevent moisture from entering the paint gun. Additionally, you’ll want to adjust the air pressure to the correct level for your particular paint gun to ensure that you atomize the paint properly and apply it evenly.
7. Tips For Achieving A Professional Finish
Achieving a professional finish is the ultimate goal for any project. Whether it’s a painting, a home renovation, or a craft project, the outcome should look polished and refined. Here are some tips for achieving a professional finish. First, preparation is key.
Take the time to clean and sand surfaces before applying any finishes. This will ensure that the surface is smooth and free of blemishes. Second, invest in high-quality tools and materials. Cheap brushes and paints can result in a sloppy finish. Third, practice proper application techniques.
Whether it’s using a roller or a brush, make sure to apply an even coat of paint or finish. Fourth, take your time. Rushing through a project can lead to mistakes and an uneven finish. Finally, pay attention to the details. Touch up any missed spots and use a clean brush to create lines.
8. Maintenance And Cleaning Of Your Air Compressor And Spray Painting Equipment
Regular maintenance and cleaning of your air compressor and spray painting equipment are essential to ensure they function efficiently and effectively. Neglecting to maintain them can lead to costly repairs and even replacement.
Always refer to the manufacturer’s instructions for specific maintenance requirements. You should take a few key steps, including checking the oil level and changing it when necessary, inspecting the air filter for dirt and debris buildup, and checking the hoses and connections for any signs of wear or leaks.
Cleaning the equipment is also crucial for optimal performance. The spray gun should disassemble and clean after each use to prevent paint buildup, which can affect the quality of the finish.
Use a cleaning solution suitable for the paint type, and ensure that all parts are thoroughly dried before reassembling the gun. The air compressor should also be cleaned periodically to remove any dust or debris that can accumulate inside.
9. Safety Precautions When Using An Air Compressor For Spray Painting
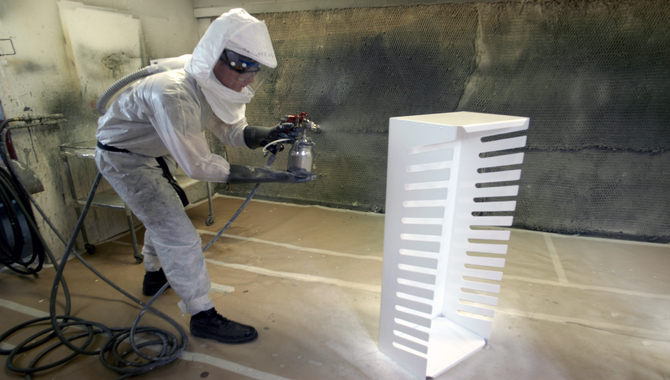
Several safety precautions must take when using an air compressor for spray painting. First and foremost, it is important to wear appropriate personal protective equipment (PPE) such as safety glasses, gloves, and a respirator mask.
This will help protect you from any airborne particles created during the painting process. Additionally, it is important to ensure that the air compressor is in good working condition and that all safety features are functioning properly. Before using the compressor, it is important to read the manufacturer’s instructions carefully and follow all recommended safety guidelines.
Another crucial safety measure is using the proper air pressure for the spray gun. Too much pressure can cause the spray gun to become unstable and increase the risk of injury. Keeping the area around the compressor and spray gun clear of any tripping hazards or flammable materials.
10. Troubleshooting Common Issues When Using An Air Compressor For Spray Painting.
When using an air compressor for spray painting, it’s important to be aware of common issues that can arise. One of the most common issues is air leaks. These can occur at various points in the system, such as at the fittings or hoses. To troubleshoot an air leak, check the fittings and tighten them if necessary.
Another common issue is low pressure. If your air compressor isn’t providing enough pressure, check the pressure gauge and set it to the correct level. If the air filter is clogged, clean or replace it.
Additionally, if you notice that your spray pattern is inconsistent or spotty, it could be due to a clogged spray gun nozzle. Try cleaning the nozzle with a specialized cleaning solution. Finally, if you’re experiencing moisture in your air supply, addressing this issue is important, as it can cause problems with your spray painting.
Conclusion
Selecting the right SBC head studs is crucial to engine building and performance optimization. It requires careful consideration of factors such as material, size, and strength, as well as the specific demands of your engine and intended usage.
You can make an informed decision and ensure that your engine is equipped with the best possible head studs for optimal performance and longevity by following the guidelines outlined in this article and consulting with experts in the field.
A well-informed and carefully executed selection of SBC head studs is an investment in your engine’s long-term health and performance and should not take lightly.
FAQ
1.What Are The Key Factors When Selecting SBC Head Studs For High-Performance Engines?
- What are the key factors when selecting SBC head studs for high-performance engines?
- How do you determine the correct length and thread pitch for SBC head studs?
- There isn’t a passive voice in the original statement. It is already in the active voice.
2.What Materials Are Commonly Used For SBC Head Studs, And What Are The Pros And Cons Of Each?
Ans: ARP 8740 Chrome Moly Steel: This material is strong and durable, making it a popular choice among racers and enthusiasts. Its high tensile strength and fatigue resistance make it ideal for high-performance applications. However, it is relatively heavy and may not be suitable for certain racing classes with weight restrictions.
3.What Factors Should Be Considered When Selecting SBC Head Studs, Such As Material, Length, And Thread Pitch?
Ans: The length of the head studs should be appropriate for the specific engine application. The studs should be long enough to provide sufficient clamping force but not so long that they interfere with other engine components.
4.What Torque Specifications Should Be Used When Installing SBC Head Studs, And How Can Improper Torque Lead To Failure?
Ans: The torque specifications for SBC (Small Block Chevy) head studs vary depending on the specific type and brand of studs being used. Generally, the manufacturer’s recommended torque values should be followed closely.
5.Are Any Specific Brands Or Manufacturers Of SBC Head Studs Recommended For High-Performance Or Racing Applications?
Ans: Yes, we recommend several brands and manufacturers for high-performance or racing applications. Some popular options include ARP, Cometic, and Fel-Pro. These brands offer head studs to withstand the higher stress and heat levels associated with high-performance and racing vehicles.
![SBC ARP Rod Bolt Torque Specs [Easy Methods]](https://accuratepicker.com/wp-content/themes/Extra/images/post-format-thumb-text.svg)

