
Assembling an SBC (small block Chevy) engine can seem like a daunting task, especially when it comes to the cylinder heads. We have given you some tips to help How to assemble SBC heads.
With the right tools and knowledge, anyone can successfully assemble SBC heads. It’s important to note that adequately assembling these components is crucial to the engine’s overall performance. We will cover everything from preparing the components, installing valves and springs, setting valve lash, and torquing the bolts to specification.

What Is Assemble SBC Heads
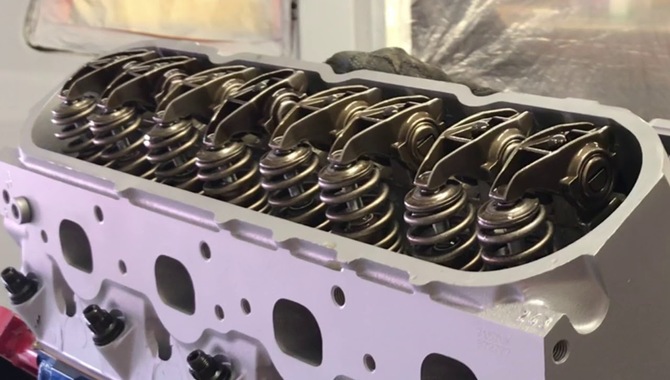
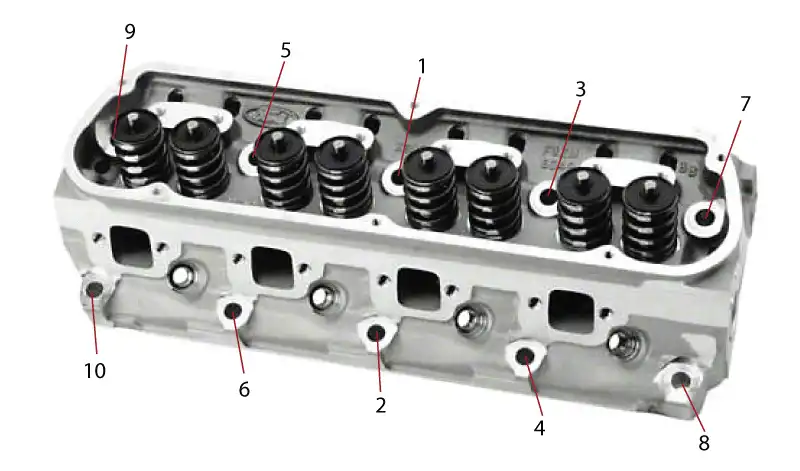
Assembling SBC heads refers to assembling the components of Small Block Chevy cylinder heads. These heads are an essential part of the engine, which houses the valves, springs, and rocker arms.
Each component is meticulously inspecte, cleane, and installe during assembly to ensure maximum performance and efficiency. The process starts by cleaning the cylinder heads. And then the valves and springs are checke for wear and damage.
The valve seats are then machine, and the valves are lappe to ensure a proper seal. Once the valves are in place, the springs are installe, and the pushrods and rocker arms are installe in their respective locations.
Finally, the cylinder heads are bolte onto the engine block, completing the assembly process. Assembling SBC heads is a critical process that requires precision and attention to detail.
Proper assembly can significantly improve the engine’s power and efficiency, while incorrect assembly can lead to premature engine failure. Therefore, it’s crucial to follow the manufacturer’s guidelines.
Tools Of Assemble SBC Heads
- Valve Spring Compressor: This tool is essential for compressing the valve springs and removing the valve retainers during assembly.
- Valve Seal Installer: A valve seal installer tool helps properly position and install valve seals onto the valve stems.
- Torque Wrench: A torque wrench is necessary to tighten the cylinder head bolts to the manufacturer’s specified torque settings during assembly.
- Feeler Gauge: To ensure proper clearance, a feeler gauge measures the gap between valve stems and valve lifters.
- Thread Chaser: A thread chaser helps clean and restore damaged or dirty threads on the cylinder head bolt holes.
- Assembly Lube: Assembly lube or engine assembly grease is applied to various engine components, including camshafts, lifters, and rocker’s arms, to provide lubrication during assembly.
- Dial Indicator: A dial indicator checks valve-to-piston clearance and ensures proper engine timing.
- Micrometer: A micrometer measures the valve stem and guides clearances to ensure precise fitment.
- Rubber Mallet or Dead Blow Hammer: A rubber mallet or dead blow hammer gently taps components into place during assembly, ensuring proper alignment.
- Sealant and Adhesives: Various sealants and adhesives, such as thread locker or RTV silicone, are used to secure components, seal gaskets, and prevent leaks.
How To Assemble SBC Heads – A Step-By-Step Guide

Assembling SBC heads can seem daunting, but it can be a breeze with a step-by-step guide. First, gather all necessary tools and parts, including a torque wrench, gaskets, and the SBC heads. Make sure the work area is clean and organized before beginning.
Step 1: Gather The Necessary Tools And Equipment

Before starting any project, gathering the necessary tools and equipment is essential to ensure that the job is done correctly and efficiently. Whether a simple DIY or complex construction project, having the right tools and equipment can make all the difference.
First, it’s essential to determine what tools and equipment are neede for the specific project. This can involve researching online, consulting with experts or professionals, or listing necessary information.
Once the necessary tools and equipment have been identifie, gathering them all in one place is essential. This can involve going to the hardware store, renting equipment, or borrowing tools from friends or family.
It’s also essential to ensure that all tools and equipment are in good working condition and are adequately maintaine. This can involve sharpening blades, checking for wear and tear, and replacing damaged parts. Lastly, using the tools and equipment safely and correctly is essential.
Step 2: Clean And Inspect
When assembling small block Chevy (SBC) heads, following a precise process is essential to ensure optimal performance and longevity. One critical step is to clean and inspect all components thoroughly. This includes the cylinder heads, valves, springs, and retainers.
Use a high-quality cleaner and degreaser to remove any dirt, debris, or oil buildup on the parts. Inspect each component for any damage or wear that may compromise the engine’s performance. Once you’ve cleaned and inspected all the components, it’s time to assemble the heads.
Start by installing the valves and springs, making sure they are aligne correctly and securely seate. Next, install the retainers and locks, ensuring they are tightly secure. Finally, torque the head bolts to the manufacturer’s specifications, ensuring each bolt is tightene to the correct torque values. It’s essential to follow this process precisely to ensure that the SBC heads are assemble correctly.
Step 3: Install Valve Guides And Seals
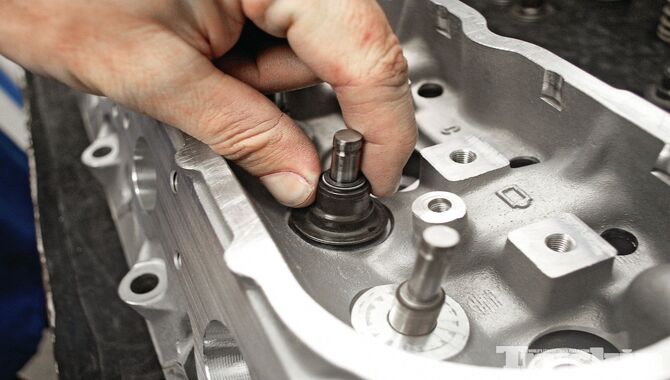
Assembling a small block Chevy (SBC) engine’s cylinder heads tricky, but with the right tools and knowledge, it done smoothly. One of the key steps in this process is installing valve guides and seals. Valve guides are essential components that guide the valve stem, ensuring that it moves smoothly as it opens and closes.
On the other hand, the valve seals provide a seal between the valve stem and the guide to prevent oil from entering the combustion chamber. You will need a valve guide driver and valve guide removal/installation tool to install these components.
Begin by removing the old guides and cleaning the guide bores. Next, install the new valve guides using the guide driver, ensuring they are seate correctly. Once the guides are installe. you can install the valve seals. These seals come in different sizes and shapes, so it’s essential to choose the right ones for your application.
Step 4: Prepare The Valves
When assembling Small Block Chevy (SBC) heads, one of the most important steps is correctly preparing the valves. This involves cleaning them thoroughly and inspecting them for any signs of wear or damage.
It’s also important to measure the valve stem diameter and ensure it’s within the manufacturer’s specifications. Once the valves are preppe, it’s time to install them into the cylinder heads.
This process involves carefully placing each valve into its guide and pressing it down until it seats properly. It’s important to ensure that each valve is properly seate and that there is no binding or interference.
Once the valves are installe, it’s time to adjust the valve lash. This involves setting the clearance between the valve stem and rocker arm to the manufacturer’s specifications. Proper valve lash adjustment is critical for optimal engine performance and longevity.
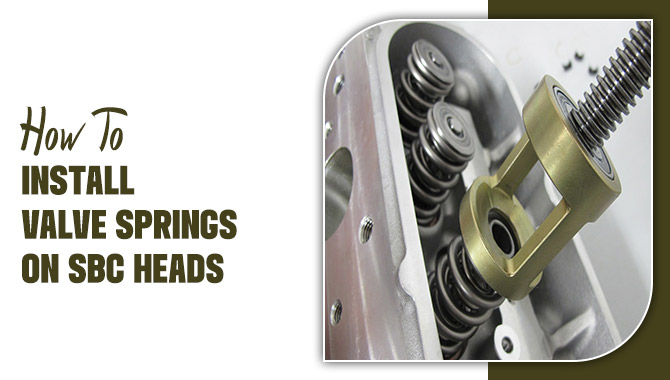
Step 5: Install The Valve
When assembling SBC heads, paying attention to the valve installation process is essential. Before you begin, ensure you have all the necessary tools and parts, including a valve spring compressor, valve seals, and valve retainers. Start by installing the valve springs onto the valve guides, ensuring they’re properly seate.
Using the valve spring compressor, compress the spring and install the valve keepers onto the valve stem. Repeat this process for all the valves. Once all the valves are installe, it’s time to install them themselves.
Begin by cleaning the valve seats and inspecting them for damage or wear. Apply a small amount of valve lapping compound to the valve seat and rotate the valve back and forth to seat it properly. This will ensure a proper seal when the valve is close.
Step 6: Check And Adjust The Valve
If you’re looking to assemble SBC heads, one of the most important steps is to check and adjust the valves. This involves ensuring the valve clearance is set correctly, and the valves are sealing properly.
First, remove the valve covers and locate the valve springs to get starte. Then, use a feeler gauge to check the valve clearance by sliding the gauge between the valve stem and the rocker’s arm.
If the clearance is too tight or loose, adjust it by loosening the lock nut and turning the adjustment screw until the desired clearance is achieve. Once the valve clearance is set, checking the valve seal is important.
This done by applying a small amount of oil to the valve stem and watching for leaks around the valve seat. If there is a leak, the valve may need to be reseated or replace.
Step 7: Install Rocker Arms And Pushrods
Assembling Small Block Chevy (SBC) heads can be a complex process, but installing rocker’s arms and pushrods is an essential step in the process. First, ensure that the heads are clean and free of debris.
Next, insert the pushrods into their respective holes in the cylinder head. Be sure to use the correct length pushrods for your engine. Once the pushrods are in place, install the rocker’s arms and adjust them to the specifications.
Tighten the rocker arm bolts to the recommended torque setting, ensuring not to over-tighten, as this can lead to thread damage or other issues. Properly installing the rocker’s arms and pushrods ensures that the engine operates smoothly and efficiently.
It is recommend that you consult the manufacturer’s instructions or seek the advice of a professional mechanic if you are unsure about any aspect of this process. With the rocker arms and pushrods properly installed, you are one step closer to completing the assembly.
Step 8: Lubricate The Lifters And Camshaft
When assembling small block Chevy (SBC) heads, one important step is to lubricate the lifters and camshaft properly. This is crucial for the longevity and performance of the engine. Before installing the lifters, it is recommended to soak them in oil overnight. This allows the lifters to fully absorb the oil and ensure proper lubrication during engine operation.
Once the lifters are ready, it’s time to lubricate the camshaft. Apply a liberal amount of assembly lube to the lobes and journals of the camshaft. This will provide a protective barrier between the camshaft and lifters, reducing the risk of premature wear and damage.
After lubricating the camshaft, carefully install the lifters into their respective bores. It’s important to ensure that the lifters are installed in the correct orientation, as they can rotate and cause engine damage if installed incorrectly.
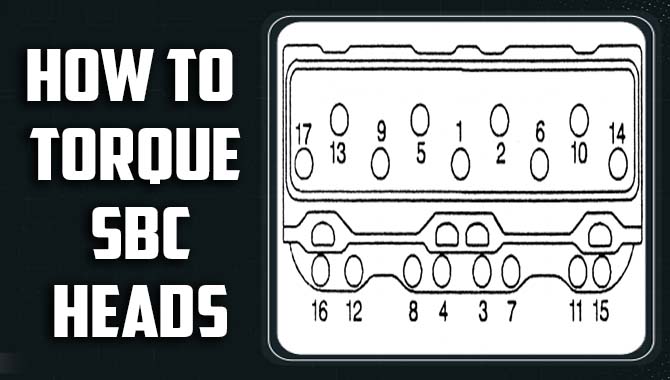
Step 9: Torque The Cylinder Head Bolts
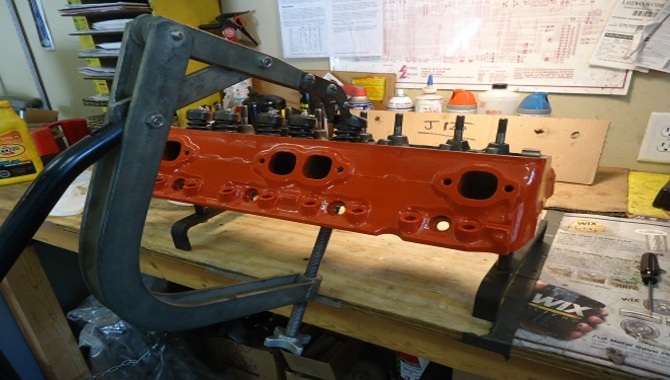
When assembling small block Chevy (SBC) heads, it’s important to torque the cylinder head bolts correctly to ensure a secure and tight fit. Begin by installing the head gasket and setting the cylinder head in place.
Then, tighten the bolts in a specific pattern, using a torque wrench to ensure even pressure distribution. Using the manufacturer’s torque specifications for the specific engine being worked on is crucial, as these can vary depending on the year and model.
Once all bolts are tightened to the proper torque, it’s important to double-check the sequence and torque values to ensure accuracy. Failing to torque the cylinder head bolts properly can result in leaks or even engine failure, so it’s crucial to take the time to do it right. Additionally, following the proper torque sequence can help prevent warping or damage to the cylinder head.
Finalizing The Assembly And Performing Quality Checks
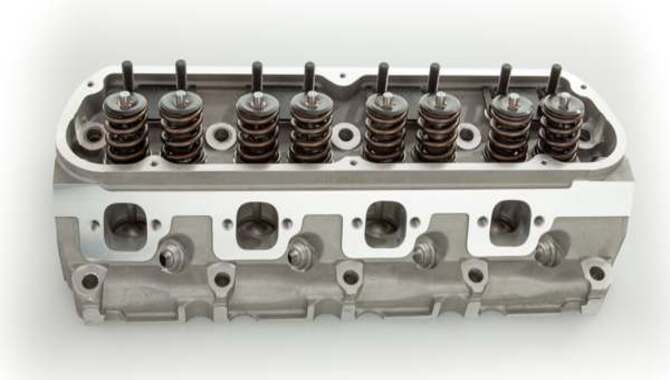
Finalizing the assembly and performing quality checks are crucial steps in assembling SBC heads. To begin with, you need to make sure that all the parts are clean before assembling them. The next step is to install the valve springs and retainers, ensuring they are correctly seated.
The valve stem seals should also be installed at this point. Once the valve springs are in place, you can install the rocker arms and pushrods, ensuring they are properly adjusted.
Paying attention to the torque specifications and using a torque wrench to tighten all the bolts to the right specifications is essential. After the assembly, performing quality checks is important to ensure everything functions properly. Start by checking for any signs of leaks, such as oil or coolant leaks. You should also check the valve clearance and adjust it if necessary.
The Benefit Of Assembling SBC Heads
Assembling Small Block Chevy (SBC) heads can provide several benefits for your engine. SBC heads can be assembled with aftermarket components to improve airflow, increase horsepower, and enhance engine performance.
Correctly assembling SBC heads can also ensure your engine has a reliable and consistent compression ratio. By utilizing high-quality components, such as valves, springs, retainers, and seals, you can improve the durability and longevity of your engine.
Assembling SBC heads can also allow you to customize your engine’s performance to fit your specific needs. For example, if you are building a high-performance engine, you can choose components specifically designed for racing applications, such as lightweight valves and springs, high-lift camshafts, and larger intake and exhaust ports.
Conclusion:
Assembling SBC (Small Block Chevy) heads can be a complex process, but with proper guidance and attention to detail, it can be done efficiently and effectively. We have already given you How to assemble SBC heads.
The key is to follow the manufacturer’s instructions and use high-quality components and tools. By carefully installing valves, springs, and retainers and ensuring proper torque specifications are met, you can achieve optimal performance from your engine.
Remember to take your time, double-check your work, and seek professional assistance. With patience and precision, you can successfully assemble SBC heads and take your engine to the next level.
FAQ:
1.What Tools Are Required To Assemble SBC Heads?
Ans: The tools required to assemble SBC (Small Block Chevrolet) heads include a torque wrench, valve spring compressor, valve stem seal installer, valve lapping tool, thread chaser, micrometer, assembly lube, and a set of feeler gauges.
2.What Is The Proper Torque Specification For SBC Head Bolts?
Ans: The proper torque specification for Small Block Chevy (SBC) head bolts is 65-70 ft-lbs. However, it is important to consult the manufacturer’s instructions or a reliable automotive manual for the specific torque specifications for your particular engine and head bolt type.
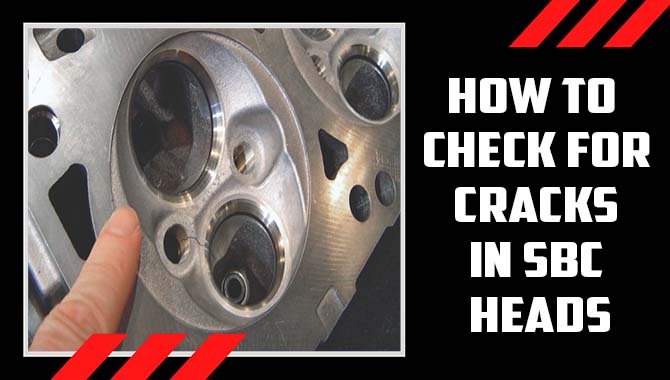
3.How Do You Properly Clean And Inspect SBC Heads Before Assembly?
Ans: Remove residual gasket material and carbon buildup from the cylinder head surfaces with a gasket scraper and abrasive pad. Inspect the head for cracks, warping, or other damage. A cracked or warped head should be replaced.
4.What Is The Proper Sequence For Tightening SBC Head Bolts?
- Tighten all bolts to 25 ft-lbs in sequence, starting from the center and working outward in a spiral pattern.
- Tighten all bolts to 50 ft-lbs in the same sequence.
5.What Are Some Common Mistakes To Avoid When Assembling SBC Heads?
- Failing to properly clean and inspect the head components before assembly.
- Over-torquing or under-torquing the head bolts, which can lead to head gasket failure or warping of the head.