
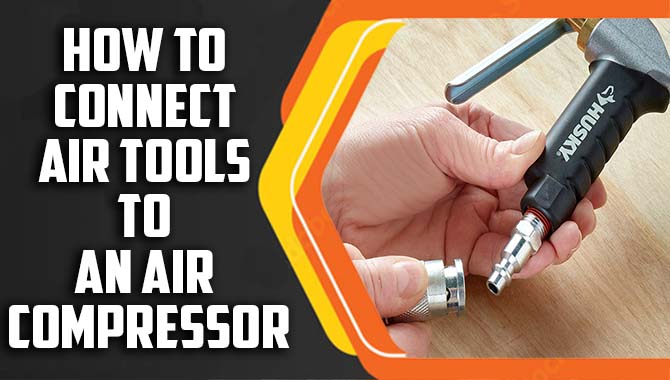
Air tools can make any job easier and faster. Air tools have become indispensable to any workshop or DIYer’s arsenal, from sanding, cutting, and drilling to painting.
However, to use air tools, one needs to connect them to an air compressor. This may seem like a daunting task for those who are new to using air tools or have little experience with air compressors. But fear not; this blog post will guide you through the steps of how to connect air tools to an air compressor.
In the post, we’ll cover everything you need to know about connecting air tools to an air compressor. Understanding the different types of air compressors available in the market is part of this. Choosing the right size of air compressor for your air tools, the different types of air hoses that can be used and how to connect them, and finally, how to connect the air tool to the air hose.

Why Need To Connect Air Tools To An Air Compressor?
Air tools require a constant supply of compressed air to operate effectively. Connecting air tools to an air compressor ensures they receive the necessary air pressure to function properly.
Without a reliable source of compressed air, air tools may not perform as intended, leading to poor results and potential damage to the tool itself. Connecting air tools to an air compressor allows for greater convenience and versatility in various settings, from home workshops to industrial job sites.
Gather The Necessary Tools And Materials
You will need a few tools and materials to connect air tools to an air compressor. Firstly, you will need an air compressor and an air hose. You will also need a set of air tool fittings, typically a male and female quick-connect fitting.
Additionally, you will need Teflon tape to seal the fittings. Finally, a wrench or pliers may be necessary to tighten the fittings securely. These tools and materials will prepare you to connect your air tools to your air compressor.
How To Connect Air Tools To An Air Compressor – The Easiest Way
Connecting air tools to an air compressor is a simple process. Ensure that the air compressor is turned off and unplugged. Locate the air hose and attach it to the compressor’s outlet valve. Make sure the connections are tight and secure. Finally, turn on the air compressor and adjust the pressure to the appropriate level for the tool you are using. Follow the easy steps to learn how to connect air tools to an air compressor.
1. Choose The Right Air Hose
When choosing an air hose for your air compressor, there are several factors to consider. First, you’ll want to determine the size of the hose you need, depending on the size of your air compressor and the tools you plan to use.
It’s also important to consider the material of the hose, as well as the fittings and connectors. Another factor to consider is the maximum PSI rating of the hose, which should be at least as high as the maximum PSI rating of your air compressor. Finally, choosing a durable hose that can withstand the wear and tear of regular use is essential.
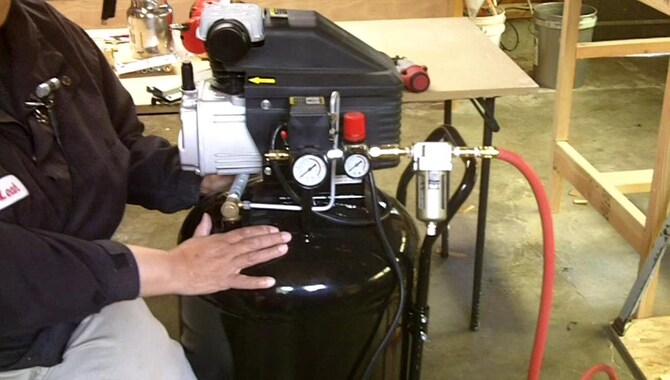
2. Check The Air Compressor’s Capacity
When you check the capacity of an air compressor, you should consider the intended use and the tools or equipment it will power. Look for the compressor’s CFM (cubic feet per minute) rating, indicating how much air it can deliver.
Ensure that the compressor’s CFM rating exceeds the requirements of the tools or equipment that will be utilized. It is also essential to check the PSI (pounds per square inch) rating to ensure it meets the needs of the tools or equipment. Additionally, you should consider the size and portability of the compressor to ensure that it suits the intended use and can be easily transported if necessary.
3. Identify The Air Inlet On The Air Compressor
To identify the air inlet on an air compressor, look for a port or valve that allows air to enter the compressor. This may be located on the side or top of the compressor and may be labelled as the air inlet or simply as an arrow pointing towards the inlet. Additionally, the inlet may be connected to a filter or intake system to ensure clean air enters the compressor.
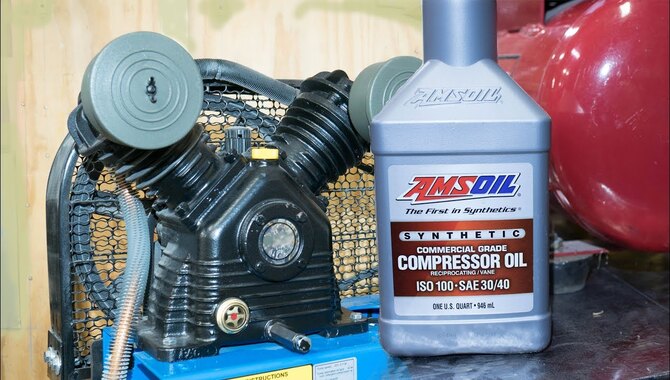
4. Install A Regulator And Filter
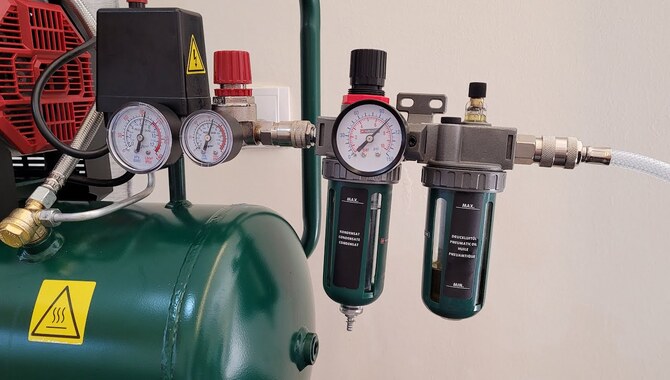
It is highly recommended to install a regulator and filter to ensure optimal performance of your air compressor. A regulator helps control the pressure in the air compressor, while a filter removes unwanted particles and contaminants from the air. This not only prolongs the life of the air compressor but also ensures the quality of the air it produces. You can install a regulator and filter easily with the help of basic tools.
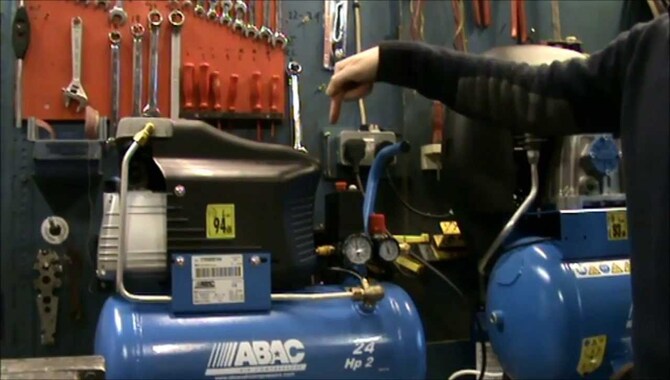
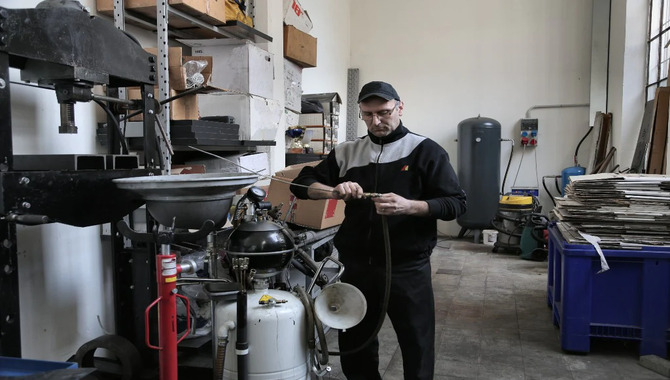
5. Attach The Air Hose To The Compressor
Attach the air hose to the compressor. First, locate the air outlet on the compressor. Then, insert the threaded end of the air hose into the outlet and turn it clockwise until it is securely tightened. Make sure the hose is not twisted or kinked. Finally, attach the other end of the hose to the tool or accessory you will use and secure it in place.
6. Install Quick-Connect Fittings
Few steps to install Quick-Connect Fittings for an air compressor. First, turn off the air compressor and release any pressure in the tank. Then, determine the type of fittings needed for your specific air tools and purchase them if necessary.
Next, attach the Quick-Connect fittings to the air compressor and the air hose using the appropriate tools and fittings. Finally, test the connections for leaks by turning on the air compressor and checking for leaks around the fittings.
7. Connect The Air Hose To The Tool
Connecting the air hose to a tool is essential for power tools that rely on compressed air to operate. It allows the tool to receive the necessary air pressure to function effectively. Attach the female end of the hose to the male connector on the tool.
Connecting the air hose to the tool will ensure it functions correctly and safely. Follow these steps for how to connect an air hose to a tool on an air compressor:
- Locate the quick-connect fitting on the tool and the air hose.
- Pull back the sleeve on the fitting and insert the male end of the air hose into the tool’s fitting.
- Release the sleeve to secure the connection.
- Attach the other end of the air hose to the air compressor’s outlet valve.
- Turn on the compressor and test the tool to ensure proper airflow.
8. Check For Leaks
Regularly checking for leaks in your air compressor is an essential maintenance task. Leaks can cause a decrease in the compressor’s efficiency and can also lead to increased wear and tear on its components. To check for leaks, you can use a solution of soap and water and apply it to all connections and fittings.
Look for any bubbles forming, which indicates a leak. If you find a leak, tighten the fittings or replace damaged parts. Regularly checking for and fixing leaks will help ensure that your air compressor operates at its best and has a longer lifespan.
9. Adjust The Air Pressure
Adjusting the air pressure is an essential step in maintaining the performance and safety of your vehicle. Properly inflated tires help to ensure better fuel efficiency, longer tire life, and improved handling. You will need a tire pressure gauge and access to an air compressor or a tire inflator to adjust the air pressure.
Begin by checking the recommended tire pressure for your vehicle, which you can usually find on a sticker inside the driver’s side door or in the owner’s manual. Then, use the tire pressure gauge to measure the air pressure in each tire and add or remove air as necessary to reach the recommended pressure.
It’s essential to check the tire pressure regularly, especially before long trips or during extreme temperature changes, to help ensure your safety on the road.
10. Turn On The Air Compressor
To turn on an air compressor, plug it into a power source. Once connected, turn on the power switch and allow the compressor to fill up with air. The compressor is ready once the pressure gauge indicates that you have reached the desired pressure.
Be sure to follow the manufacturer’s guidelines for safe and proper use, such as wearing appropriate safety gear and maintaining the equipment regularly to ensure optimal performance.
11. Start Using The Air Tool
Start by plugging in and turning on the air compressor to begin using the air tool. Then, attach the air tool to the compressor using the appropriate hose and fittings. Match the air pressure to the requirements of the tool by adjusting it, which you can typically find in the tool’s manual or on its label.
Finally, engage the trigger or switch on the tool to begin using it. Always wear appropriate safety gear and follow all safety guidelines while using air tools.
12. Monitor The Air Pressure

Pressure gauge to monitor the air pressure in an air compressor. Attach the gauge to the compressor’s pressure regulator. After attaching the gauge, switch on the compressor and wait for it to build pressure. The gauge will display the current pressure level.
Monitor the gauge while using the compressor to ensure the pressure remains within the recommended range. If the pressure drops too low, the compressor may not function properly. If the pressure gets too high, it could damage the compressor or any connected equipment. Regularly monitoring the air pressure is important for maintaining the compressor’s efficiency and prolonging its lifespan.
Disconnect The Air Hose From The Tool
To disconnect the air hose from the tool in an air compressor, you should first turn off the air compressor and release any pressure from the hose. Then, find the quick-release valve on the tool and press it in to release the hose. If there is no quick-release valve, unscrew the hose from the tool in a counterclockwise direction. Ensure to store the hose and tool separately to prevent damage properly.
Store The Air Tool And Accessories Properly
To store air tools and accessories properly, cleaning them thoroughly and removing any moisture from the airlines is essential. Then, place the tools and accessories in a dry, cool place free from dust and debris. To prolong the life of the equipment and prevent damage, I recommend using a protective cover or case.
Additionally, follow the manufacturer’s instructions for storing specific tools and accessories. By storing air tools and accessories properly, you can ensure they are ready for use when needed and avoid any potential damage or malfunction.
Conclusion
Connecting air tools to an air compressor is a straightforward process requiring careful attention to key details. Firstly, ensure that the air compressor delivers sufficient air pressure and volume to meet the needs of the air tool being used. Secondly, selecting the correct air hose size and length ensures the air tool operates correctly and efficiently.
Additionally, it is crucial to use high-quality connectors and fittings to prevent leaks and damage to the equipment. Finally, regular air compressors and air tools must be maintained to ensure they operate safely and efficiently. By following these simple steps, users can confidently how to connect air tools to an air compressor and enjoy the benefits of pneumatic too.
FAQs
1.What Air Compressor Should I Use For My Air Tools?
Ans: For most air tools, it is recommended to use a compressor with at least a 2.6 CFM at a 90 PSI rating.
2.How Do I Connect My Air Hose To The Compressor?
Ans: Most air compressors come with a quick-connect fitting; simply push the fitting onto the compressor’s air outlet.
3.What Type Of Fittings Do I Need To Connect My Air Tools?
Ans: It depends on the air tool. However, most air tools use a 1/4-inch NPT fitting. Make sure to match the fitting on the tool with the fitting on the hose.
4.Do I Need A Regulator And Filter When Connecting My Air Tools?
Ans: Yes, a regulator to control the air pressure and a filter to remove moisture and debris from the air are recommended.
5.What Is The Best Type Of Hose To Use For My Air Tools?
Ans: For most air tools, it is recommended to use a rubber or PVC hose with a reinforced braided interior.