

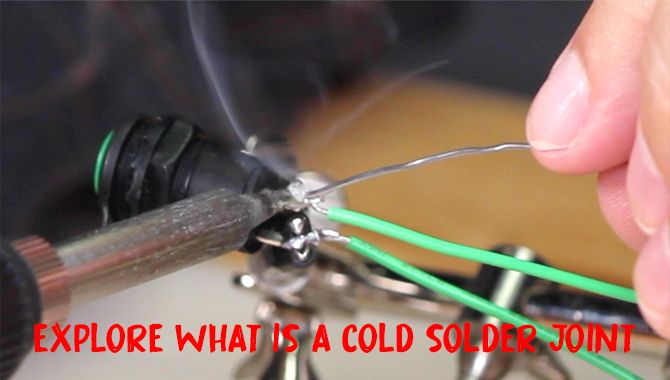
A perfect solder joint makes an alloy on a component or PCB surface. Simply we can say that a cold solder joint is defined as the solder joint that fails after your soldering.
There are a variety of causes for cold solder joints. The cold solder joint is found where the solder isn’t melted correctly. We often repair the cold solder joint by reheating using a hot iron. So, what is a cold solder joint?
The most common cause for cold solder joints is a high temperature. Too much temperature causes the breaking of flux before building. It creates a problem, not to the homeowners or unprofessional only.
It is also a disaster for professionals manufacturers often. However, keep going through our guide to know about a cold solder joint and how to cover this problem!
Causes Of Stirring Cold Solder Joint
The problem of cold solder joint happens with beginners in most of the case. It is because they cannot cover the exact heat temperature.
If one part of the PCB’s heat temperature gets more rather than the other, the solder will start flowing on that part only. Later it will get you a cold solder joint.
This odd heat temperature doesn’t let the solder melt properly, which causes it to bring a rough look. And, it fails.
If you are about to deal with several circuit boards, mistakes with soldering are common. You can face different types of defects like cold solder joints while working on your projects.
However, we have identified the 7 most common mistakes that you should consider carefully to avoid cold solder joints. Let’s see what they are-
- Over-Heated Joint
- Cold-Joint
- Disturbed-Joint
- Excessive Soldering
- Untrimmed-Lead
- Non-Existent Lifted Pad
- Damp Solder-Bridge
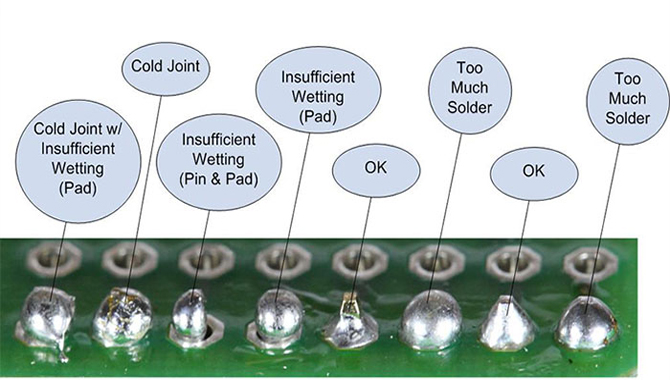
How To Identify The Cold Solder Joint?
The more you will practice joining different components, and the more your skill will be improved. It will not happen in one day.
You already have known that soldering problems happen if you cannot meet your soldering activity adequately.
This means, if the solder fails to melt, it makes an obstacle to forming a good solder joint.
It doesn’t matter whether you can solder adequately. But if you find your solder joining isn’t perfect, you should know some standard methods to detect the fault.
To know how to identify or detect the cold solder joint, here you go! Examine the following steps-
- Wiggle your soldering gently whether it is stable. If it is stable, you have to understand the joint is sound.
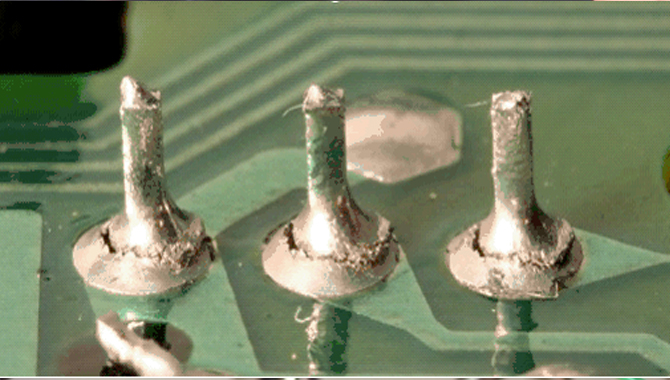
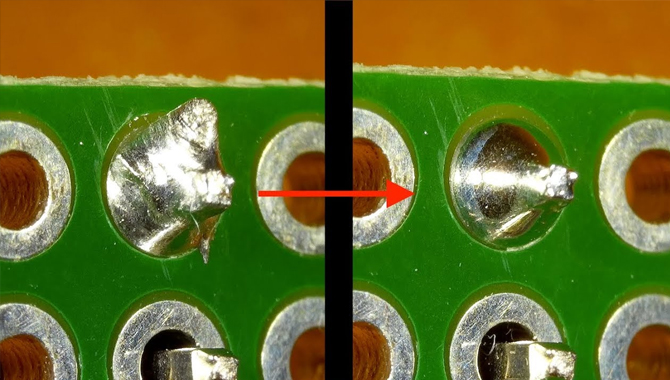
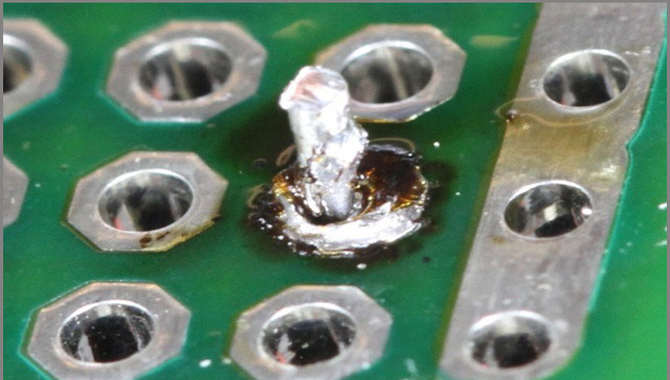
- If you find your solder joint looks dull or deformed, it means you have made a cold solder joint.
- The joint will look shiny after you have finished your soldering procedure if you have made the good one.
- We recommend you use a magnifying glass and a multimeter to detect your mistakes well.
- If you make good soldering, it will not overflow the soldering pad.
- The more you will control the temperature, the more you will get a good soldering joint. So, make sure!
- If the pad isn’t covered with solder entirely.
- If the lead isn’t covered with the solder fully and if it will let you see through the hole.
All the steps recommended above are not an exact go to detect your detection. But these steps will help you deduce the fault or mistakes you made.
Remember, trying all these steps above will lead you to be a professional at detecting cold solder joint if you compare it to your immediate previous project.
Once you can detect the mistakes, it will bring you a high confidence for your next project.
Way Of Fixing Cold Solder Joint
There are many options to fix cold soldiers. But, you can fix it as simply as possible. We recommend you add more flux. Use a pen to add flux well. It will help you make an incredible mechanical and electrical connection.
Now, add some more heat at the connection of the PCB on the lead in the board. Now heat it again, and you are done!
The most focused thing to avoid cold solder joint is the exact heating temperature. Besides, you have to be conscious of whether you are making your heating iron overheated.
Then again, this over-heating thing will create another problem as precisely as the cold solder joint. And it is called physical inspection.
Yet, this physical inspection problem is easily solvable by reflowing the solder over the solder joint and cleaning it.
In this case, we suggest you make a few times trial with the heating temperature before going for a real one.
The Difference Between Cold Soldering Of Re-Flow Solder Joint And Cold Soldering
It is quite a confusing deal to distinguish between cold soldering of reflow solder joints and cold soldering.
The cold soldering of the reflow solder joint is a little similar to cold soldering. And, people often get confused with these two.
The metallurgical reaction is cold soldering, while the soggy or low-temperature cannot reach the PCB at soldering time.
Reflow soldering, on the other hand, focused on the instability in the whole process of your projects.
Despite the little similarity, there is more difference between these two. The differences are in –
- Color
- Mechanism Formation
- Connection Strength and
- Metallographic Structure
Conclusion
Soldering is kind of a fundamental skill for those who are dealing with the electronic circuit regularly. And it is a kind of chemical process.
If you want to make perfect soldering, we recommend you do more practice before making your go. You must know the proper heating temperature if planning for a soldering project.
However, you now know what a cold solder joint is, why it does happen, what to do over this problem, and many more things by reading our article. You can now easily solve your cold solder joint problem, we guess. All the best for your next go! I hope now you know what is a cold solder joint.

![10 Best Torch For Plumbing [Reviews With Buying Guide]](https://accuratepicker.com/wp-content/uploads/2022/03/Best-torch-for-plumbing.jpg)