
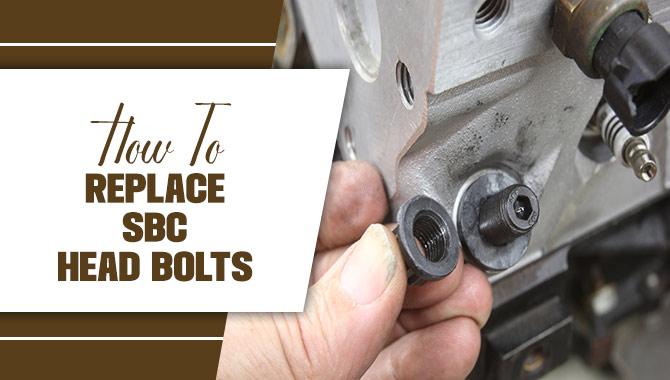
Head bolts are essential to maintaining any engine, and the process for SBC (Small Block Chevy) head bolts is relatively straightforward. So it is essential to know how to replace SBC head bolts.
First, start by removing the valve covers and pushrods. This will give you access to the head bolts. Next, use a breaker bar to loosen the head bolts in the correct sequence. Be sure to follow the correct torque specifications for your specific engine. After removing the bolts, use a scraper to clean the mating surface between the head and the block.
Before installing the new head bolts, make sure to apply a high-quality thread sealant to the threads. This will ensure that the bolts don’t come loose over time. Install the bolts in the correct sequence and torque them to the recommended specifications. Finally, replace the pushrods and valve covers.

Why Replacing SBC Heads Is Important
Replacing SBC (Small Block Chevrolet) head is a crucial step to ensuring the longevity and performance of an engine. SBC heads play a crucial role in the engine’s performance, as they control the flow of air and fuel into the combustion chamber and allow exhaust gases to exit efficiently.
Over time, SBC heads can become damaged or worn out due to factors such as overheating, corrosion, or simply wear and tear. This can lead to a drop in engine performance, reduced fuel efficiency, and even engine damage. Therefore, it is important to replace SBC heads regularly to maintain optimal engine performance and prevent costly repairs down the road.
Replacing SBC heads can also provide an opportunity to upgrade to higher-performance heads, further improving engine performance and power. You should replace SBC heads regularly to ensure optimal performance and longevity and maintain the health and performance of your engine.
Tools And Equipment Needed For The Job
- Hand Tools: These are basic tools that are manually operated. Examples include hammers, screwdrivers, wrenches, pliers, chisels, and saws. People commonly use these tools in construction, carpentry, plumbing, and electrical work.
- Power Tools: These electrically or pneumatically powered tools make tasks easier and more efficient. They include drills, power saws, sanders, routers, nail guns, and angle grinders. People commonly use power tools in woodworking, metalworking, and construction.
- Safety Equipment: Safety should always be a priority in any job. Safety equipment may include items such as hard hats, safety glasses, gloves, ear protection, dust masks, and steel-toed boots. The specific safety gear required will depend on the hazards associated with the job.
- Measuring and Leveling Tools: These tools are used to ensure accuracy and precision in various tasks. They include tape measures, spirit levels, laser levels, callipers, and rulers. People commonly use measuring and leveling tools in construction, woodworking, and metalworking.
- Electrical Testing Equipment: Electricians and technicians often require specialized tools for testing and troubleshooting electrical systems. These tools may include multimeters, circuit testers, voltage detectors, and cable analyzers.
- Heavy Machinery: Some jobs require the use of heavy machinery, such as excavators, cranes, bulldozers, or forklifts. Operating such machinery often requires proper training and certification.
- Computer and Software: In many modern jobs, computers, and software are essential tools. They can be used for designing, programming, data analysis, drafting, and other tasks. The specific software needed will depend on the industry and job requirements.
A Step-By-Step On How To Replace SBC Heads
Disconnect the battery: To ensure safety, disconnect the battery’s negative terminal to prevent accidental electrical contact during the process.
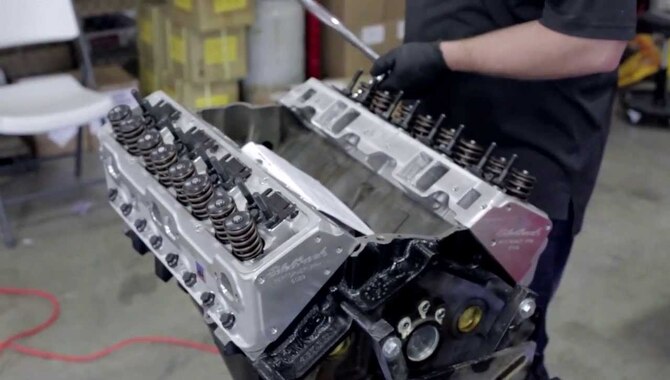
Remove The Old Heads:
- Remove the valve train components: This includes removing the rocker arms, pushrods, and lifters. Keep them organized to ensure proper reassembly later.
- Remove the head bolts: Loosen and remove the head bolts in a specific sequence recommended by the manufacturer. It’s crucial to follow the correct tightening and loosening sequence to avoid warping the engine block or damaging other components.
- Carefully lift off the old heads: Gently lift the old heads off the engine block, taking care not to damage the mating surfaces. They may require some wiggling or light tapping to loosen.
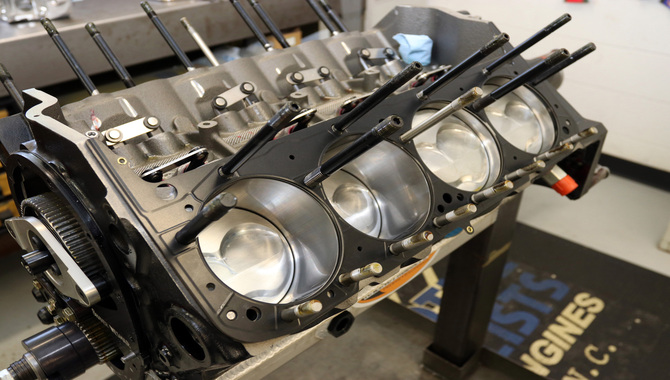
Clean And Inspect:
- Clean the mating surfaces: Thoroughly clean the cylinder head mating surfaces on the engine block and the new heads. Remove any old gasket material or debris to ensure a proper seal.
- Inspect the components: Inspect the new heads, paying attention to gasket surfaces, valve seats, and other critical areas. Ensure they are in good condition and free from any defects.
Install The New Heads:
- Apply a thin layer of high-temperature gasket sealer: Apply a small, even layer of high-temperature gasket sealer to both sides of the head gasket. This helps to ensure a proper seal.
- Carefully position the new heads: Lower the new heads onto the engine block, aligning them with the dowel pins if present. Take care not to damage the gasket or other components.
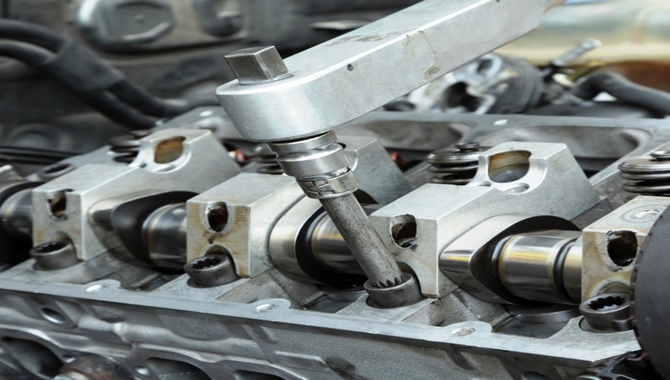
- Install the new head bolts: Install the new head bolts and tighten them to the manufacturer’s specified torque values in the recommended sequence. Tighten them gradually and evenly to avoid warping the heads or damaging the gasket.
Reassemble The Components:
- Reinstall the valve train components: Install the lifters, pushrods, rocker arms, and other components following the proper sequence and torque specifications provided by the manufacturer.
- Reinstall other components: Reinstall the intake manifold, exhaust manifolds, valve covers, and any other components that were removed during the disassembly process.
Refill Fluids And Reconnect The Battery:
- Refill engine coolant: If necessary, refill the engine coolant to the appropriate level according to the manufacturer’s recommendations.
- Reconnect the battery: Reconnect the battery’s negative terminal.
Perform Necessary Adjustments:
- Adjust valve clearance: Adjust the valve clearance or lash as specified by the manufacturer. This may involve rotating the engine to the proper cylinder firing position and adjusting each valve individually.
- Check and adjust ignition timing, if necessary.
Perform a thorough inspection: Double-check all connections, fluid levels, and adjustments. Look for any signs of leaks, unusual noises, or abnormal engine behavior.
Removing The Old Head Bolts

Removing the old head bolts requires careful attention and can take a lot of time, but it is crucial to replace the head gasket accurately. The first step in removing the head bolts is to use a torque wrench to loosen them in a specific order.
This is important because it prevents the warping of the cylinder head or block. Once you loosen the bolts, you should carefully remove them one at a time while ensuring that you keep them in the correct order. This will make reinstallation much easier.
Inspecting the bolts for signs of damage or wear is also important, as they may need replacement if they are no longer in good condition. Once you remove all head bolts, you can carefully lift off the cylinder head from the engine block.
It is important to be cautious during this step to avoid any damage to the engine or surrounding components. After removing the old head bolts, you can inspect and replace the head gasket as needed.
Inspecting The Cylinder Head And Block
Inspecting the cylinder head and block is an important step in maintaining the health of an engine. During this inspection, a mechanic will examine the surfaces of both components for any signs of wear or damage. This can include cracks, warping, or pitting.
We will also check the cylinder head for valve seat wear, guide wear, and valve stem seals. The mechanic will determine if the head or block can be repaired or needs to be replaced entirely if they find any issues during the inspection.
It is also important to check the cylinder head and block for cleanliness during this inspection. Any debris or buildup can lead to poor engine performance, overheating, or even engine failure. The mechanic will use specialized tools to thoroughly clean these components and ensure they are free from dirt or debris.
Overall, inspecting the cylinder head and block is a crucial step in maintaining the health and longevity of an engine. Regular inspections can catch issues early on, preventing more significant problems down.
Preparing The New Head Bolts
Preparing the new head bolts is crucial when installing a new cylinder head. You first need to clean the bolts’ threads with a wire brush to remove any dirt, rust, or debris. You can also use a thread chaser to clean the threads if necessary. Ensure the threads are completely clean and dry before applying any lubricant.
Next, apply a thin coat of engine oil or assembly lubricant to the threads and the underside of the bolt head. This will help ensure you properly torque the bolts and prevent any binding or seizing during installation. Be careful not to over-apply the lubricant, which can cause the bolts to loosen over time.
Before installing the bolts, check your engine’s torque specifications and ensure you have the correct torque wrench and socket. Using the proper sequence and torque settings when tightening the bolts is also important.
Installing The New Head Bolts
Installing new head bolts can be crucial in repairing a damaged engine. The first step in this process is to remove the old bolts, which can be done by loosening them with a socket wrench.
Once all the old bolts have been removed, cleaning the threads in the engine block and the cylinder head is important to ensure the new bolts have a secure fit. Afterwards, inspect the threads for any signs of damage or wear and replace them if necessary.
When installing the new bolts, following the manufacturer’s instructions closely is important. Begin by applying a small amount of engine oil to the threads of each bolt. Then, torque the bolts using a torque wrench to the specified torque setting. It’s important to tighten each bolt in a specific sequence to ensure that the head is evenly seated and the gasket is properly compressed.
Tightening The Head Bolts To The Specifications
Regarding engine assembly, one of the crucial steps that should not be overlooked is tightening the head bolts to the specifications. The head bolts play a significant role in keeping the engine together by securing the cylinder head to the engine block.
Failing to tighten them properly can result in severe engine damage, such as blown head gaskets, warped cylinder heads, and even engine failure. Therefore, following the manufacturer’s recommended torque specifications is essential when tightening the head bolts.
Before starting the torque process, it’s essential to ensure that the bolts and engine block threads are clean and free of debris, oil, or grease. The torque specification and sequence can vary depending on the engine design.
Some manufacturers recommend tightening the head bolts in a specific sequence, while others require a specific torque pattern. An accurate torque wrench is crucial for ensuring the head bolts are tightened to the correct specification.
Checking For Proper Torque And Re-Torquing
Checking for proper torque and re-torquing are essential steps in ensuring the safety and reliability of mechanical components. Proper torque is the amount of pressure needed to tighten bolts or screws to a specific level, preventing them from coming loose or over-tightening.
When components are assembled, it is crucial to check for proper torque to prevent potential failures, which could be catastrophic. Regular inspections and re-torquing are necessary to ensure the components stay secure and maintain their torque levels over time. It is especially important in critical applications such as aircraft, automobiles, or heavy machinery.
Re-torquing is a process of re-tightening the fasteners to their proper torque after a certain period or after a certain amount of use. It is essential to ensure that the mechanical components are not experiencing any loosening or deformation, which can lead to failure.
Re-torquing is also vital in cases where the components are exposed to extreme temperatures or dynamic loads that can cause the fasteners.
Common Mistakes To Avoid
To making decisions, it is not uncommon to make mistakes. However, some common mistakes can easily be avoided with little effort. One of the most common mistakes people make is not doing enough research.
Research is key, whether buying a new car or investing in the stock market. It is important to know the product or service you are getting yourself into before making any decisions. Another mistake is not setting clear goals.
Without clear goals, knowing what you want to achieve and how to achieve it is difficult. This can lead to wasted time and effort on things that do not contribute to your overall objective.
Additionally, failing to plan ahead can be detrimental. Planning ahead allows you to anticipate potential obstacles and prepare accordingly. It is important to have a backup plan if things are not as expected. Lastly, many people do not seek advice from experts or experienced individuals.
Troubleshooting And Problem-Solving
As a troubleshooter and problem-solver, I am confident in my ability to identify and resolve complex issues that arise in various situations. My approach to troubleshooting involves a thorough analysis of the problem at hand, followed by a systematic process of elimination to pinpoint the root cause.
I am skilled in utilizing various tools and techniques to identify and diagnose issues, such as network monitoring software, diagnostic equipment, and data analysis.
Additionally, I have the ability to communicate effectively with team members and stakeholders to ensure a clear understanding of the issue and the proposed solution. My problem-solving skills are equally strong, as I am able to come up with creative and practical solutions to even the most challenging problems.
I can think outside the box and consider all possible angles to find the best solution. My experience in troubleshooting and problem-solving has allowed me to develop a strong sense of adaptability, agility, and the ability to remain calm and focused in high-pressure situations.
Conclusion
Knowing how to Replace SBC head bolts is a crucial task that requires attention to detail and precision. Following the manufacturer’s guidelines and using the proper tools are important to ensure a successful replacement.
Following the comprehensive guide in this blog post, you can confidently replace your SBC head bolts easily and efficiently. Remember to take your time and stay organized throughout the process to ensure the best possible outcome.
FAQ
1.How Do I Clean The Bolt Holes Before Installing New Head Bolts?
Ans: Use a gasket scraper or wire brush to remove debris or residue from the bolt holes. Clean the holes thoroughly with a solvent to ensure a clean and secure fit for the new bolts.
2.Do I Need To Apply Sealant Or Lubricant To The New SBC Head Bolts?
Ans: It is generally recommended to use a thread sealant or lubricant specifically designed for head bolts. Follow the manufacturer’s instructions for proper application.
3.Do I Need To Perform Additional Steps After Tightening The SBC Head Bolts?
Ans: Some head bolts require an additional torque angle tightening procedure. Use a torque angle gauge to achieve the specified angle rotation as mentioned in the service manual.
4.Can I Reuse Old Head Bolts?
Ans: It is generally not recommended to reuse head bolts. New head bolts provide proper clamping force and ensure a secure and leak-free seal. It is best to use new bolts during reassembly.
5.How Tight Should I Torque The SBC Head Bolts?
Ans: Torque specifications vary depending on the specific engine model and type of head bolts used. Always refer to the service manual for the exact torque specifications and tightening sequence.
